


Stock Barcode Pro with Mobile Camera Scanning
This Odoo app enhances the efficiency of inventory management by enabling barcode scanning for various operations. It simplifies the process of managing transfers, receipts, delivery orders, and product quantities through seamless barcode integration.
Highlight Stock Barcode Pro

Efficient Barcode Scanning
User-Friendly Interface
Responsive UI
Internal Transfer Management
Inventory Adjustment by Scanning barcode
Scan barcodes using mobile camera
Lot and Serial Number Scanning
 Features
 Screenshots
 Support
 Service
Features
Location Barcode Scanning:
Scan location barcodes to identify quickly and manage inventory locations.
Operation Barcode Scanning:
Scan operation barcodes to open and manage transfers for specific operations.
Transfer Barcode Scanning:
Scan transfer barcodes such as receipts and delivery orders streamlining transfer processes.
Product Barcode Scanning:
Scan product barcodes to add new products or update quantities efficiently.
Lot and Serial Number Scanning:
Scan lot or serial number barcodes to track and manage individual items accurately.
Internal Transfers:
Manage internal stock movements efficiently
Inventory Adjustment:
Adjust stock levels using barcode scan
Camera Scanning:
Scan barcodes directly with mobile/device camera
Screenshot
New Feature: Mobile Camera Scanning
Now users can scan barcodes directly using their mobile or device camera, eliminating the need for external scanners. This enhancement makes the scanning process faster, more flexible, and accessible from anywhere.
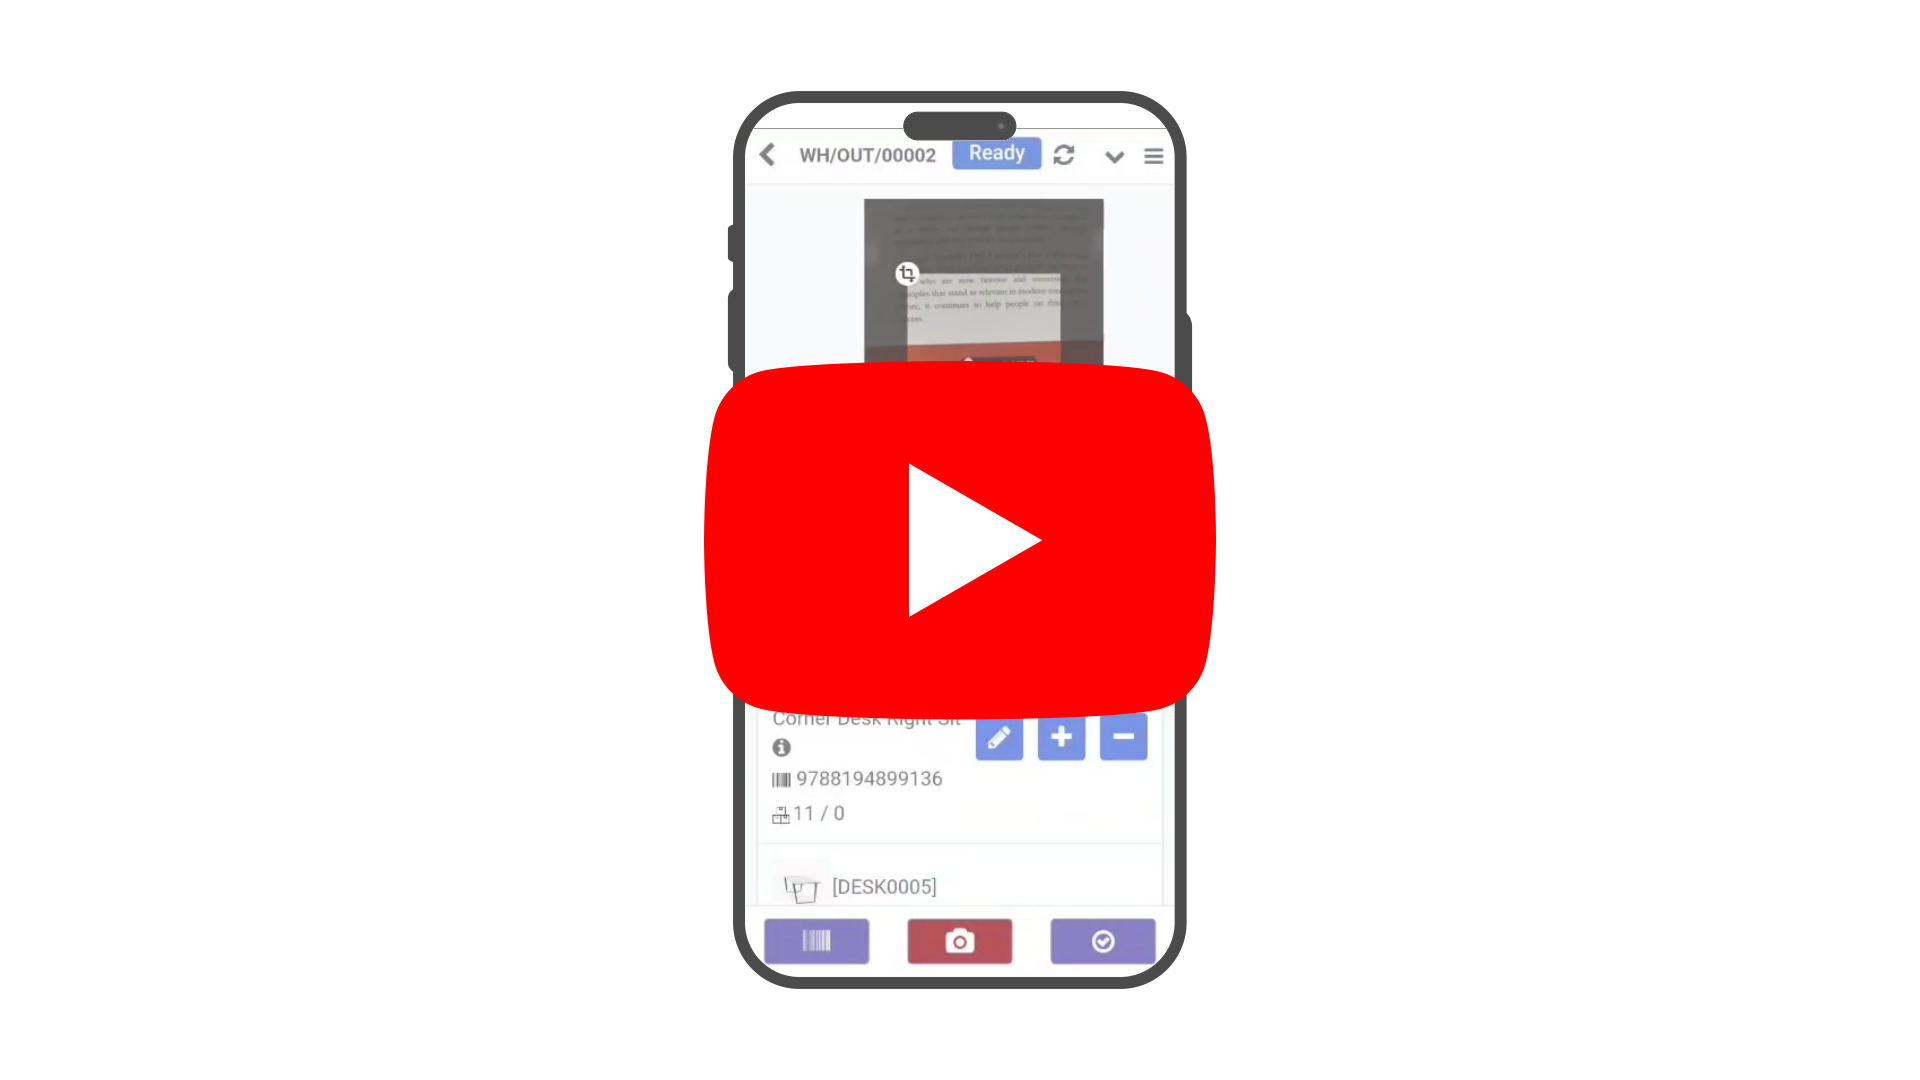
1) Scanning Product Barcode to Add Product or Quantity :
When a product is scanned, if it already exists in the system, the system will locate
the corresponding entry and increase its quantity.
If no entry for the product is
found, the system will create a new line and add it to the records.
Whenever a
quantity order for a product is added, the system will highlight that line by making it
blink.

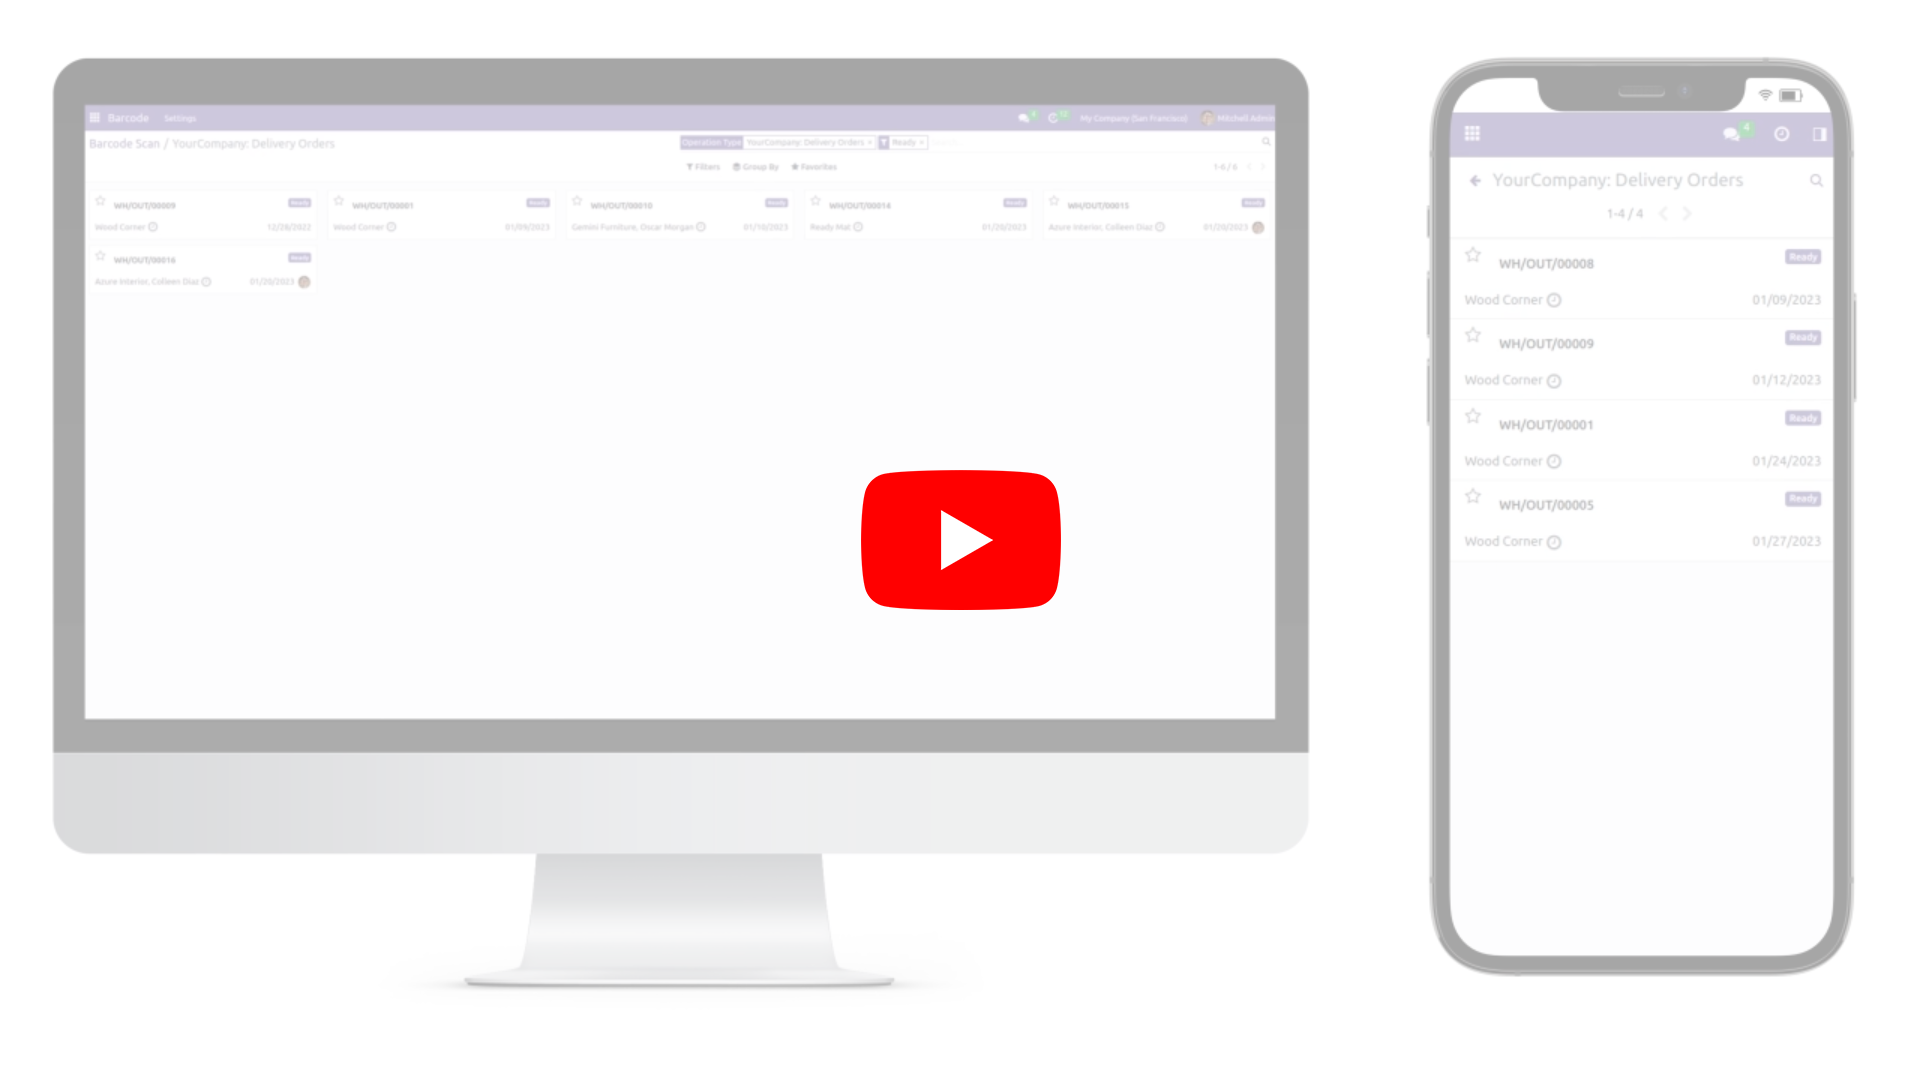
2) Scanning Delivery Operation Barcode:
By scanning the barcode of the delivery order operation, the user will be redirected to the Kanban view of the delivery orders, where all records in the "Ready" state will be listed by default. The user can click on a record to open it.
3) Scanning Done Transfer Barcode :
By scanning the barcode of a completed incoming shipment or delivery order, the user will access a detailed view of the record in read-only mode. In this view, the user can see information such as the partner name, product name, reserved quantity, and done quantity.

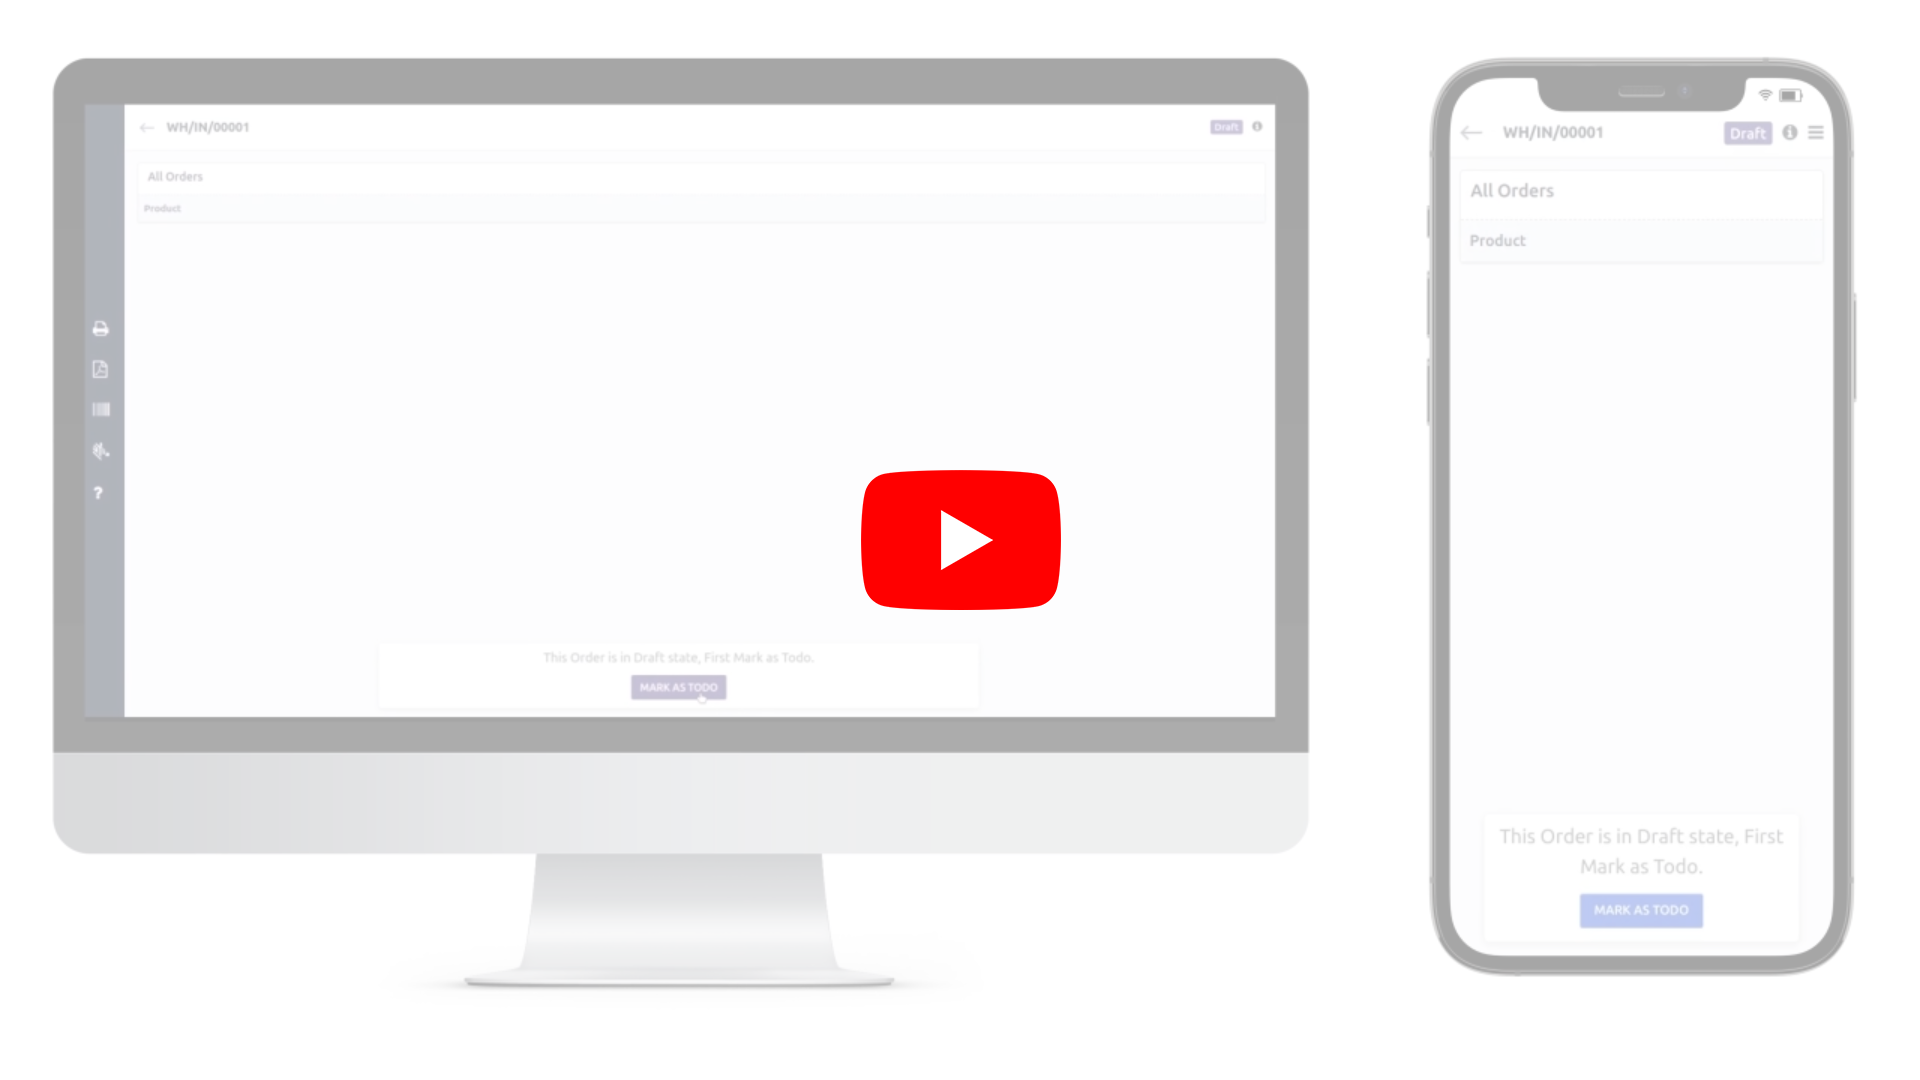
4) Scanning Draft Transfer Barcode :
By scanning the barcode of a draft incoming shipment or delivery order, the user will access a detailed view of the record in read-only mode, which will display no data until the order is marked as TODO.
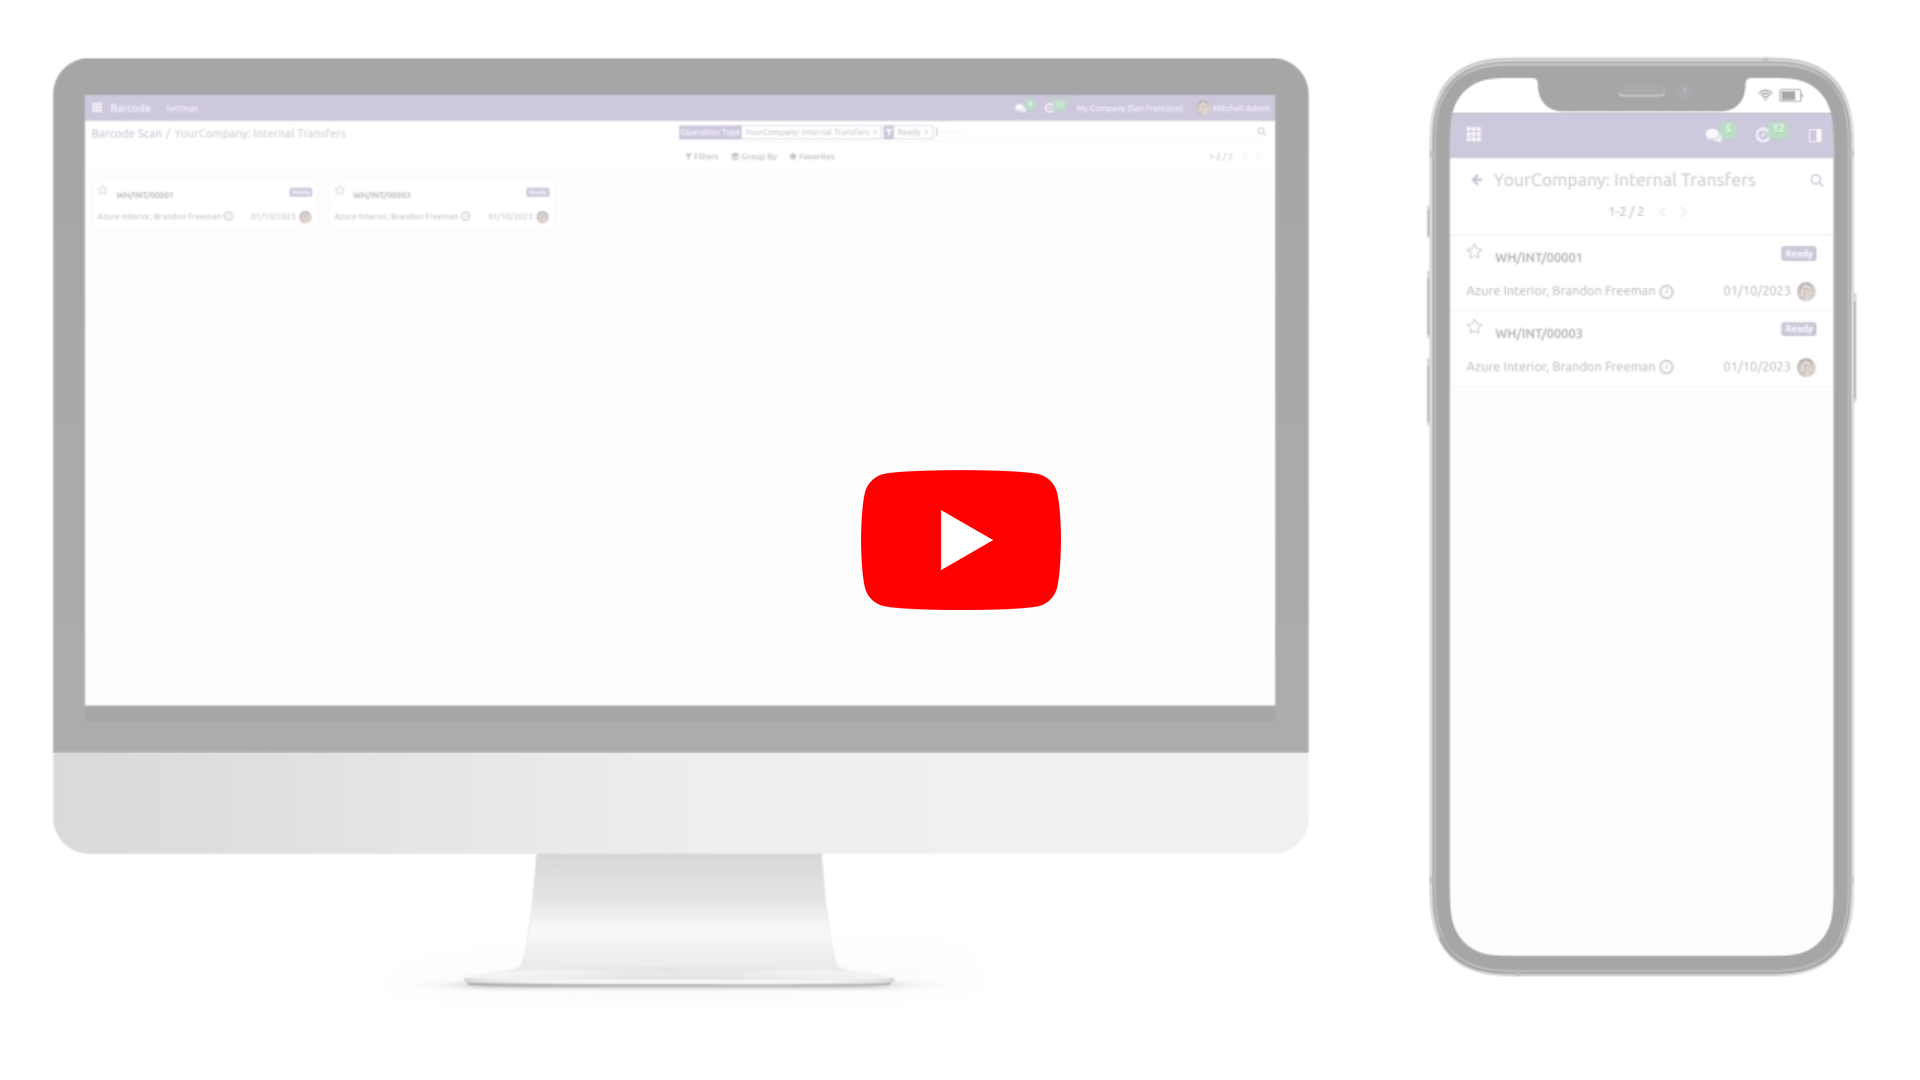
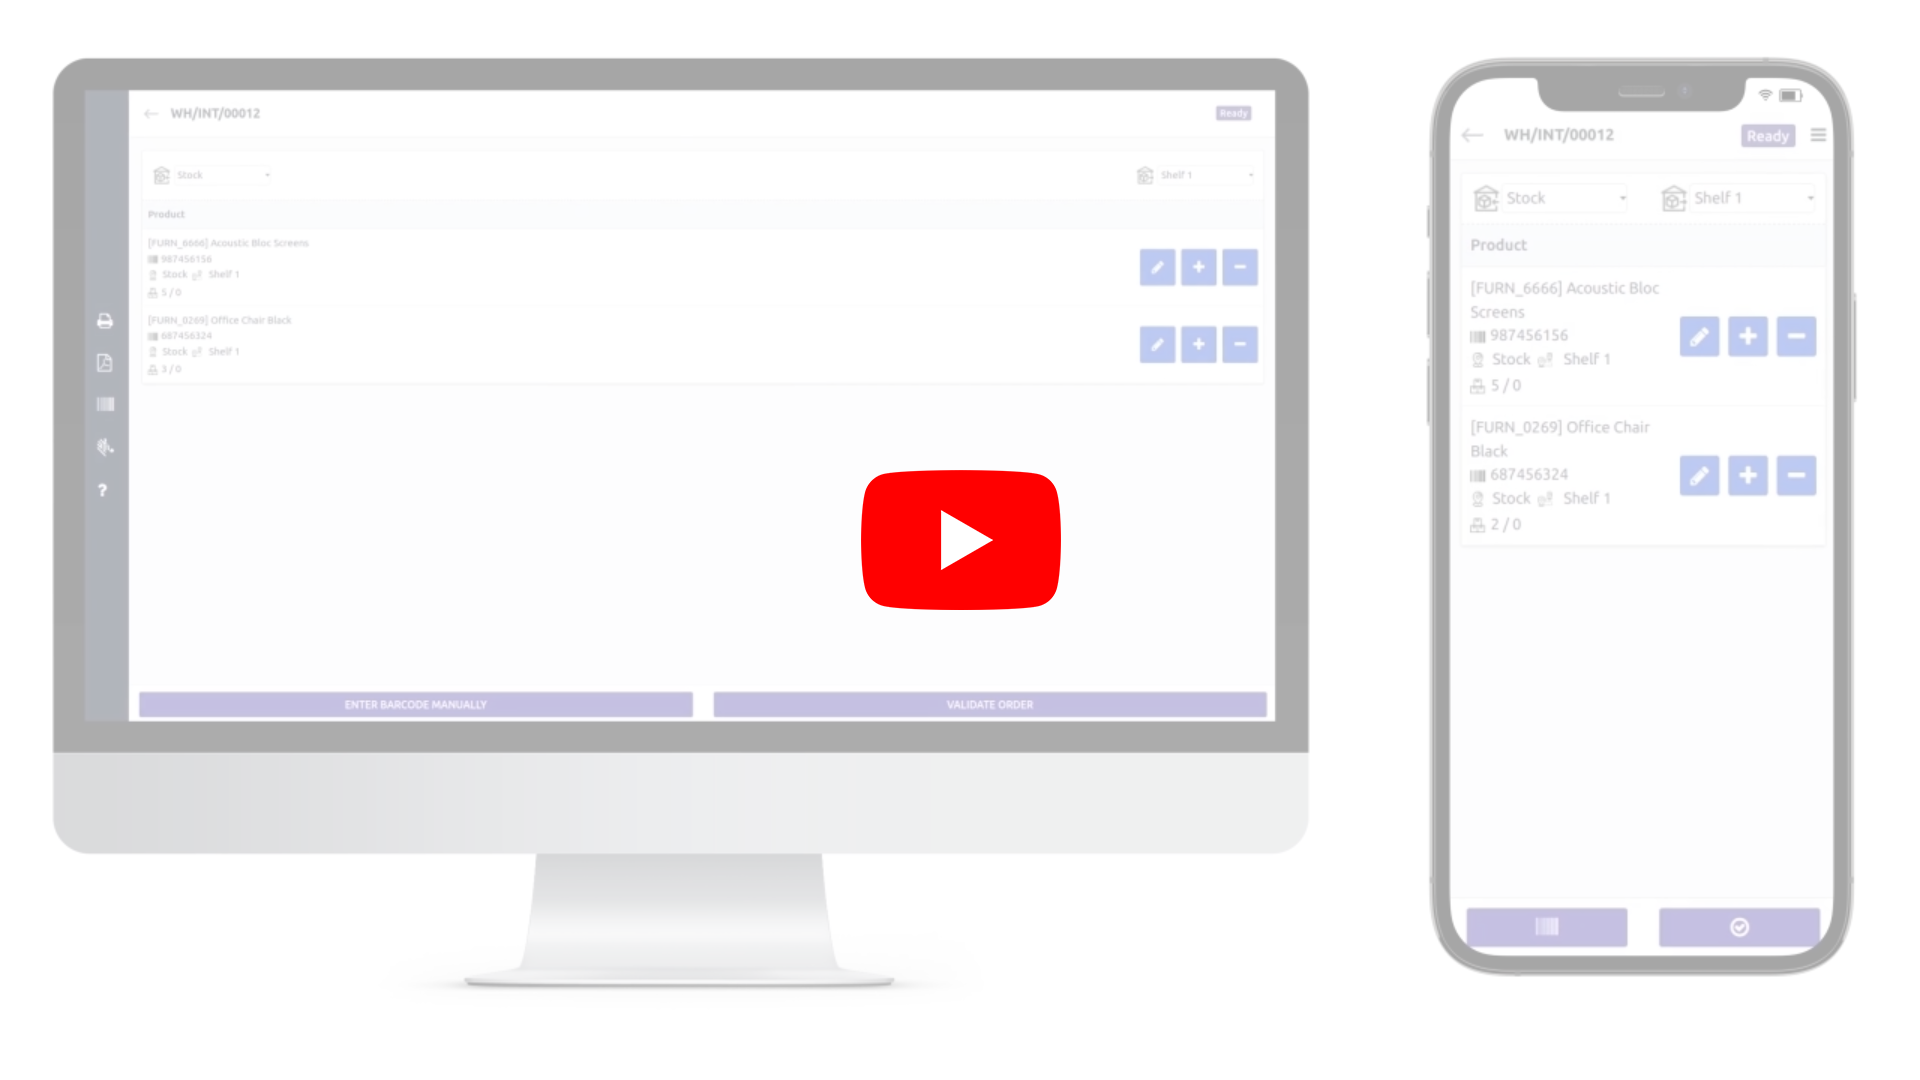
5) Scanning Internal Transfer Barcode :
By scanning the barcode of the Internal Transfer, the user will be redirected to the Kanban view of the delivery orders, where all records in the "Ready" state will be listed by default. The user can click on a record to open it.
5.1) Adjustment of Quantity :
Users can adjust quantities using + and - buttons.
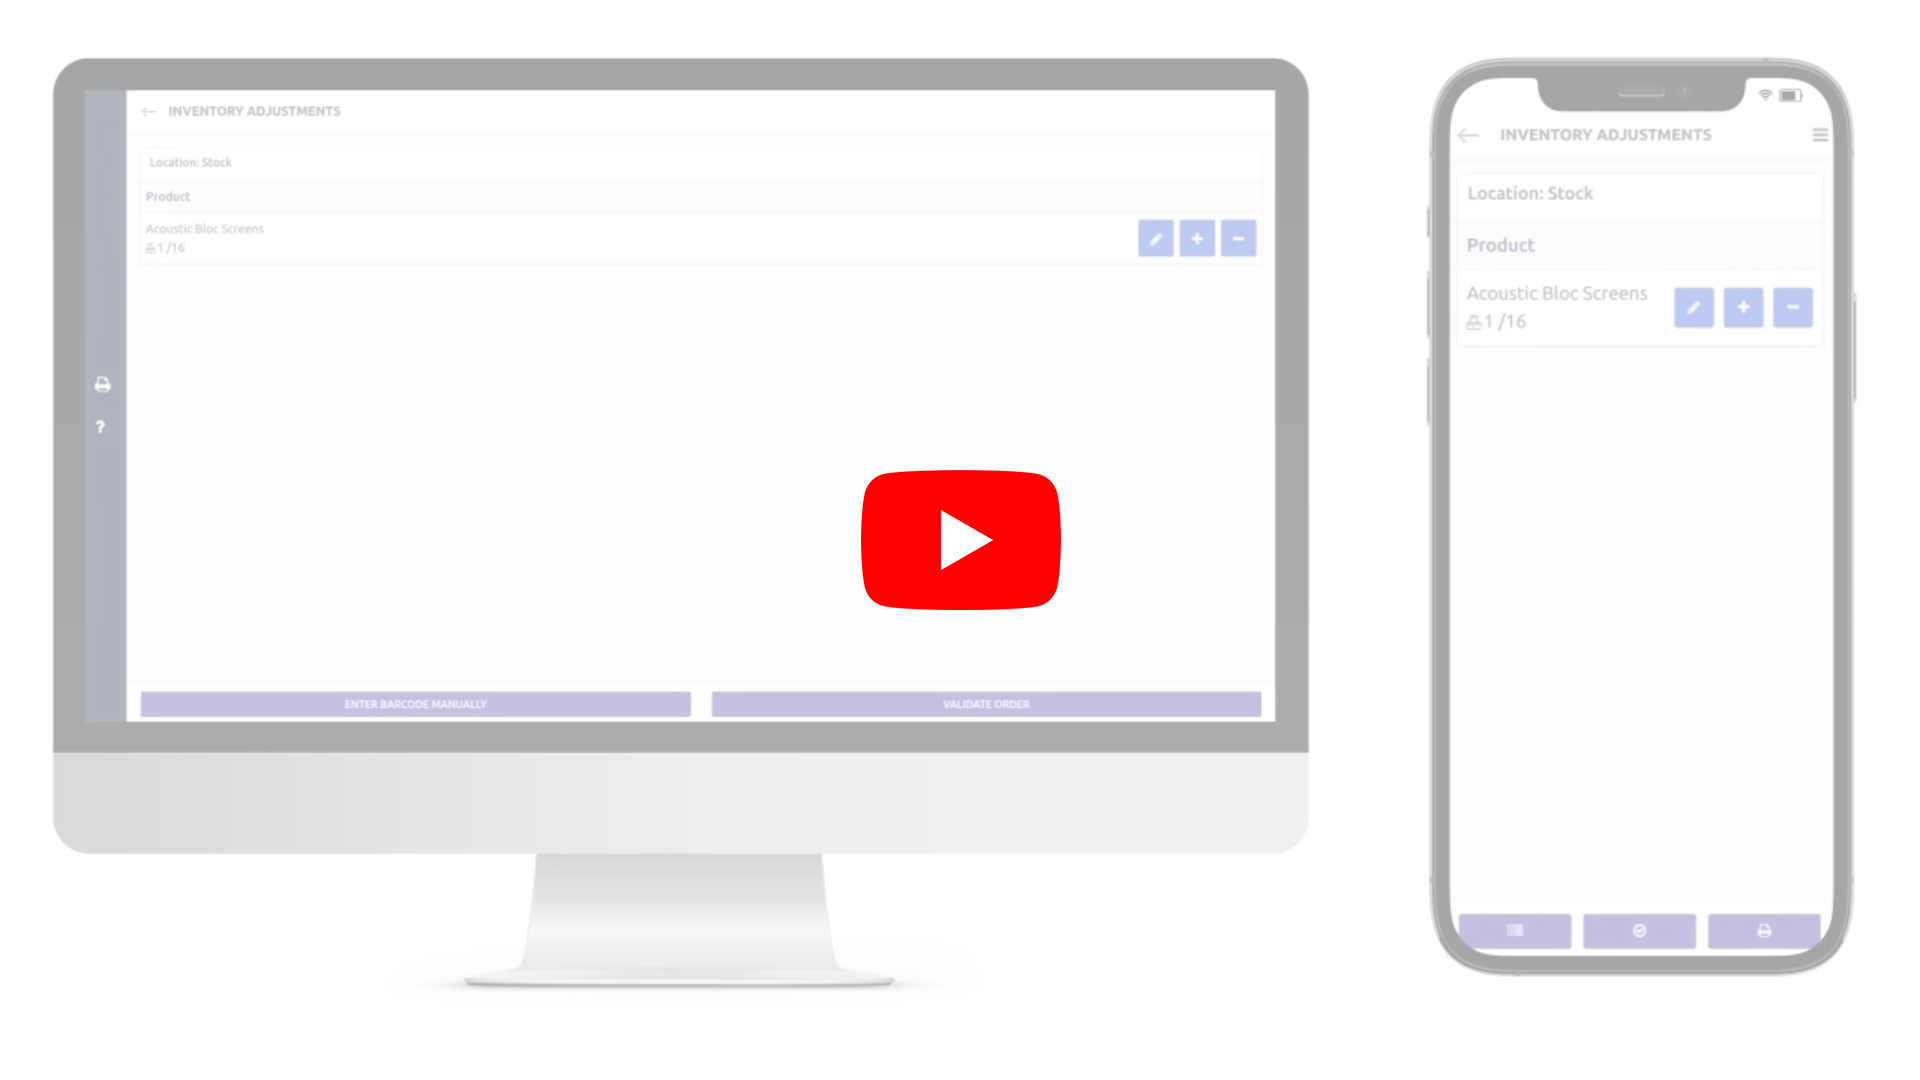
6) Scanning Inventory Adjustment Barcode :
If we scan the barcode of an existing product, its quantity will be updated. For new products, they will be added to the system. When we validate the order, the stock for that product will be updated.
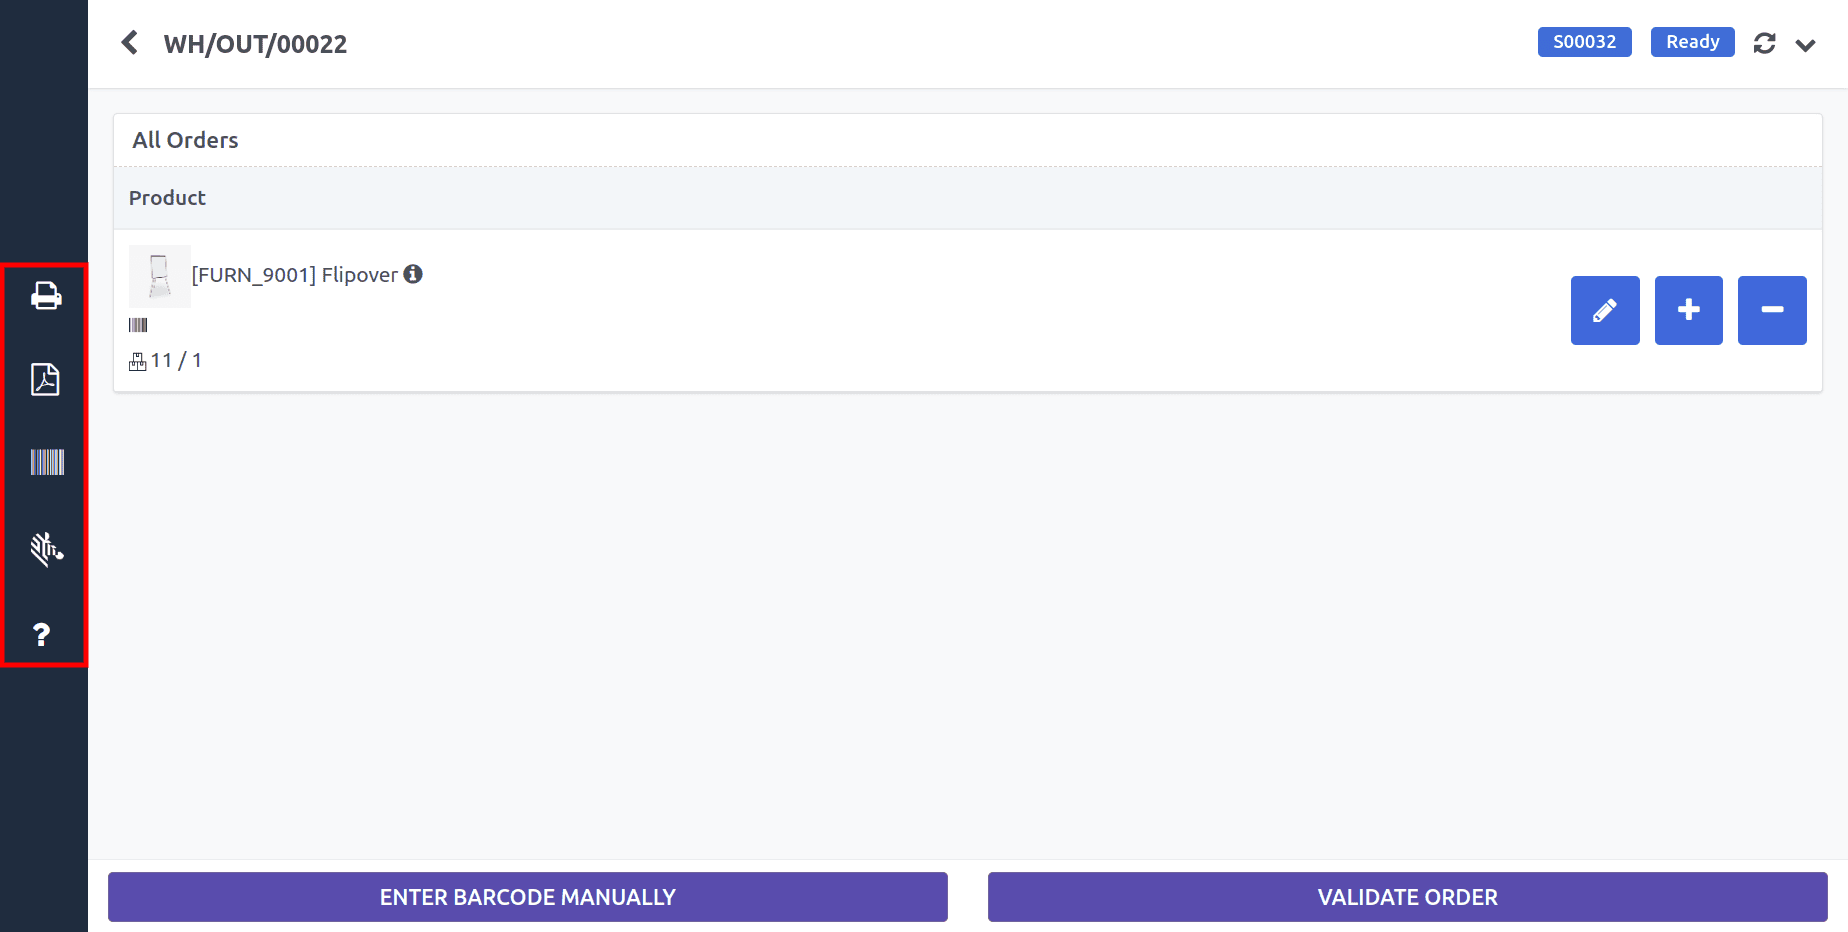
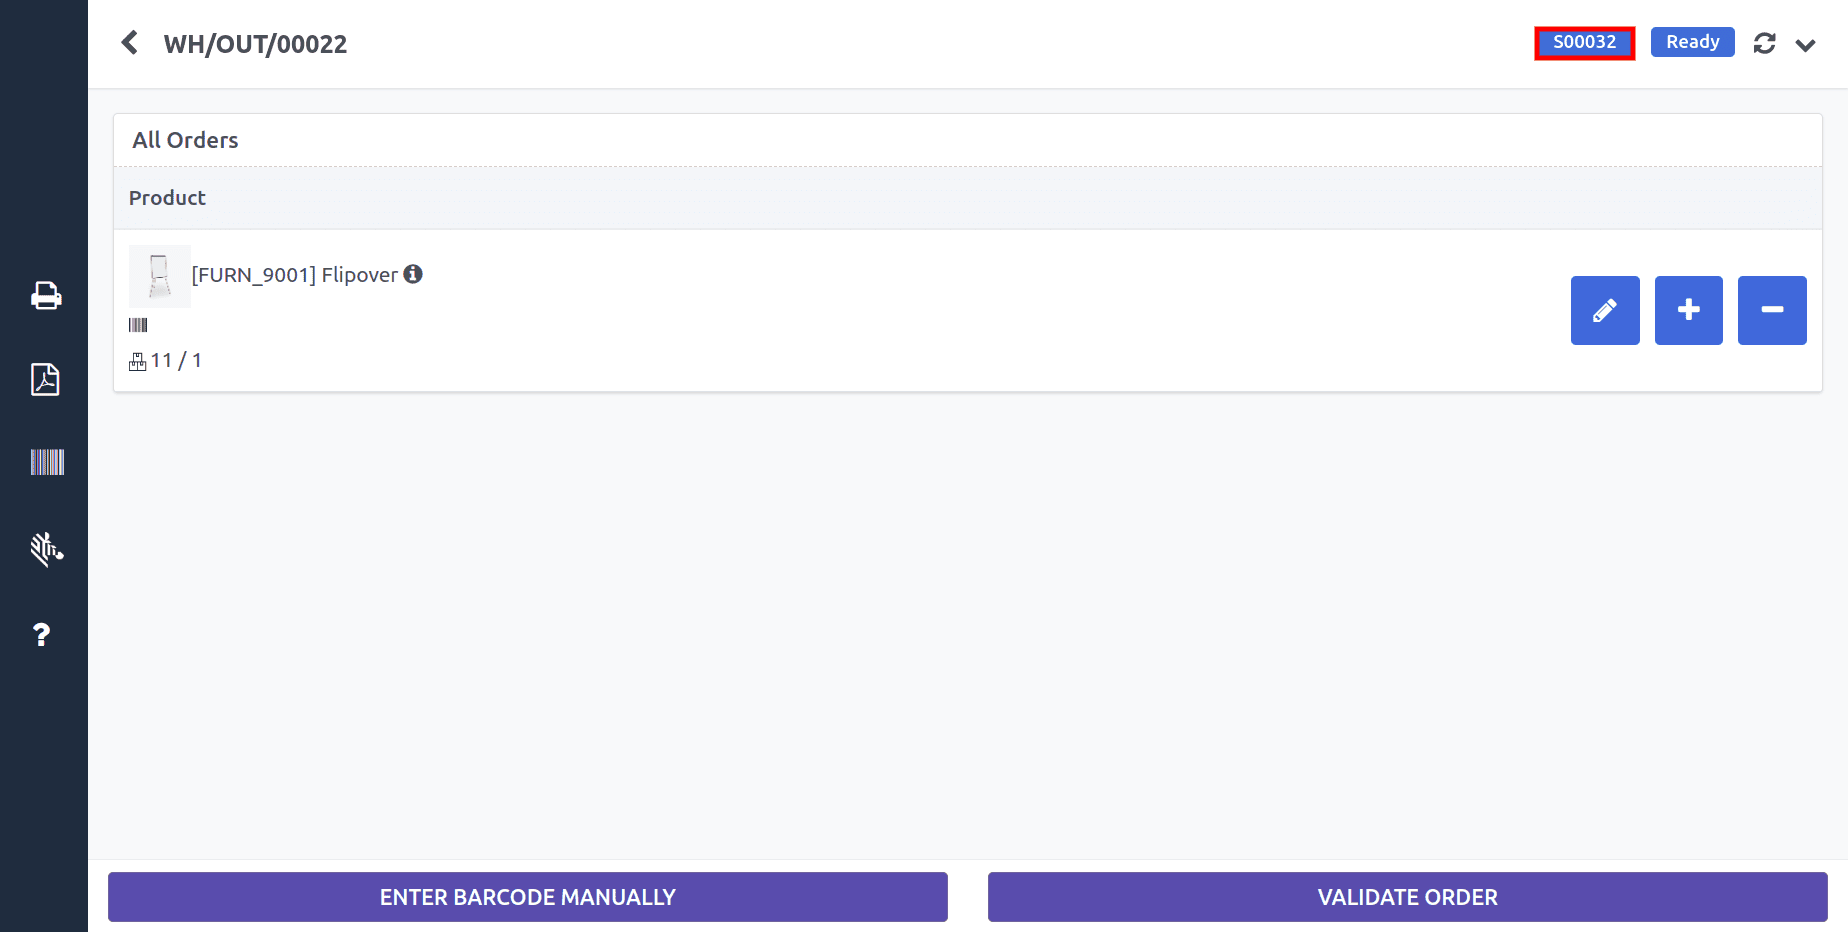
7) Scanning Ready Transfer Barcode :
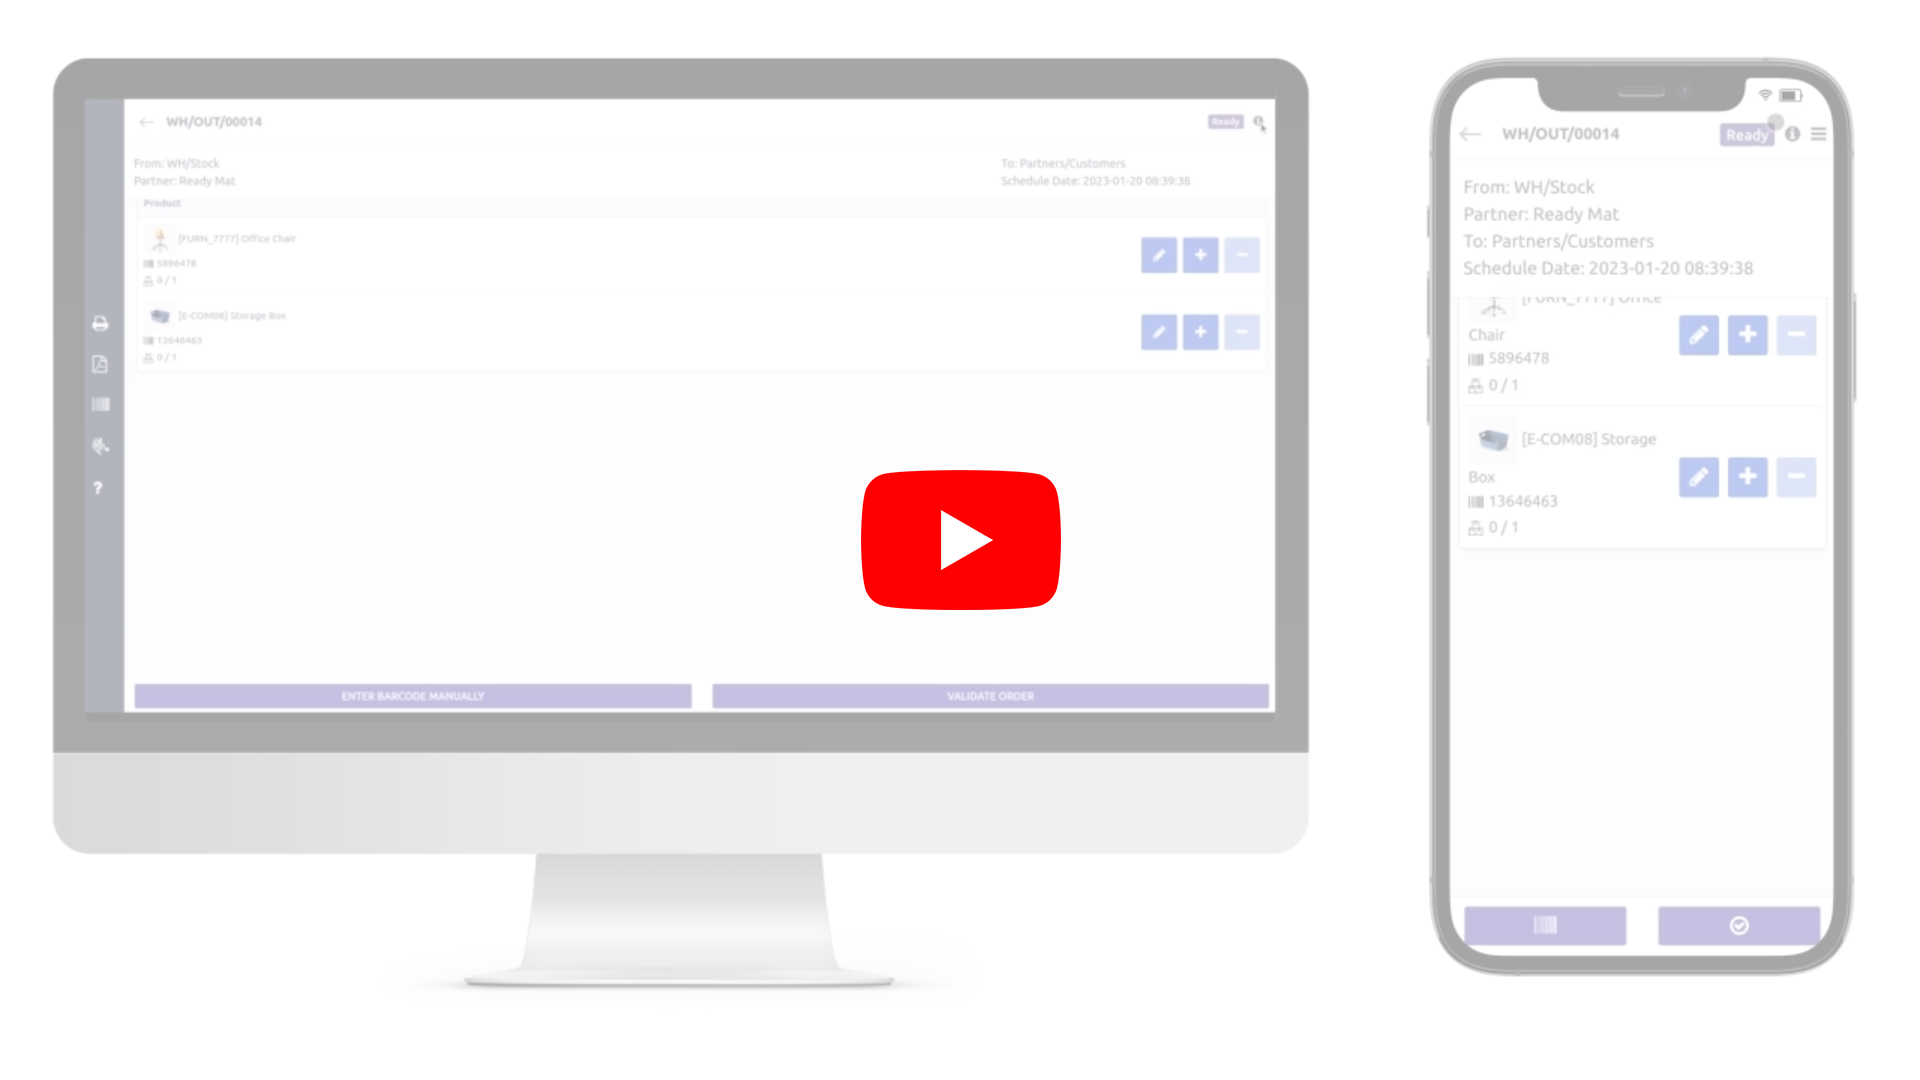
By scanning the barcode of a ready state, incoming shipment, or delivery order, the user will get a detailed view of the record. This view will display data such as the partner name, product name, reserved quantity, done quantity, a button to enter a manual barcode, and a validate button.
8) Scanning Receipt Operation Barcode :
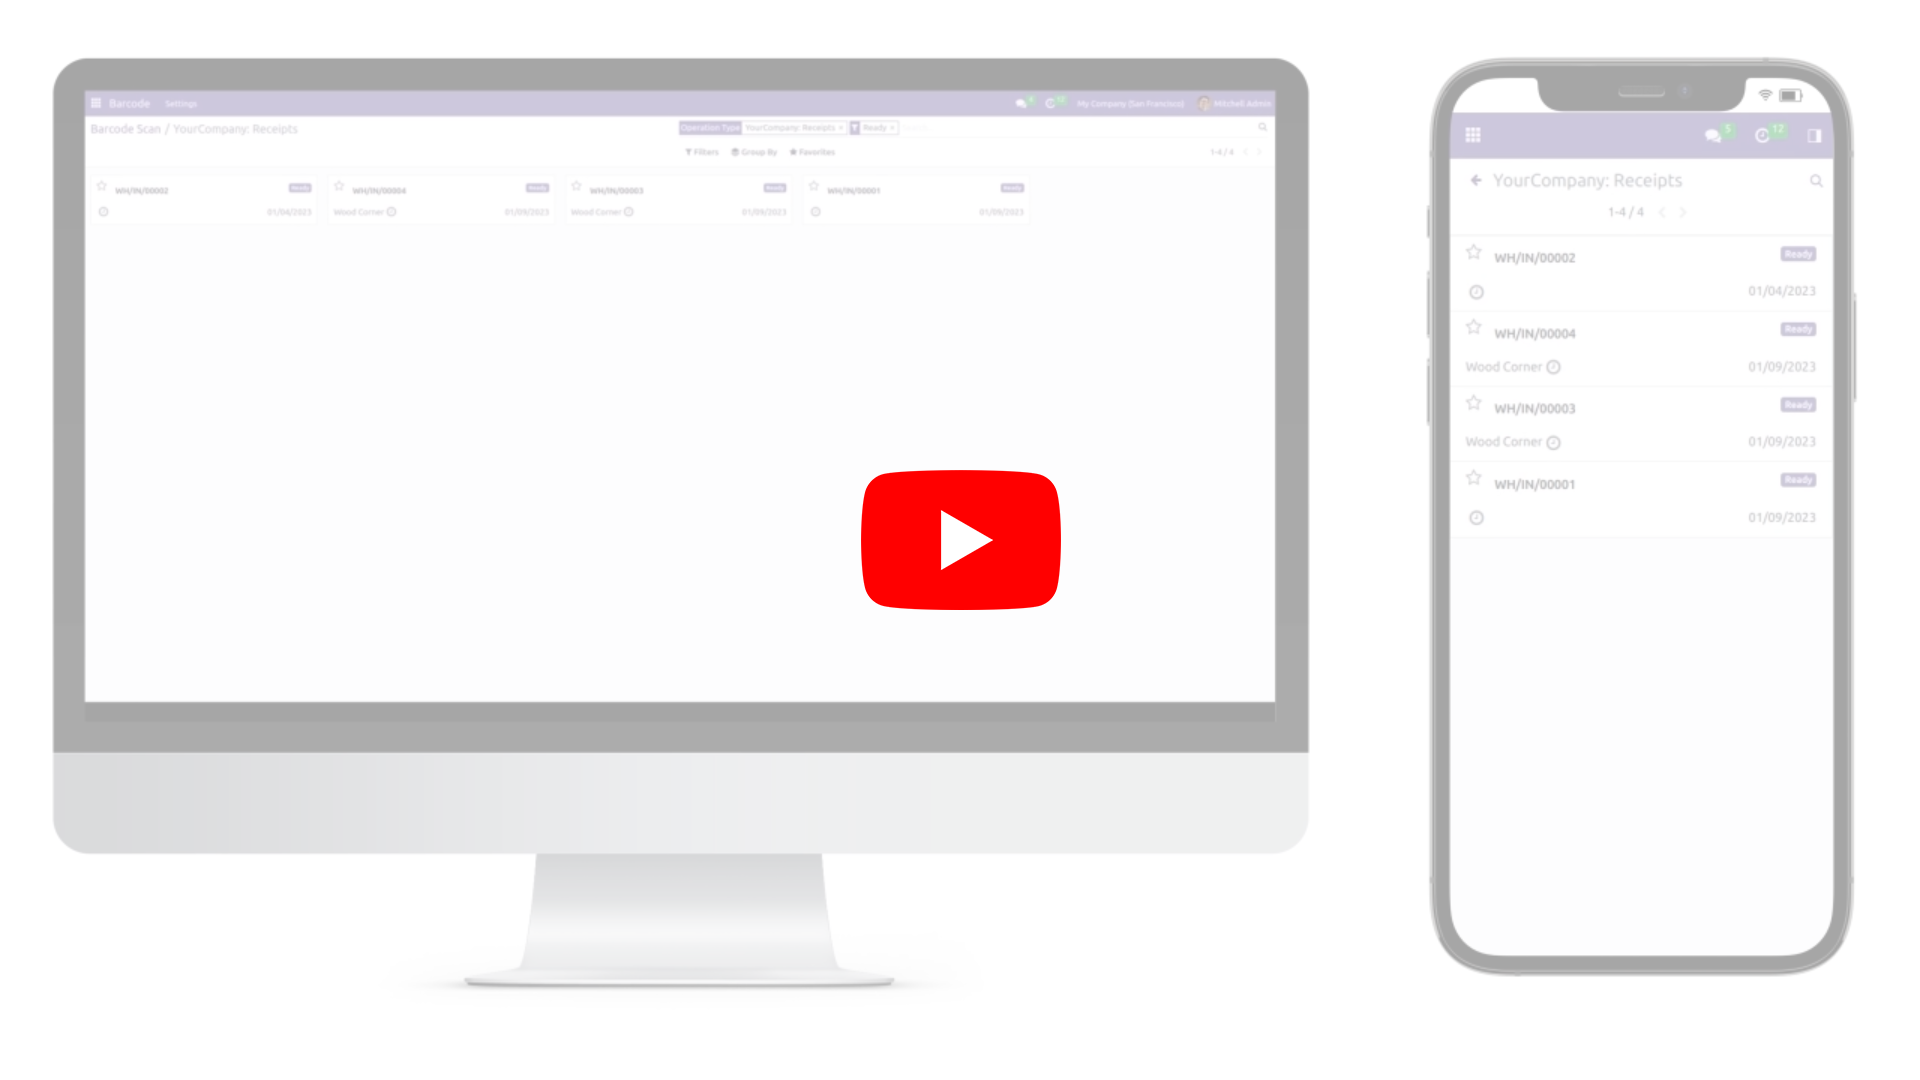
By scanning the barcode of the receipt or incoming operation, the user will be redirected to the Kanban view of the receipt operation. All the ready state records will be listed by default, and the user can click to open any record.
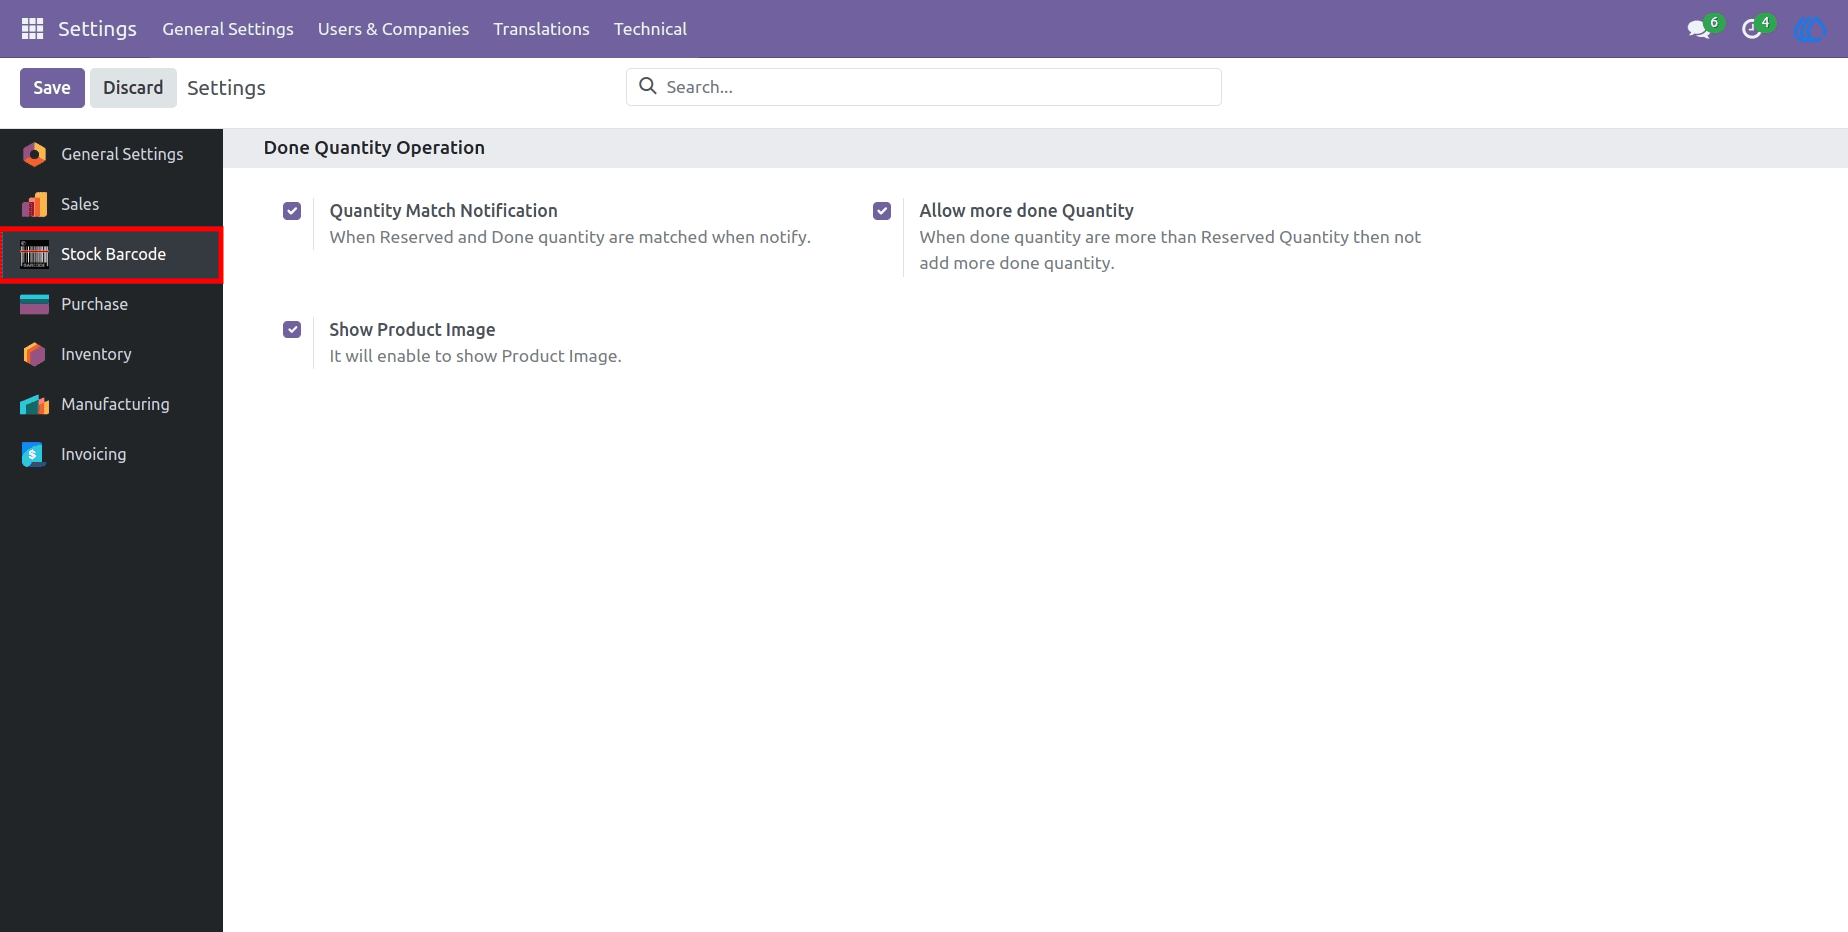
9) Setting View:
Quantity Match Notification:
This option is enabled, as indicated by the checked checkbox. It notifies users when the
reserved and done quantities match.
Allow More Done Quantity:
This option is disabled, as shown by the unchecked checkbox. It prevents users from
recording a done quantity that exceeds the reserved quantity.
Show Product Image Button:
A button labelled "Show Product Image" is present, with a note explaining that enabling
it will display product images.
Navigation : General Settings ➡ Stock Barcode
10) Sidebar Icons :
1.Print Picking Operations :
This option is likely used to print documents related to the picking process in the
warehouse.
2.Print Delivery Slip :
This option allows you to print the delivery slip for the order.
3.Print Barcode :
This option is used to print barcodes for the products or orders.
4.Print ZPL Barcode :
This option is for printing barcodes in ZPL (Zebra Programming Language) format, which
is commonly used for label printers.
11) Sale Order View :
This interface will work in such a way that it will open the related sale order or purchase order for the user when they interact with the relevant options. The user can click on a record to open it.
User Guide