

Our Most Suggested Products


Google Drive Integration for Odoo - Cloud Document Storage & Synchronization
Google Drive Odoo Integration connects your Odoo documents and attachments with Google Drive, giving your team a convenient way to store, organize, and synchronize business files in the cloud. The module provides secure Google Drive authentication, support for personal and Shared Drives, cloud folder management, file synchronization, and direct file operations such as upload, download, rename, move, and delete. It works with the Cloud Storage Base framework to keep Odoo records and Google Drive documents connected, helping users maintain an organized document structure while reducing manual file management.
 Features
 Screenshots
 Support
 Service
Features
Secure Google Drive Connection
Connect Google Drive through OAuth-based authentication and configure the required Google API credentials from the cloud storage settings. The connection keeps authentication details organized and provides a reliable foundation for all Google Drive file operations.
Cloud File Manager
Manage Google Drive documents through the integrated Cloud File Manager with folder navigation, breadcrumbs, file cards, and file actions. Users can work with cloud files from a familiar Odoo interface without losing the connection to the underlying Google Drive structure.
File Synchronization
Synchronize documents between Odoo and Google Drive so that important business files remain available in both systems. The connector works with the base synchronization framework to process cloud document changes and maintain linked records.
Google Drive File Operations
Perform common cloud file operations such as uploading, downloading, renaming, moving, opening, and sending files to trash. This makes everyday document management faster and avoids switching between multiple systems for routine tasks.
Cloud Folder Fetching
Existing Google Drive folders can be connected to the cloud storage structure by providing a folder URL or identifier. This is useful when a business already has an established Drive hierarchy and wants to bring selected folders into its Odoo document workflow.
Synchronization Monitoring
Cloud synchronization works together with the base module's queue and logging system for handling document operations. Users can track synchronization activity, review processing information, and manage operations more systematically.
Screenshot
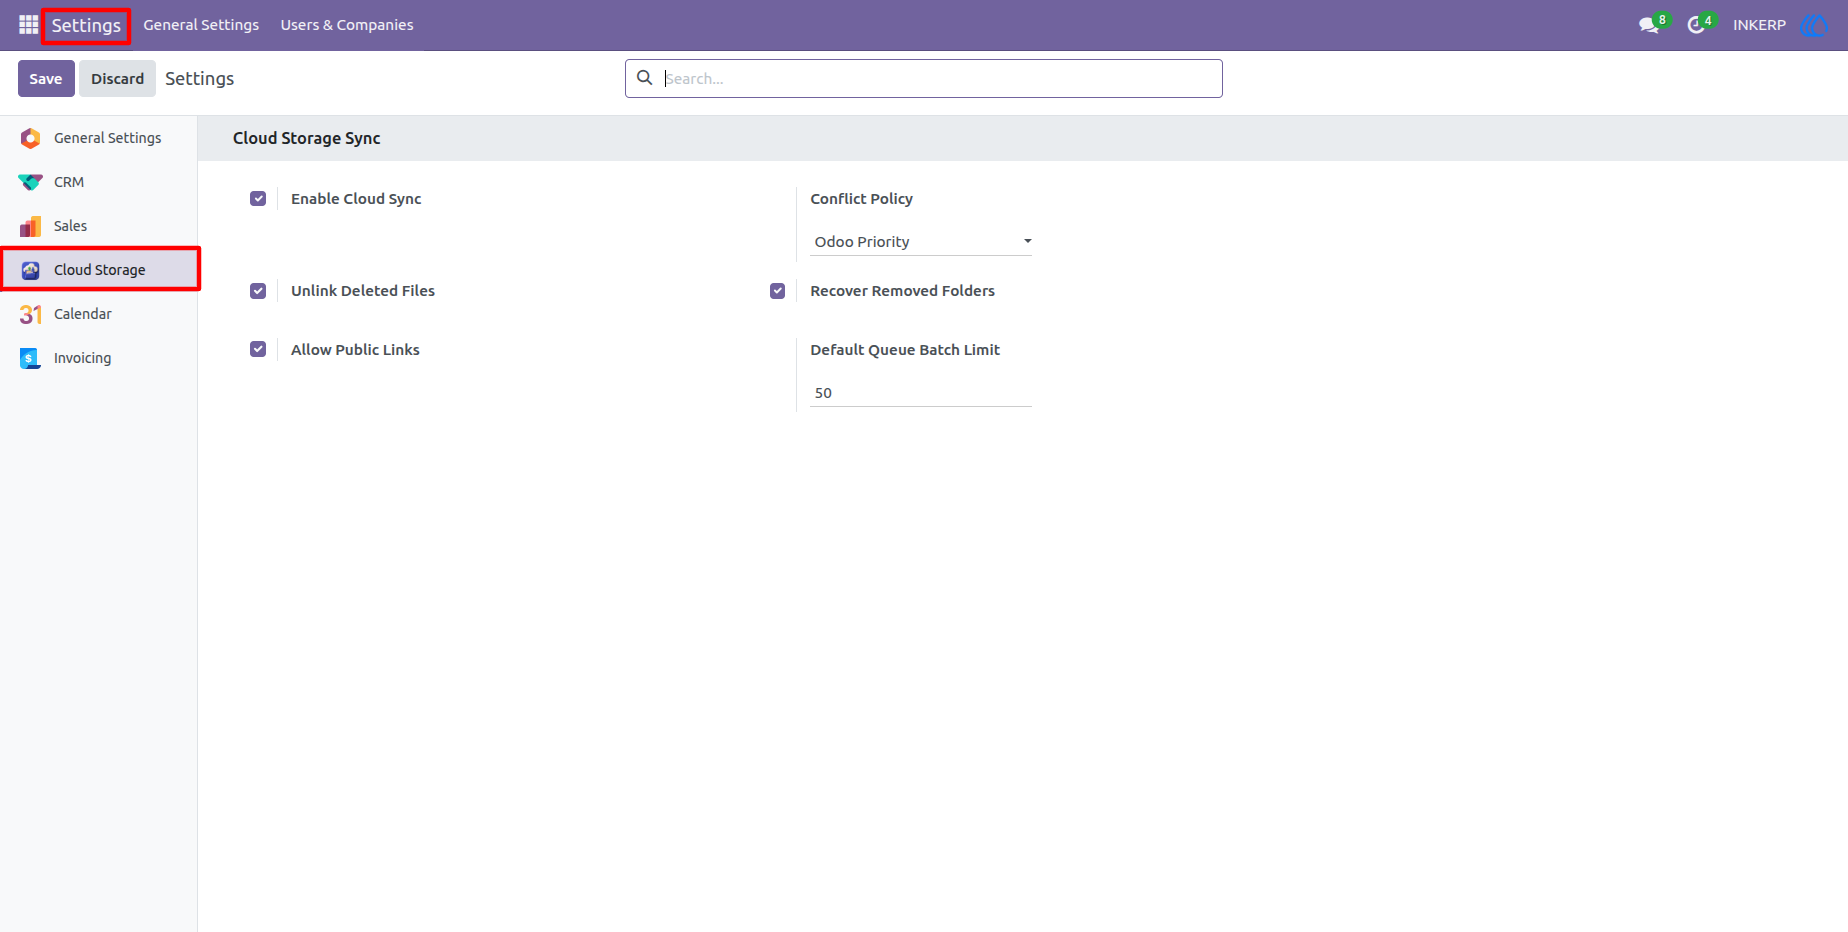
1.) Cloud Storage Settings
Configure the general cloud storage environment and access the Google Drive-related settings from the centralized configuration area. This provides the starting point for enabling and managing cloud document functionality.
2.) Google Drive Cloud Client
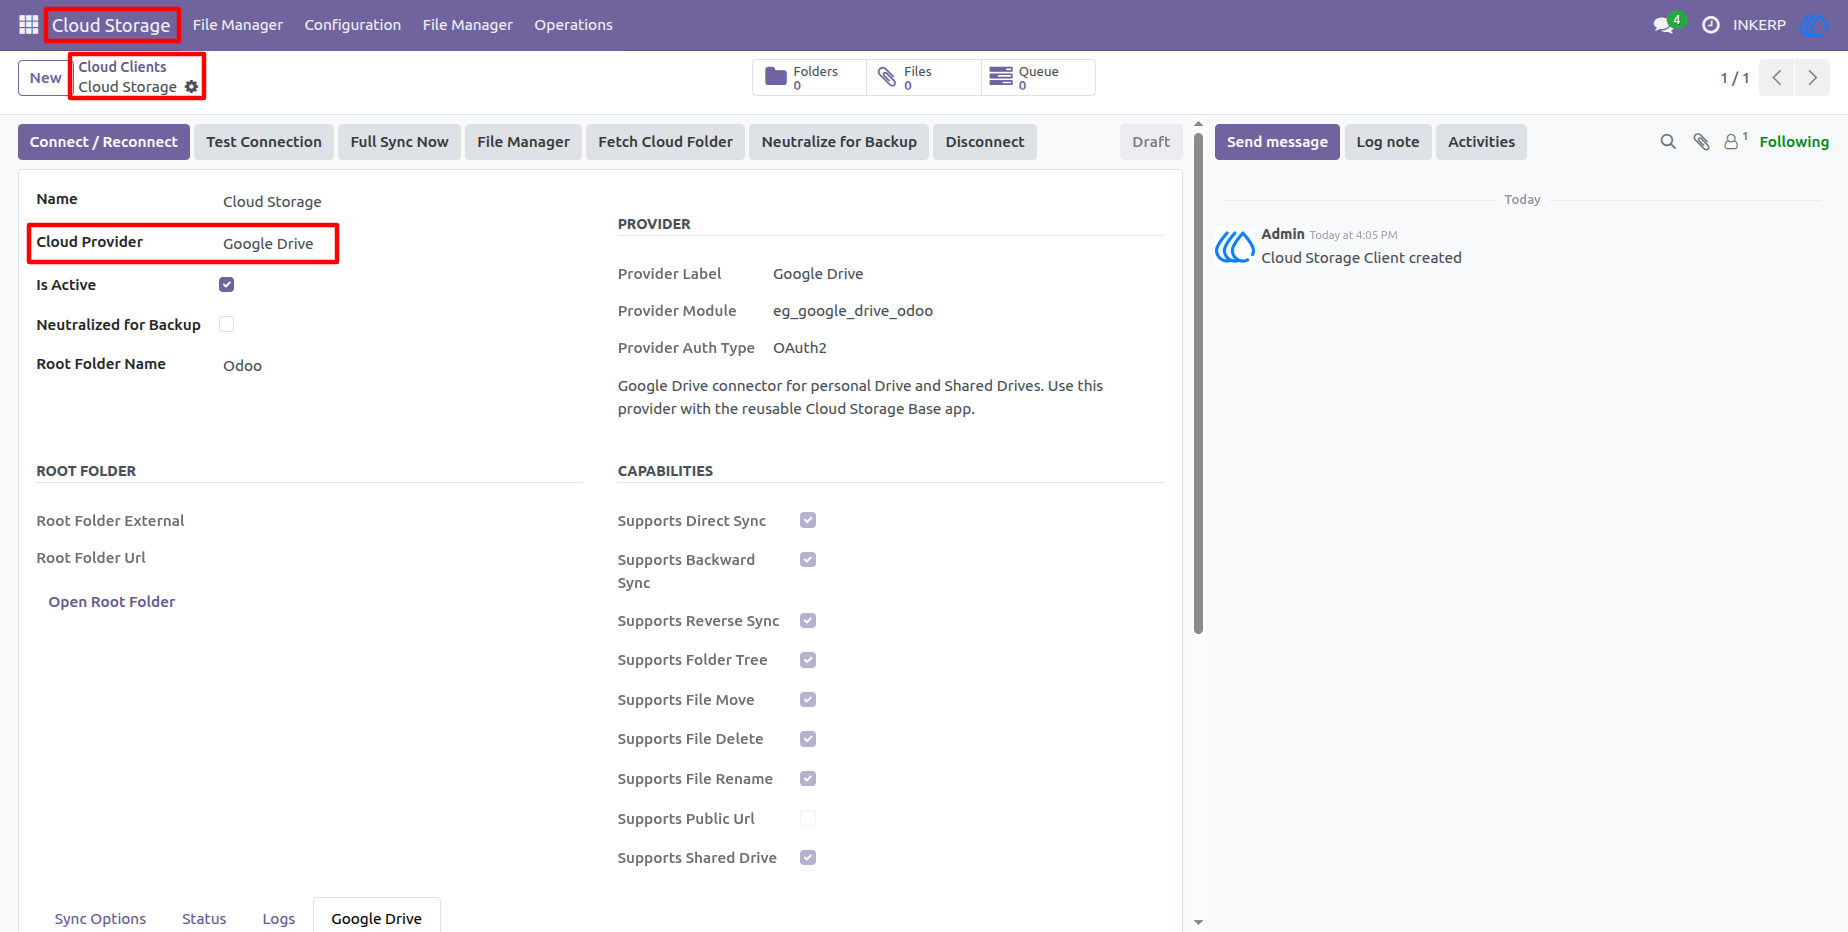
Create and configure the Google Drive cloud client with the provider, connection information, and synchronization capabilities. The client record acts as the main bridge between Odoo and the Google Drive account.
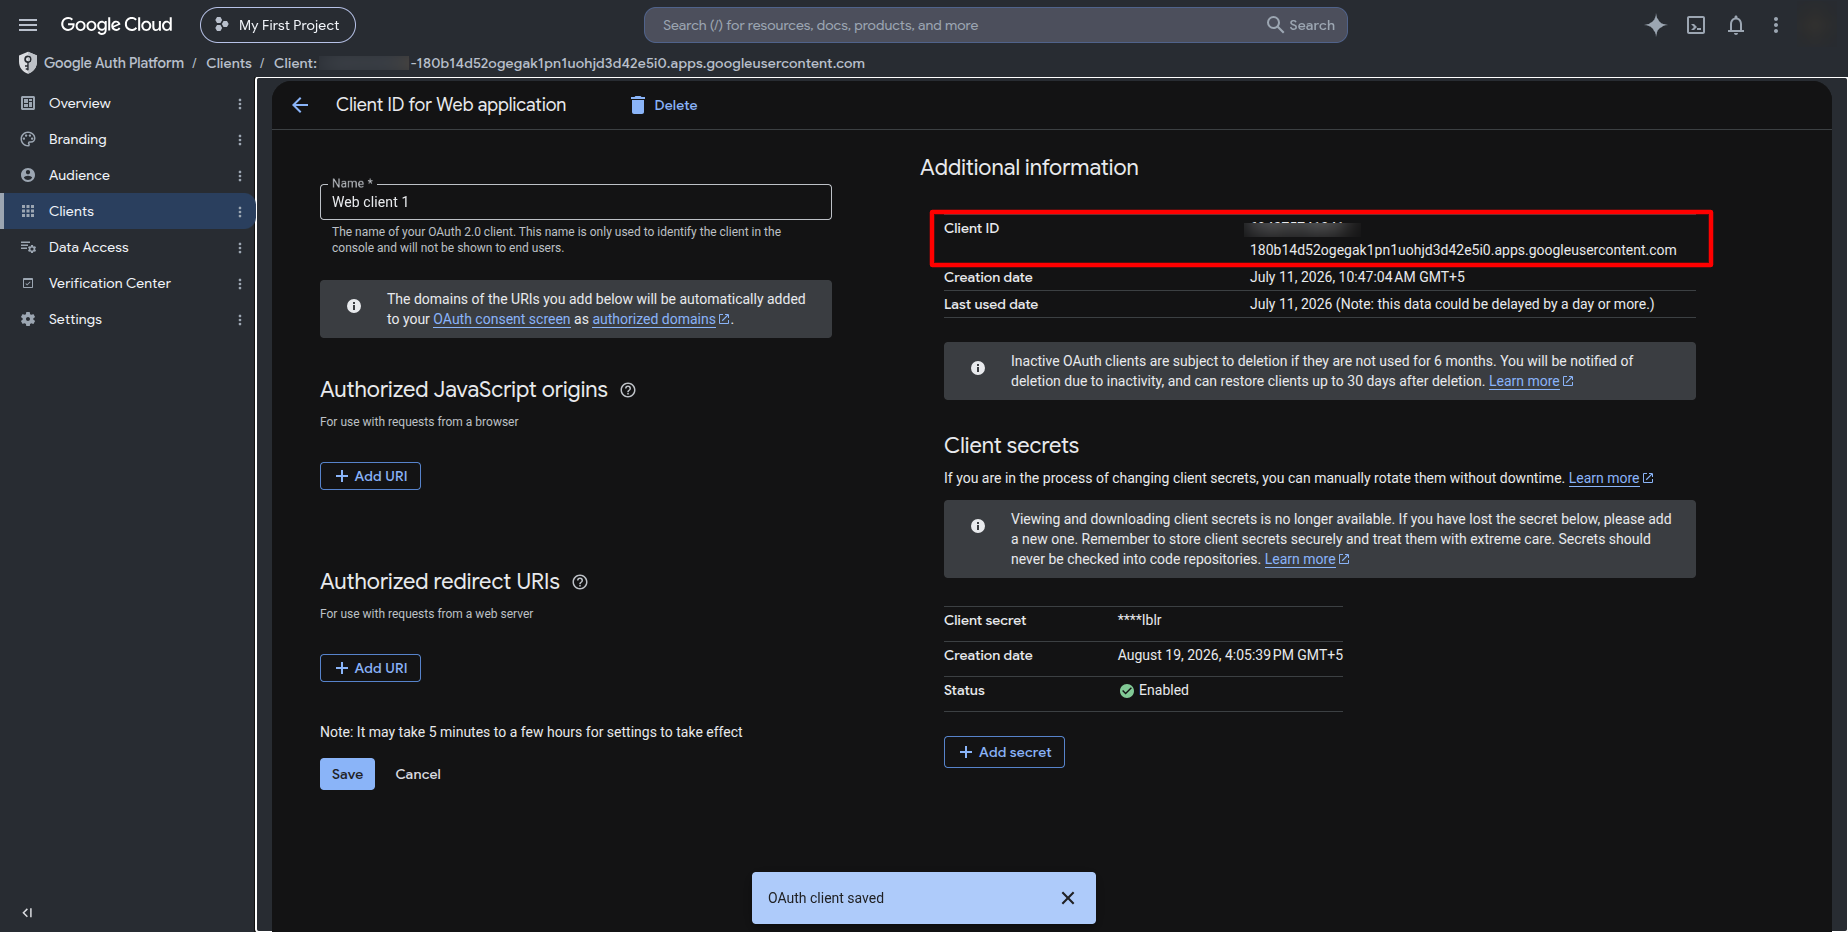
3.) Obtain Your Google Client ID
Inside your Google Cloud Console, navigate to your OAuth 2.0 client credentials. Copy the generated Client ID, which acts as the public identifier for your Odoo integration.
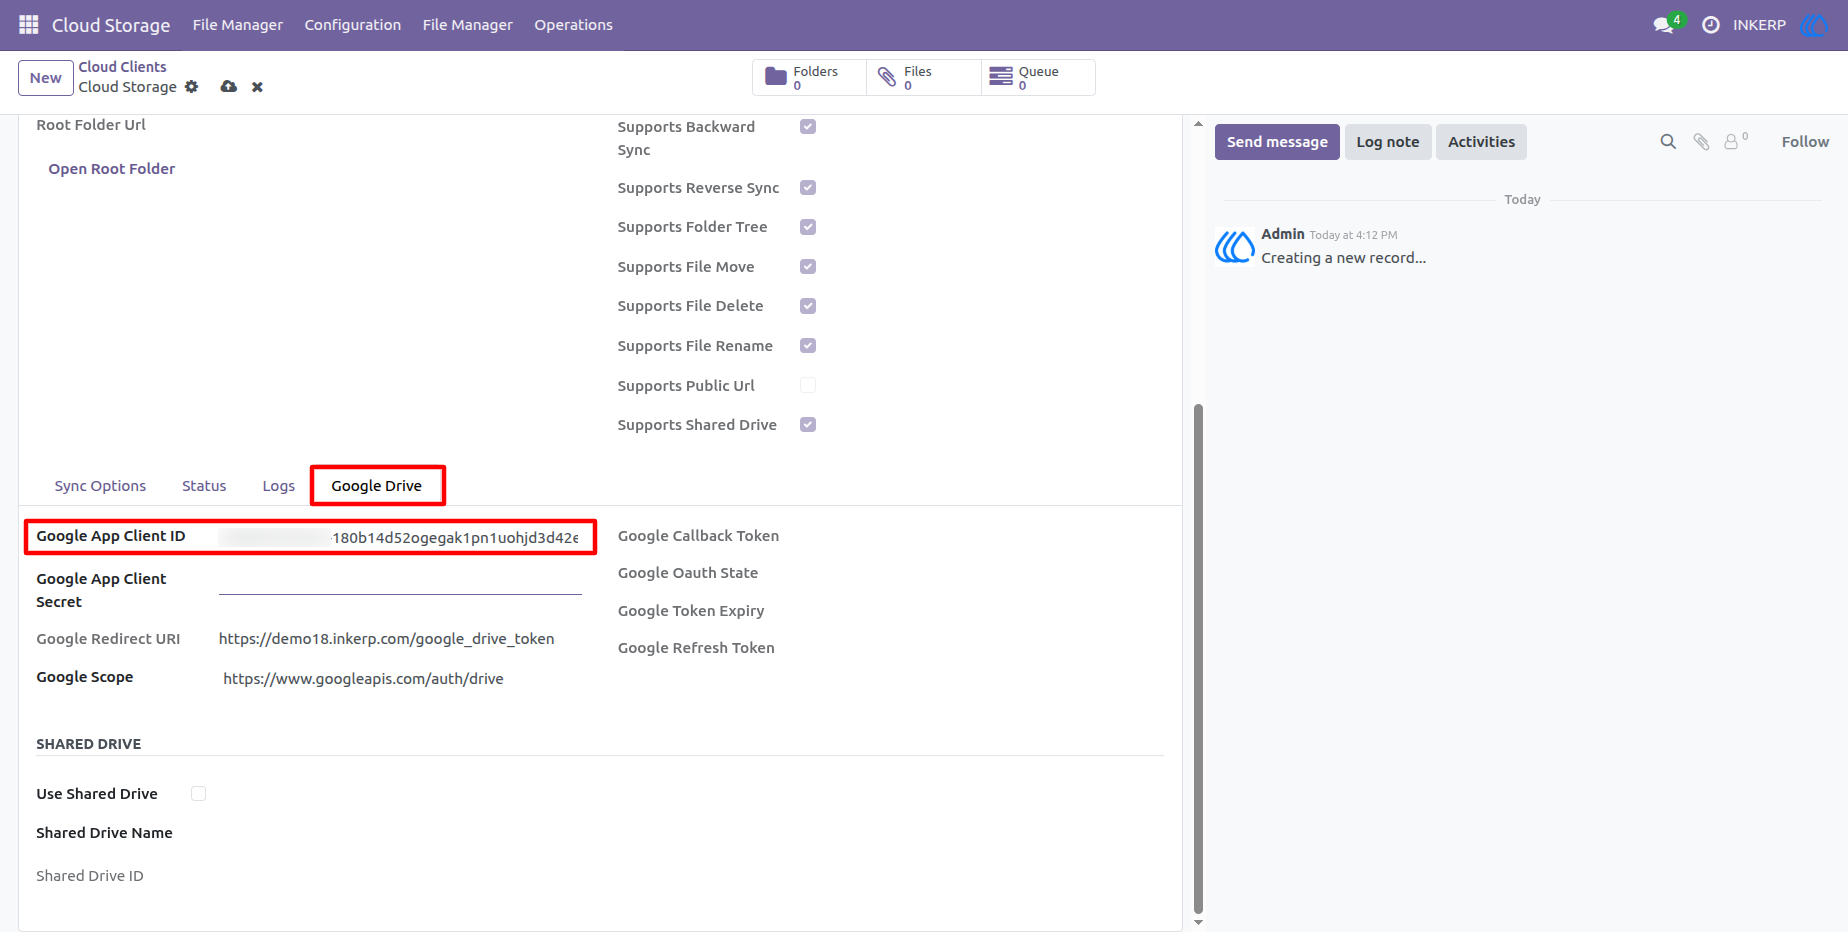
4.) Enter the Client ID in Odoo
Return to your Odoo configuration screen and paste the copied identifier into the Google App Client ID field under the Google Drive tab. This tells the system exactly which Google Cloud project it needs to communicate with.
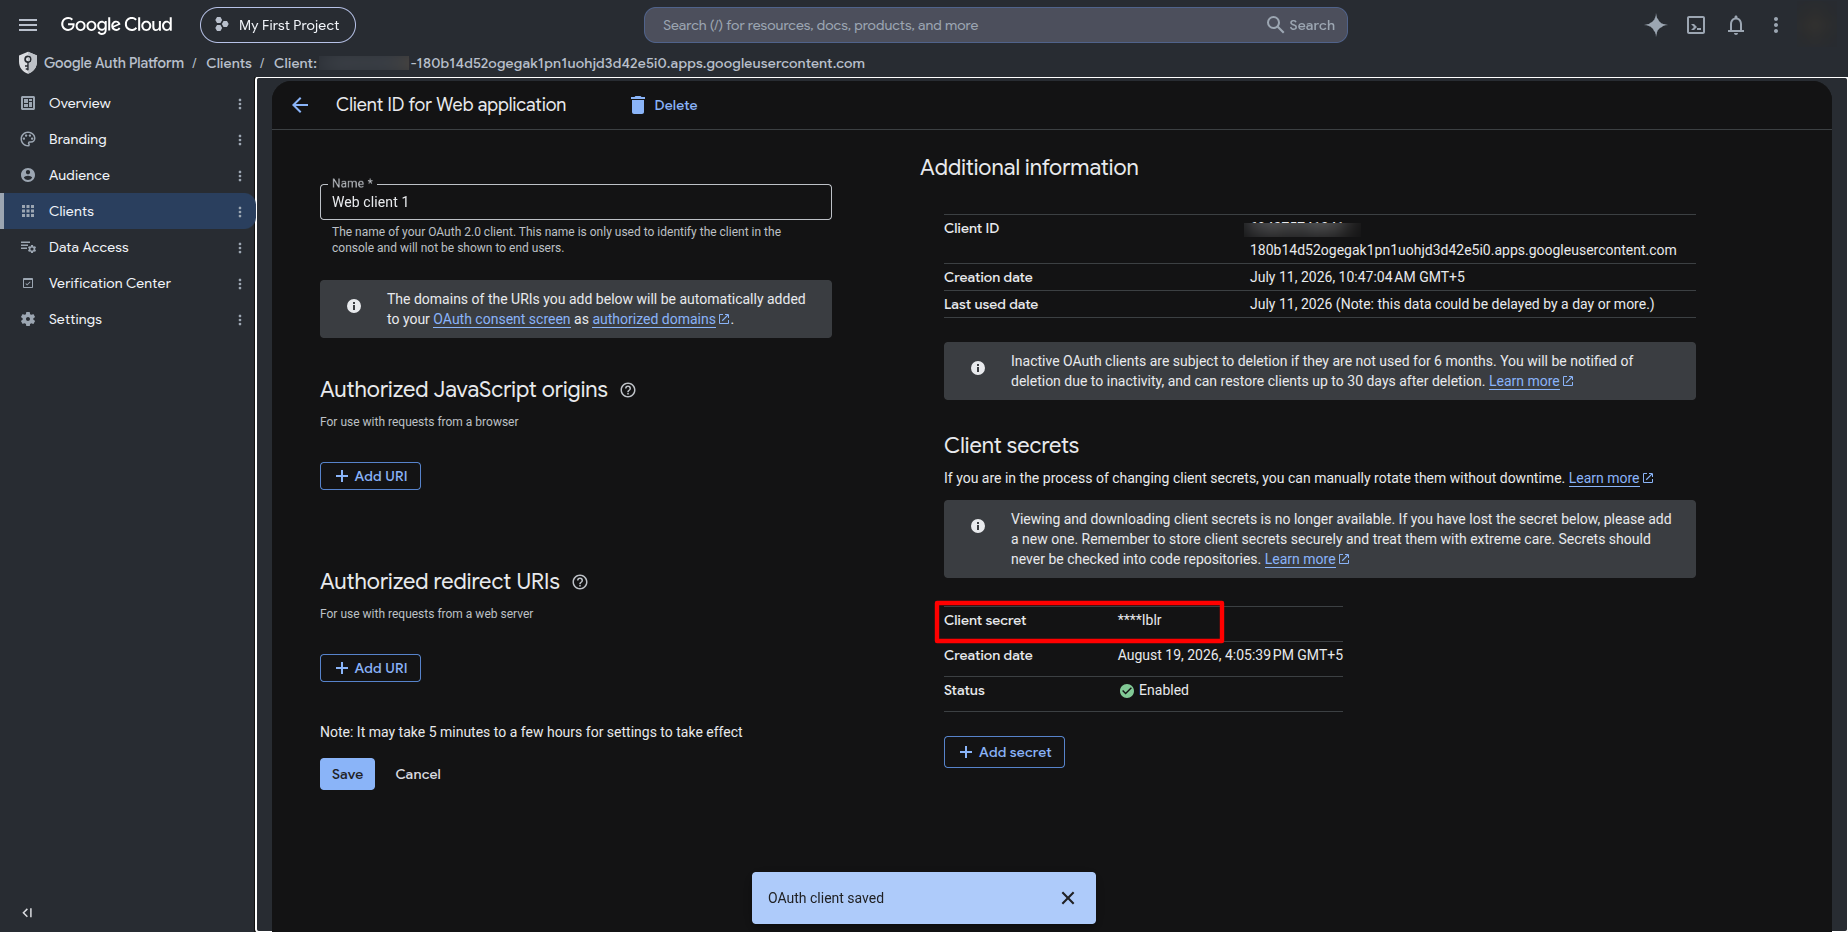
5.) Generate the Google Client Secret
Back in the Google Cloud Console, locate or generate your Client Secret. Treat this alphanumeric string like a password; it securely authenticates the data exchange between your database and Google Drive.
6.) Secure the Connection with the Secret Key
Paste your copied Client Secret into the corresponding field within the Odoo Google Drive tab. With both the ID and Secret in place, the application is now equipped to request access securely.
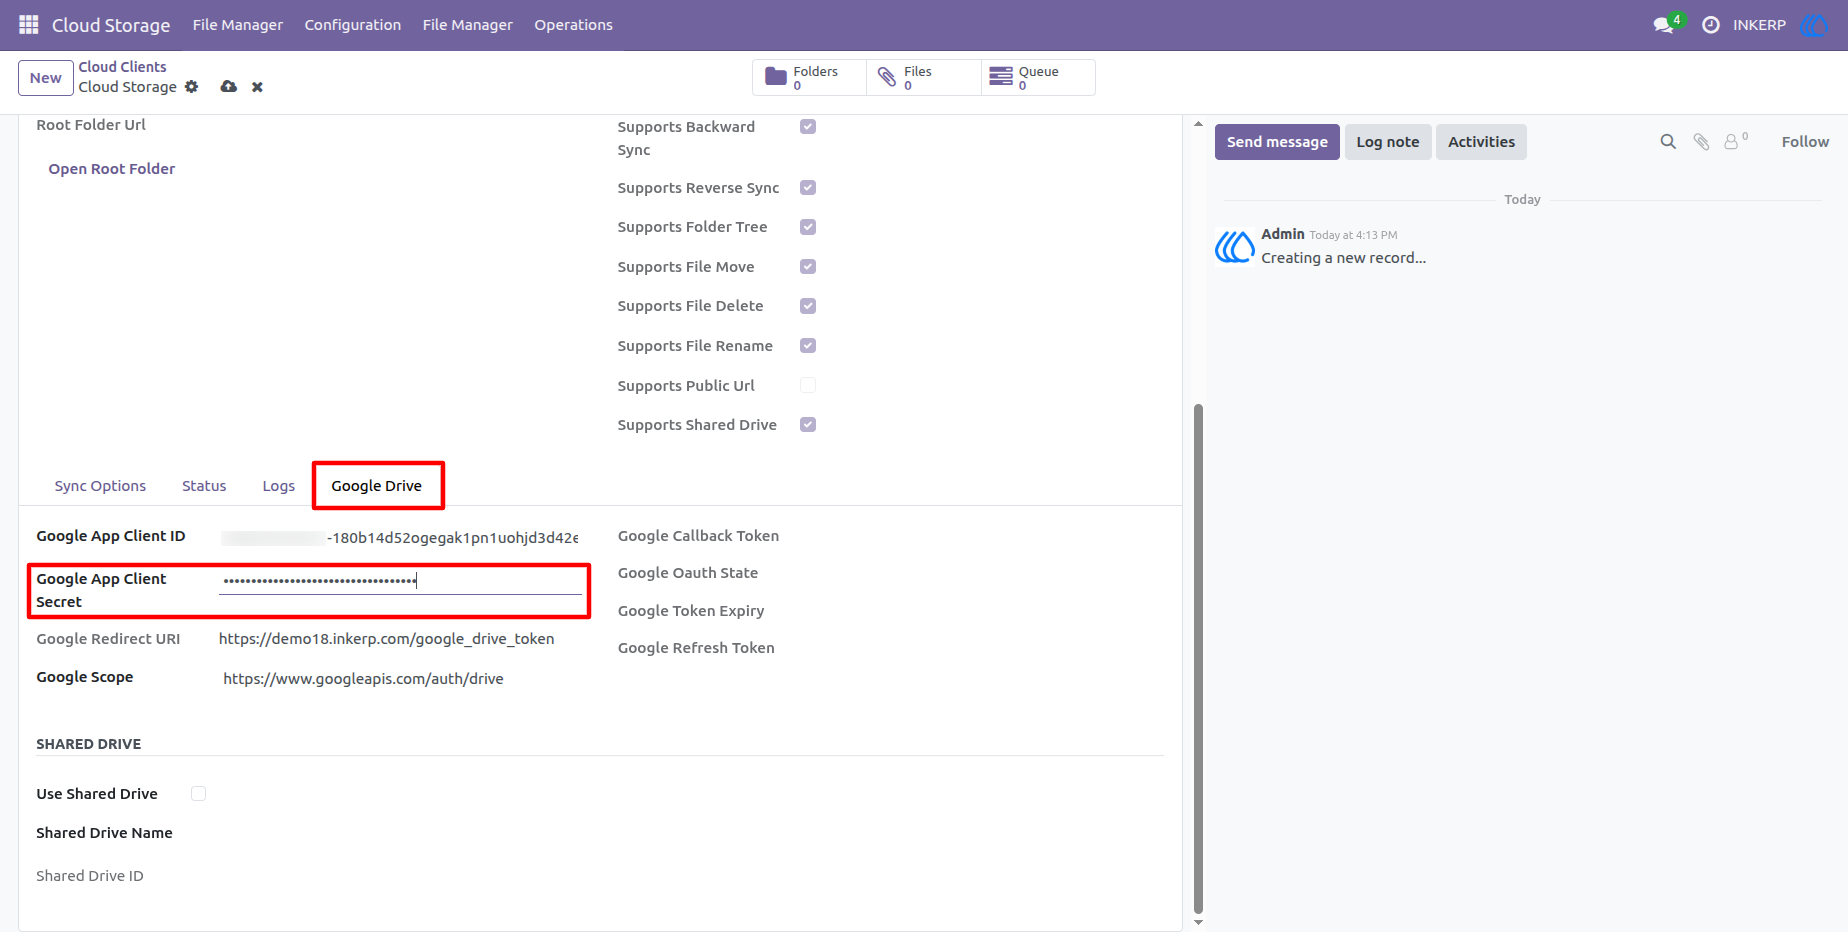
7.) Copy the Authorized Redirect URI
Once you save your configuration, the system automatically generates a secure Google Redirect URI. Copy this specific link; Google requires it to know exactly where to send users back after a successful login attempt.
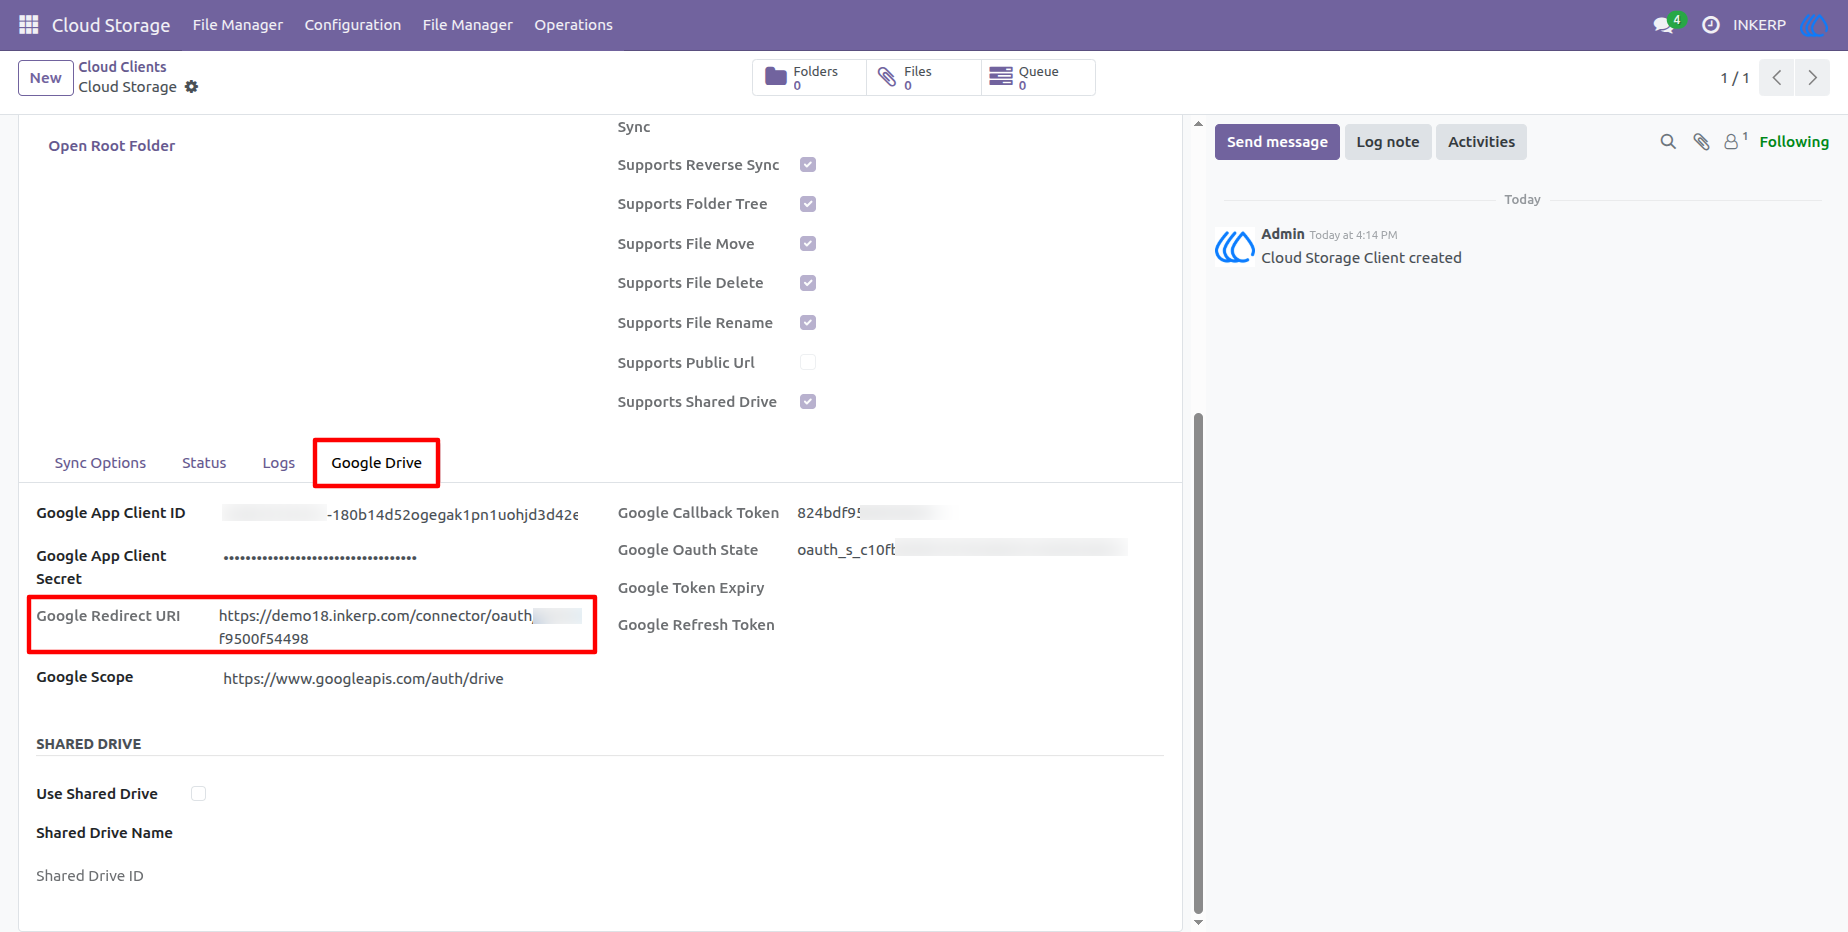
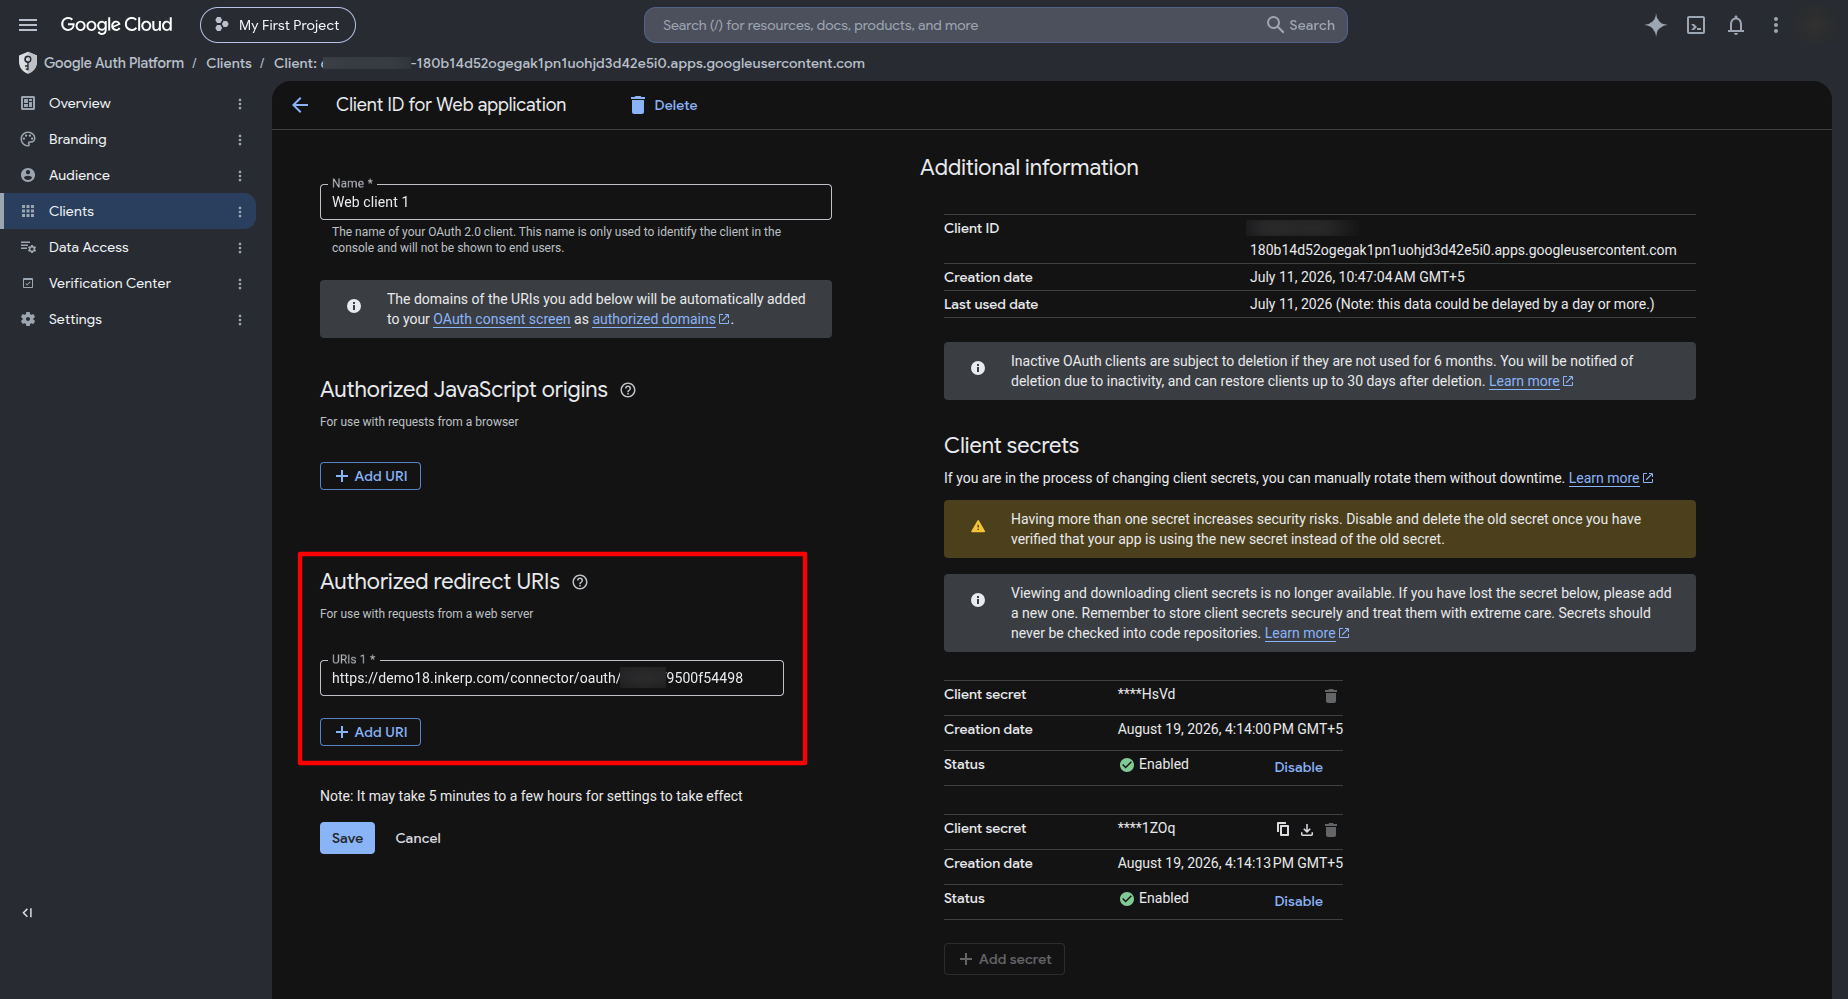
8.) Register the Redirect URI in Google Cloud
Paste the generated URI into the "Authorized redirect URIs" section of your Google Cloud Console and save your changes. This crucial step prevents unauthorized applications from intercepting your authentication tokens.
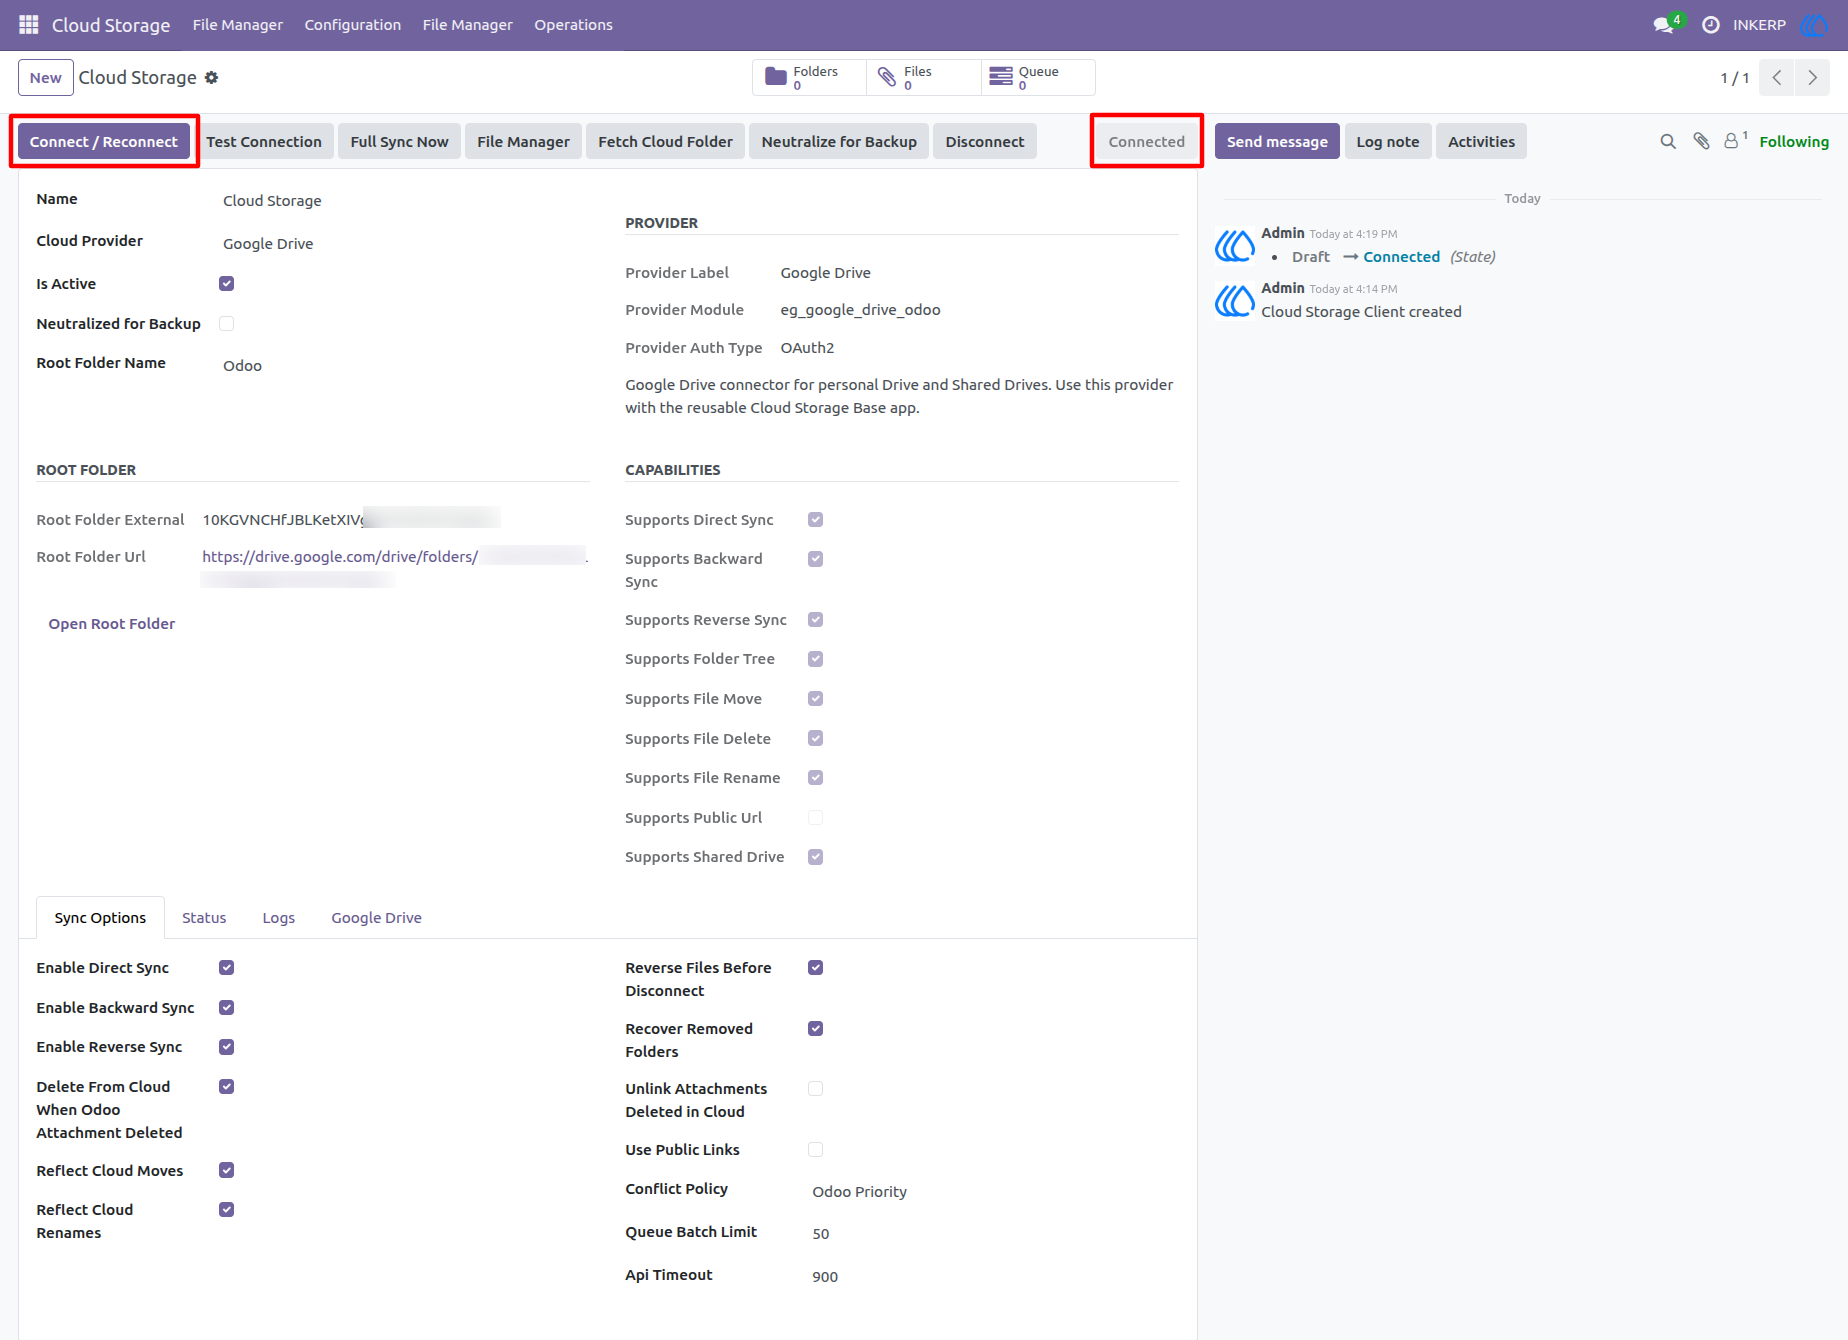
9.) Connect and Verify Integration
Click the Connect button in the header to trigger the Google login prompt. Once authorized, your client status automatically updates to "Connected," indicating that your system is fully synced and ready to manage cloud documents.
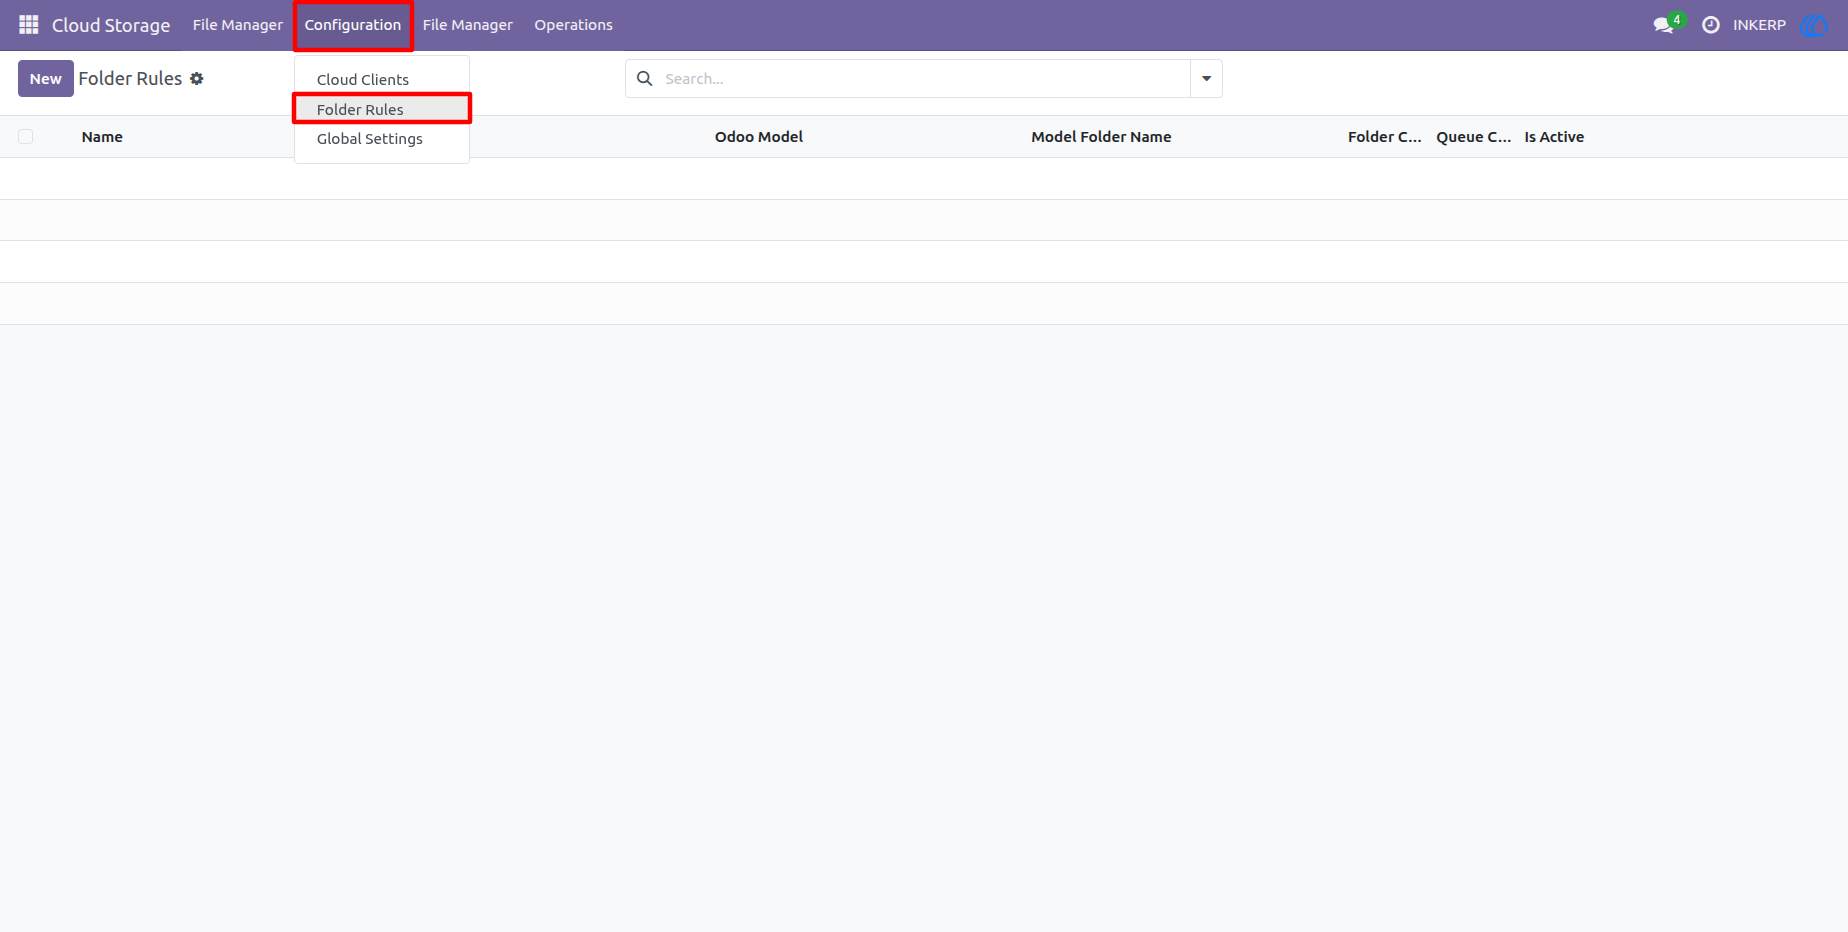
10.) Access Folder Rules Configuration
Navigate to the Configuration menu to define how your database records should be organized in the cloud. Folder rules act as the core blueprint, allowing you to establish exactly which modules get their own dedicated Google Drive directories.
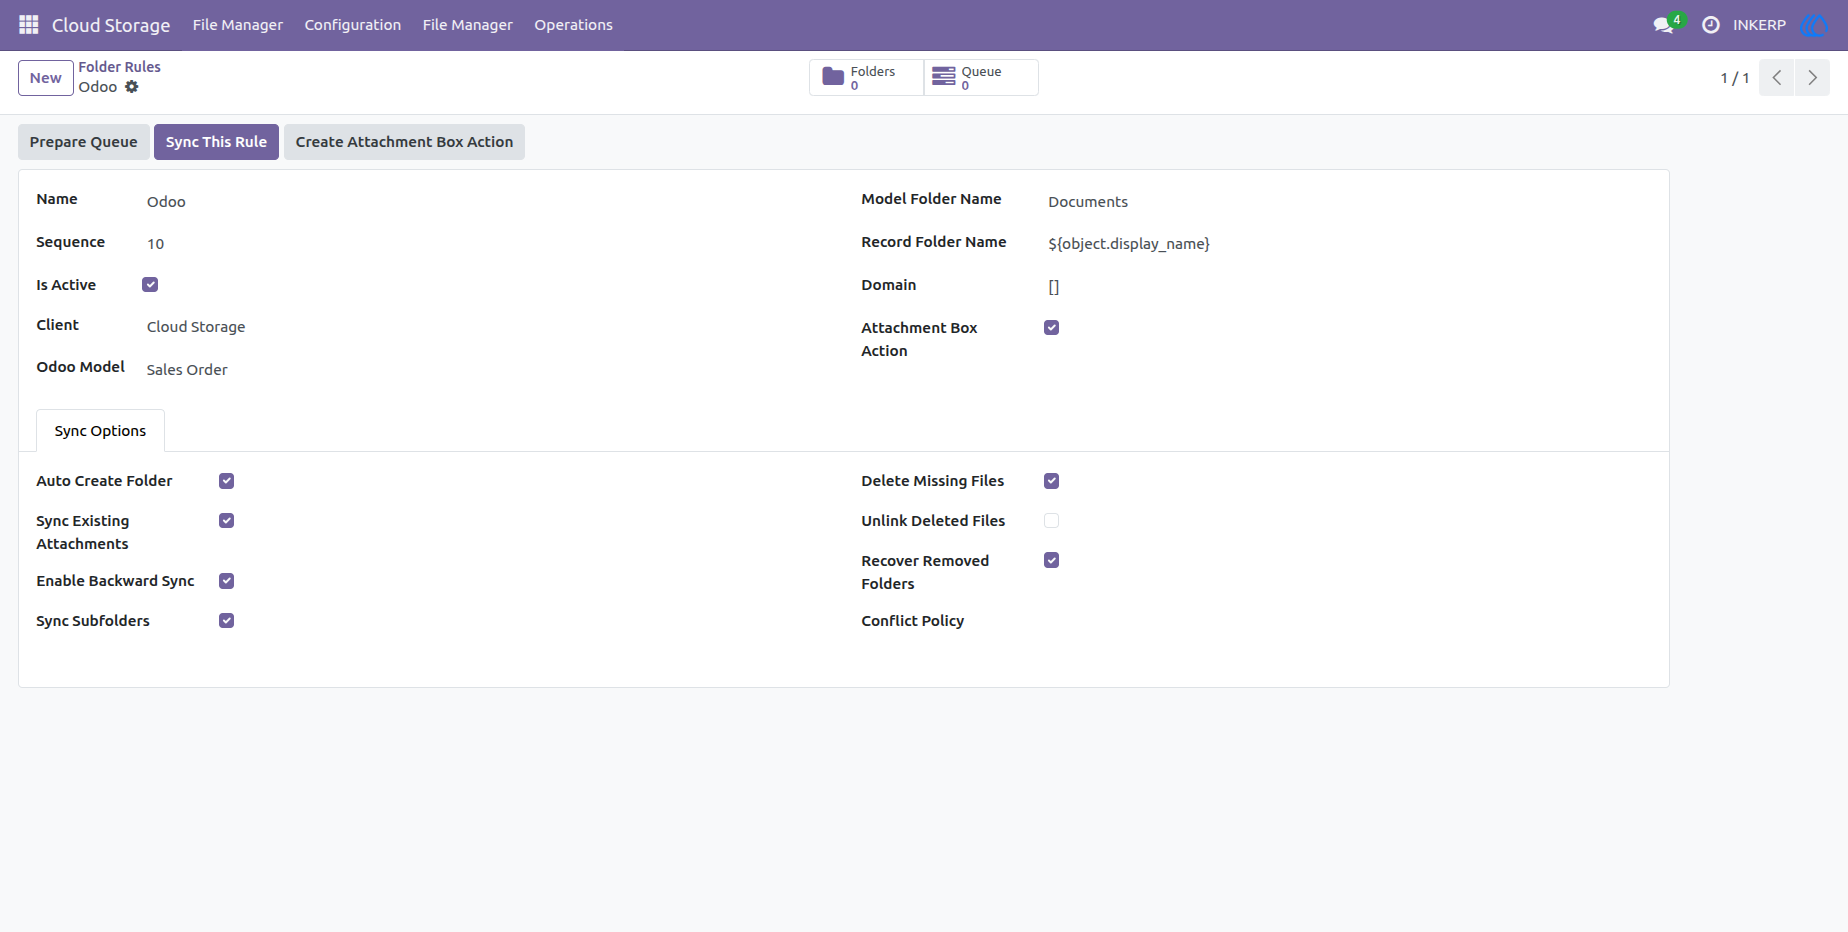
11.) Configure Dynamic Model Rules
Create a tailored mapping rule for any specific module, such as Sales Orders. By utilizing the "Create Attachment Box Action" feature, you instantly add a convenient shortcut to your record forms, giving your team direct access to the associated cloud folder right from the document view.
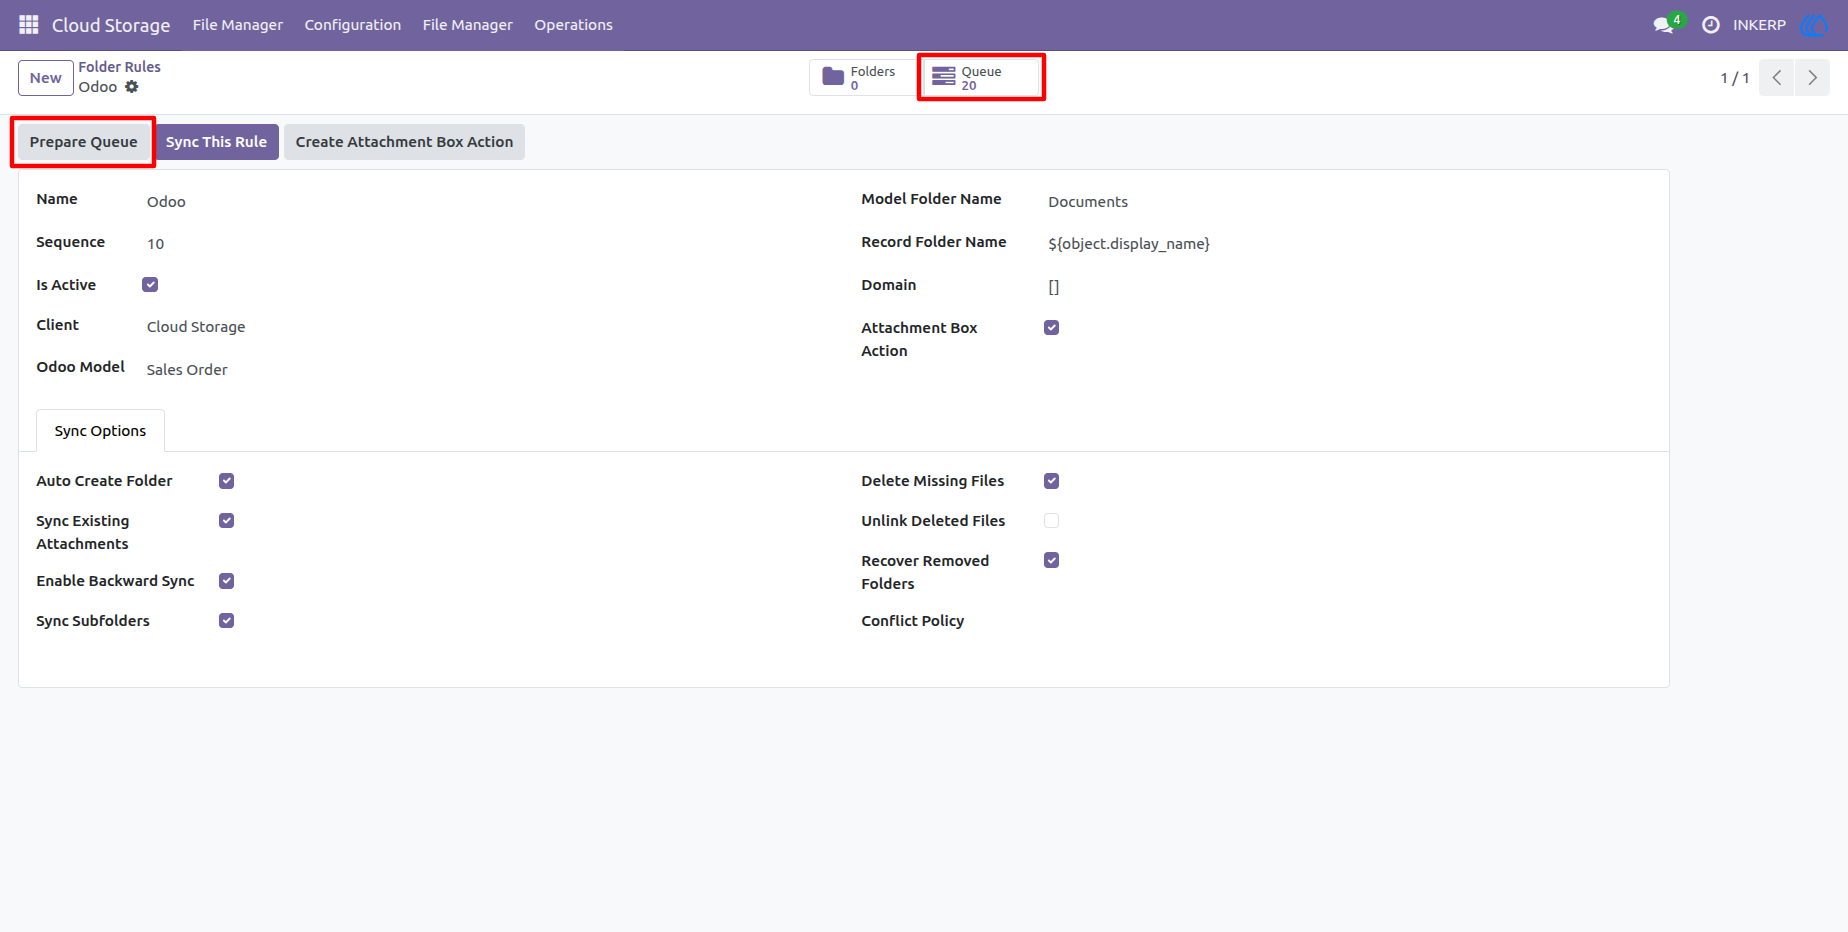
12.) Prepare Records for Synchronization
Use the "Prepare Queue" function to safely line up existing records for their initial cloud sync. Instead of overloading the server by pushing everything at once, the system intelligently batches these tasks into the queue to ensure smooth, uninterrupted background processing.
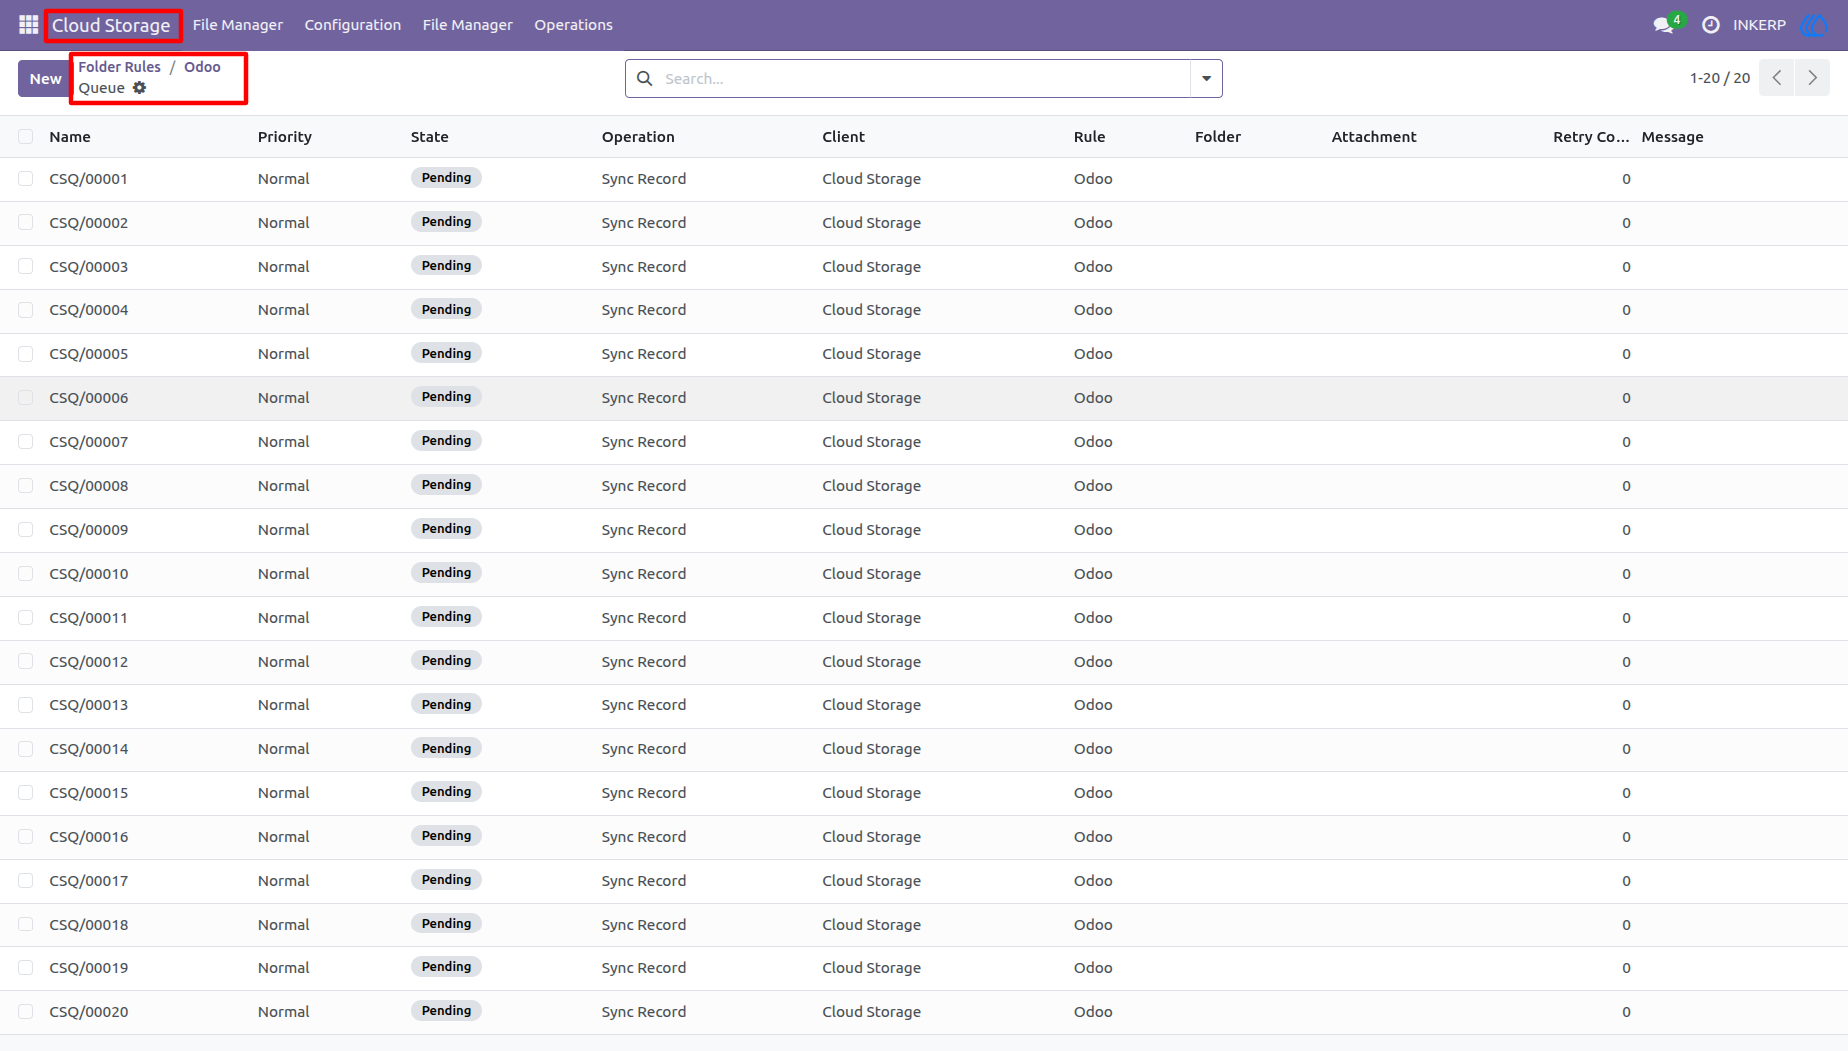
13.) Monitor Background Sync Operations
Track your pending synchronization tasks inside the transparent queue manager. This control center allows administrators to see exactly which records are scheduled for processing, complete with priority levels, operation types, and real-time execution states
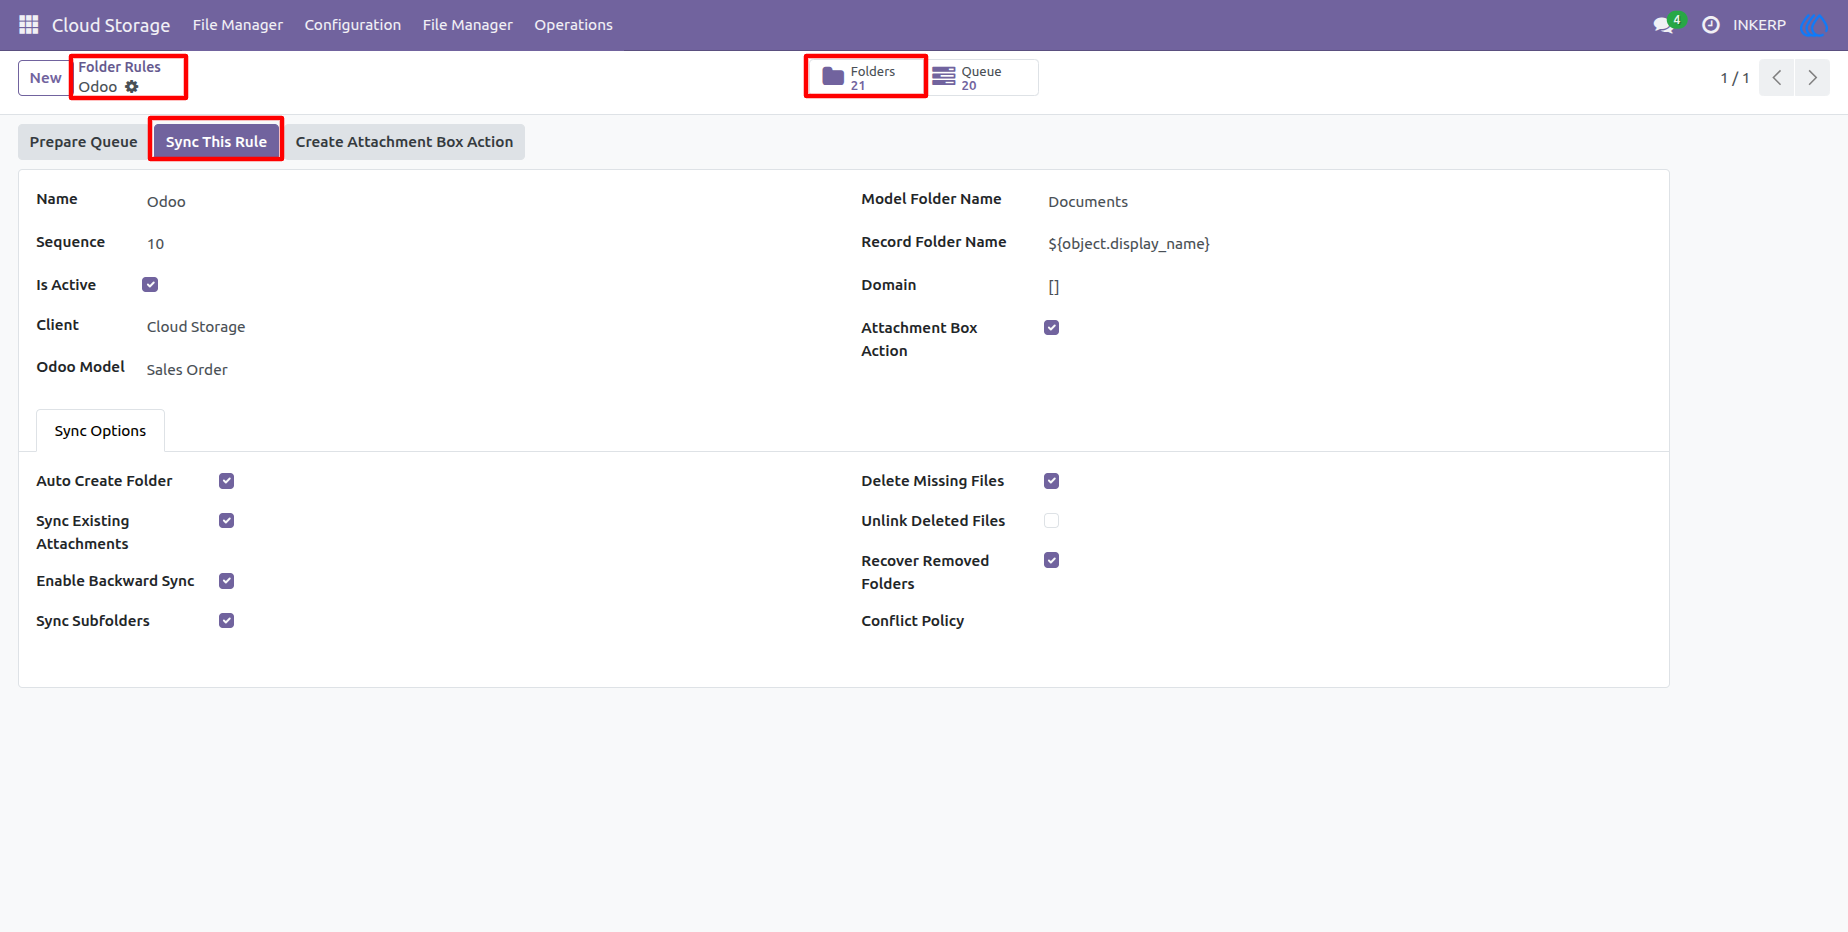
14.) Execute On-Demand Rule Synchronization
Trigger a manual, immediate sync at any time using the "Sync This Rule" button. Once processed, the system seamlessly communicates with Google Drive to generate the required cloud directories, which is instantly reflected in the updated folder statistics at the top of your screen.
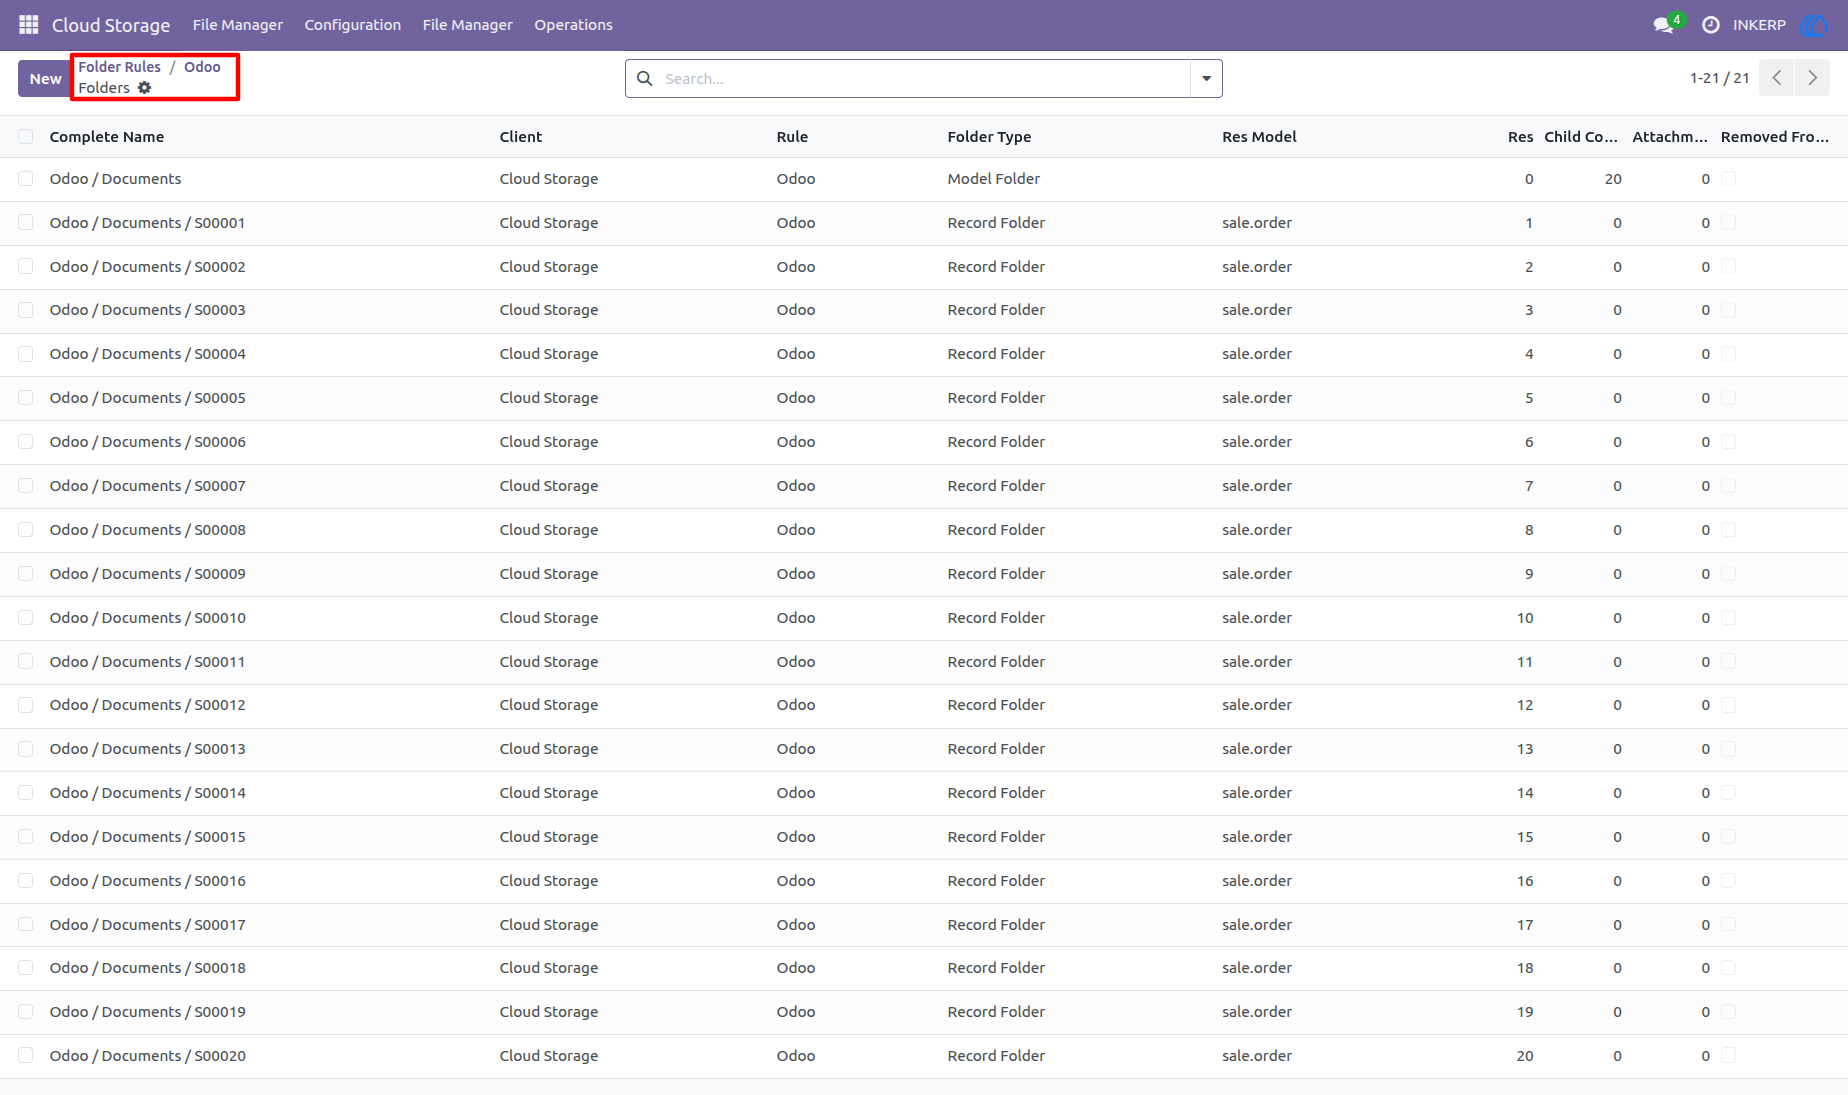
15.) Verify Automated Folder Generation
Review the comprehensive list of newly generated object folders directly within your database. The system automatically structures a master model folder alongside individual, uniquely named subfolders for every single synced record based on your custom naming conventions.
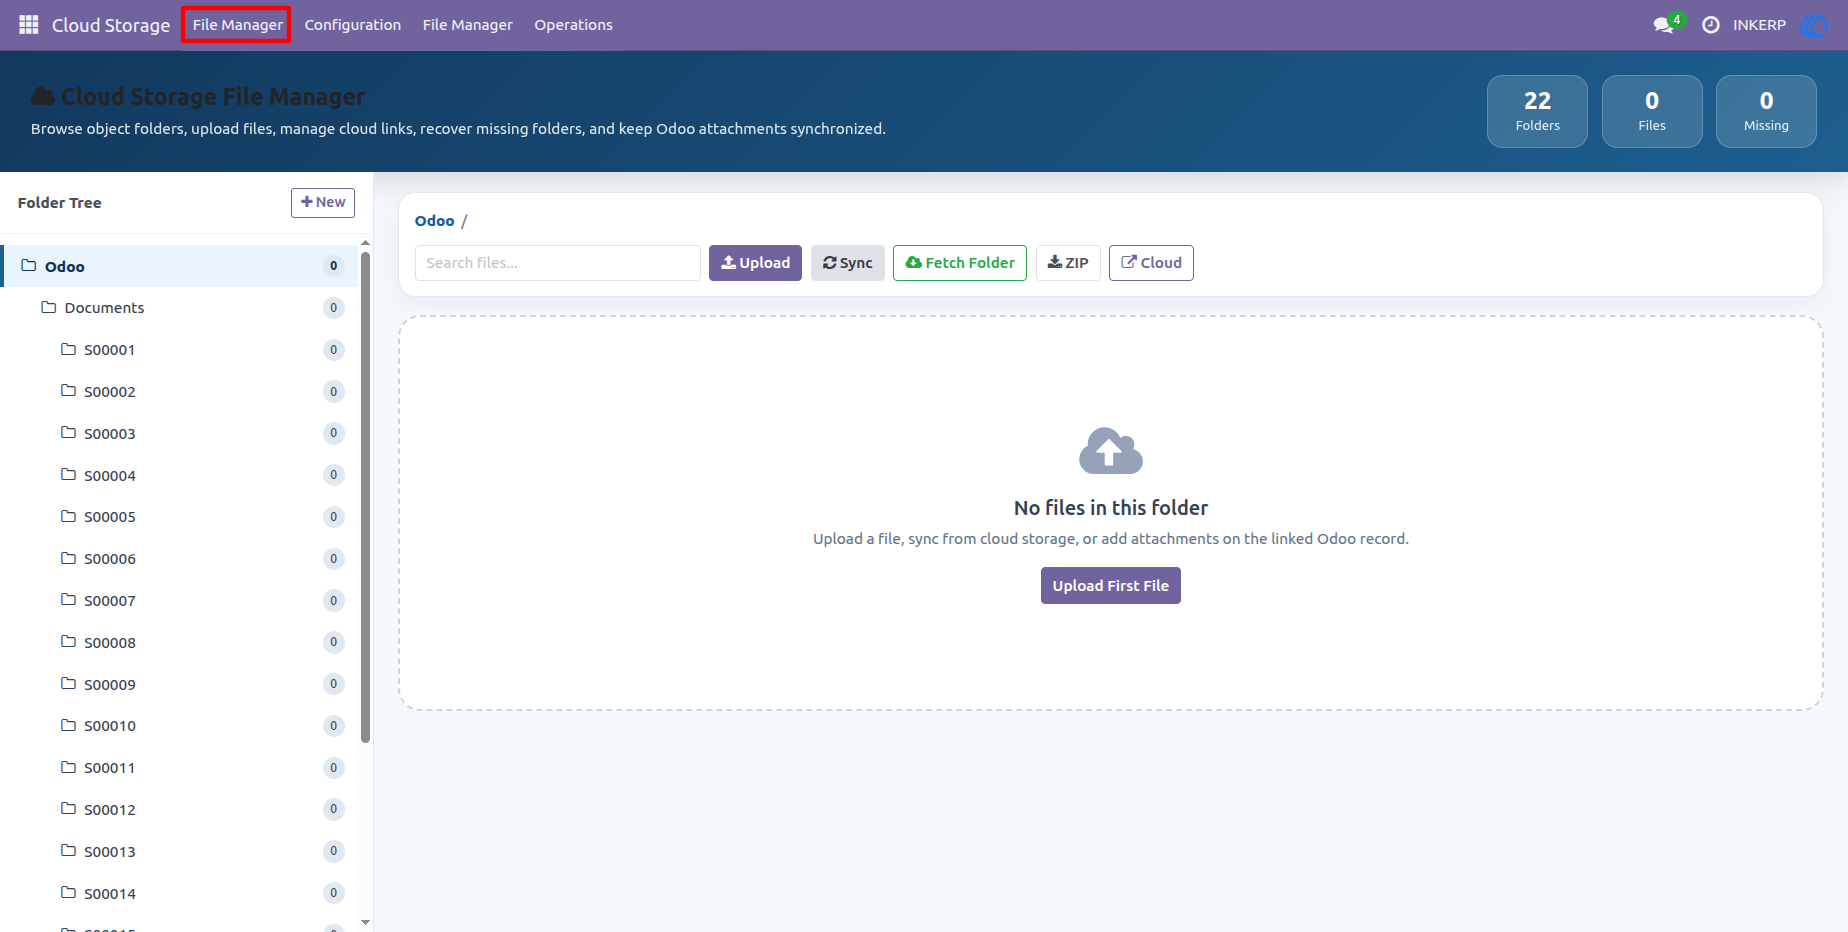
16.) Navigate the Interactive Cloud File Manager
Step into the built-in Cloud File Manager to visually explore your freshly created directory hierarchy. The intuitive left-hand tree view perfectly mirrors your cloud storage layout, allowing users to upload, fetch, and manage documents without ever leaving their enterprise workspace.
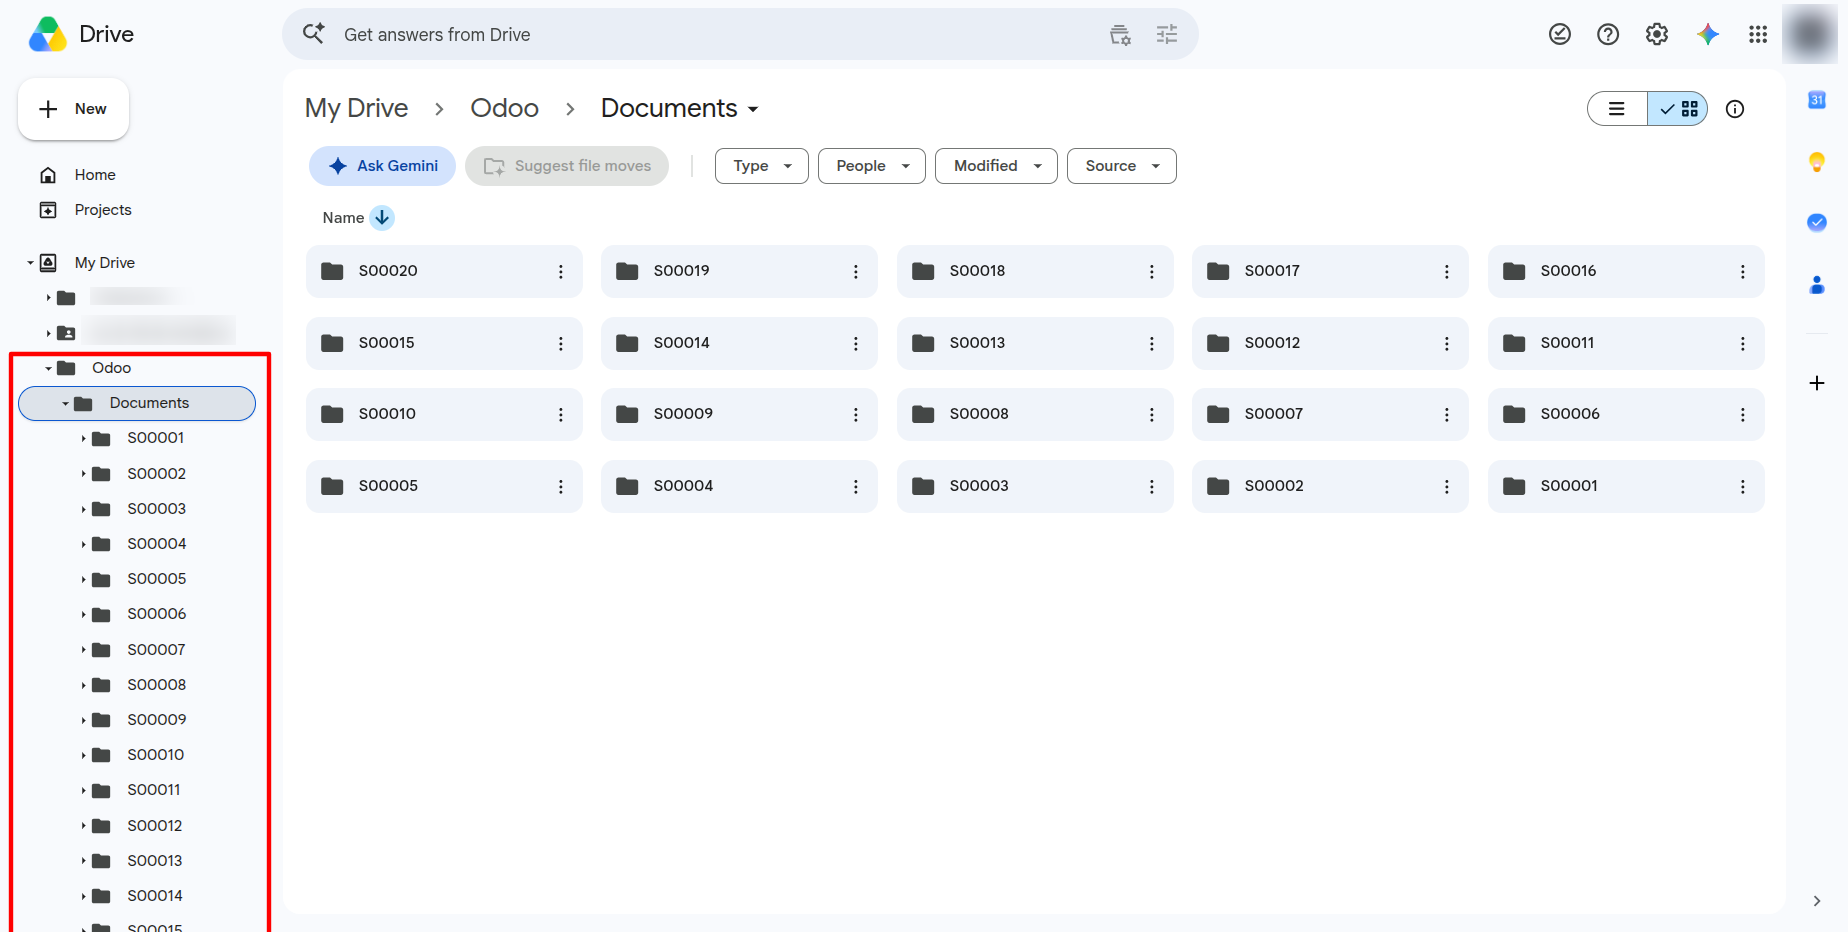
17.) Real-Time Reflection in Google Drive
Experience true synchronization as the exact folder structure generated by your database rules appears instantaneously within your Google Drive account. Your sales orders, invoices, or projects are now perfectly organized, backed up, and accessible directly from the cloud.
18.) Upload Your First Document
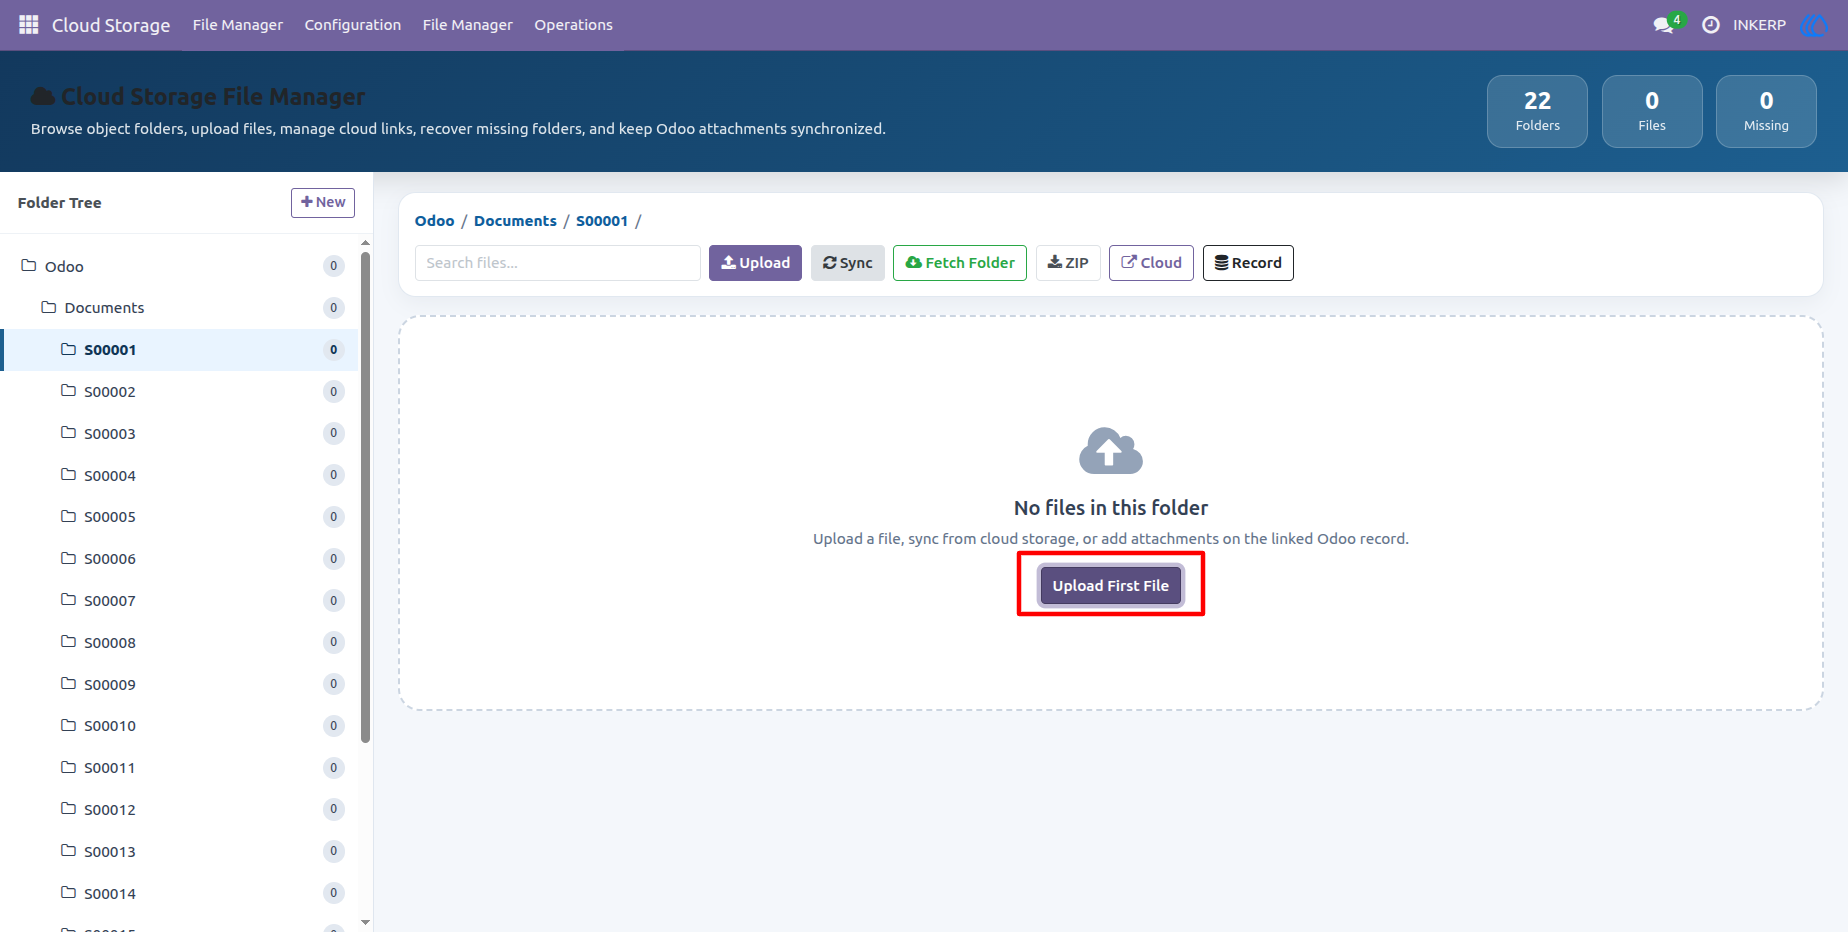
The Cloud Storage File Manager makes it easy to add new documents. If a record's folder is currently empty, you'll see a clear prompt inviting you to "Upload First File." Clicking this immediately opens your local file browser, allowing you to quickly populate the new cloud directory.
19.) Manage Files with Interactive Cards
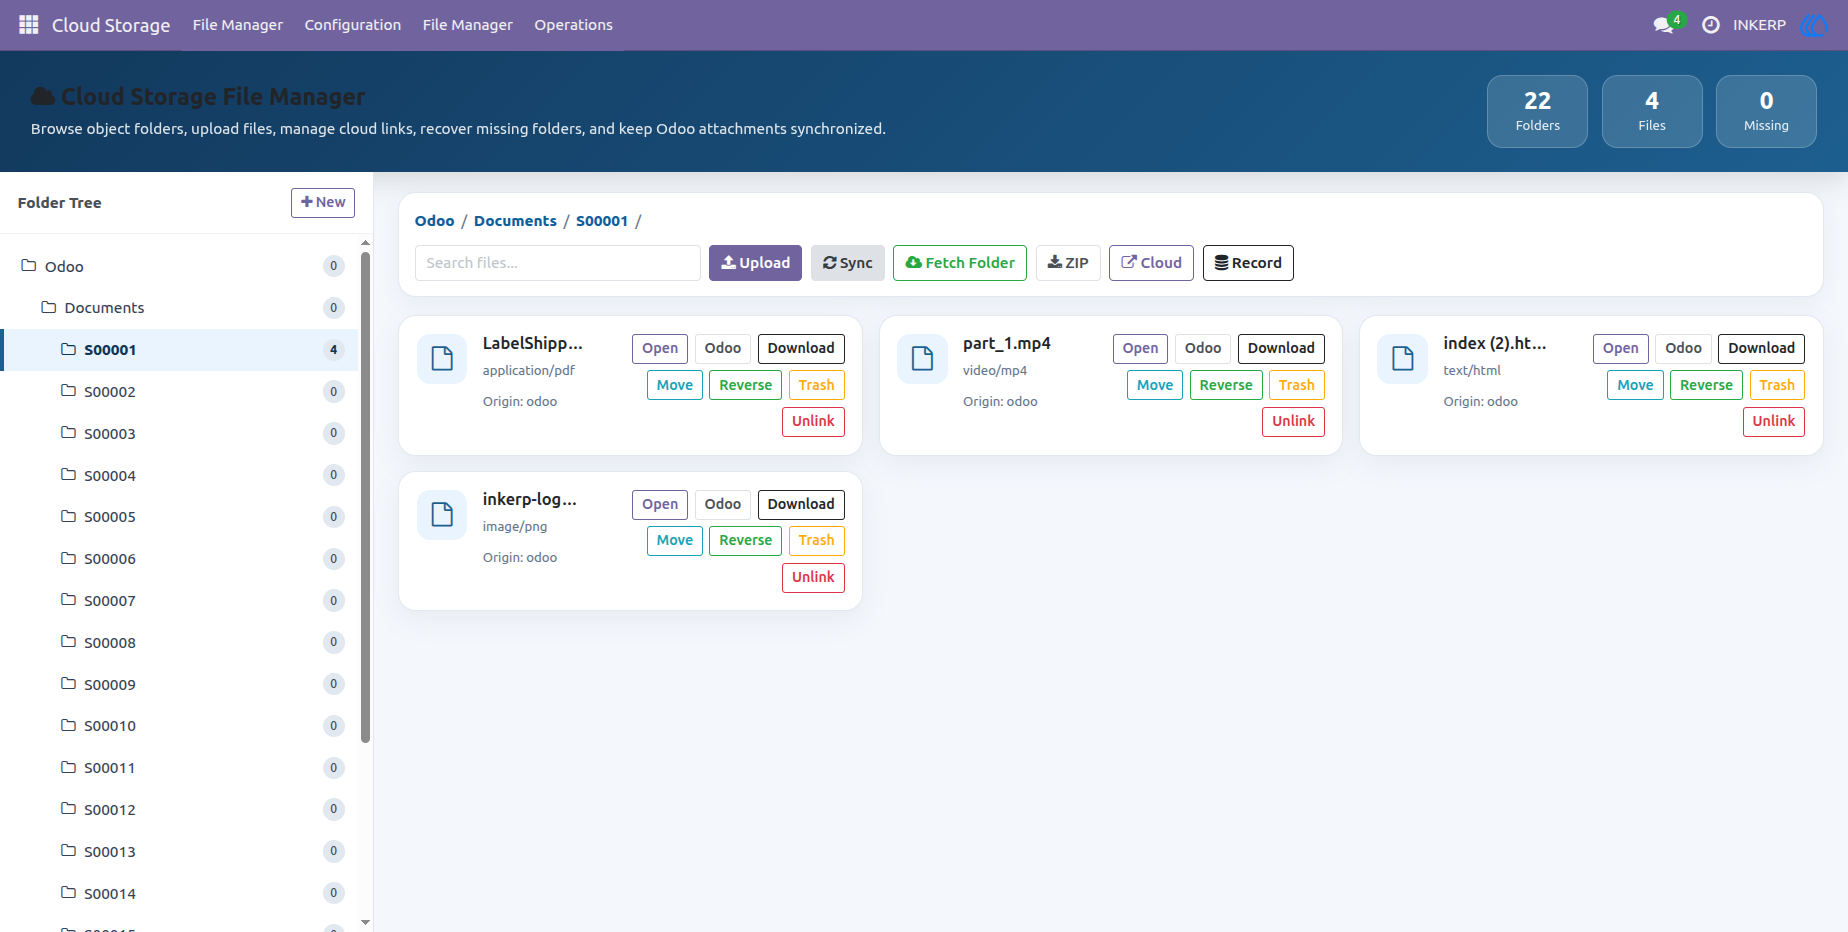
Once files are uploaded, they appear as clean, interactive cards within the File Manager. Each card clearly displays the file name, type, and its origin (Odoo or cloud). From here, you have immediate access to actions like Open, Download, Move, Reverse, Trash, and Unlink—giving you complete control over every document without leaving the interface.
20.) Direct Cloud Deletion via File Manager
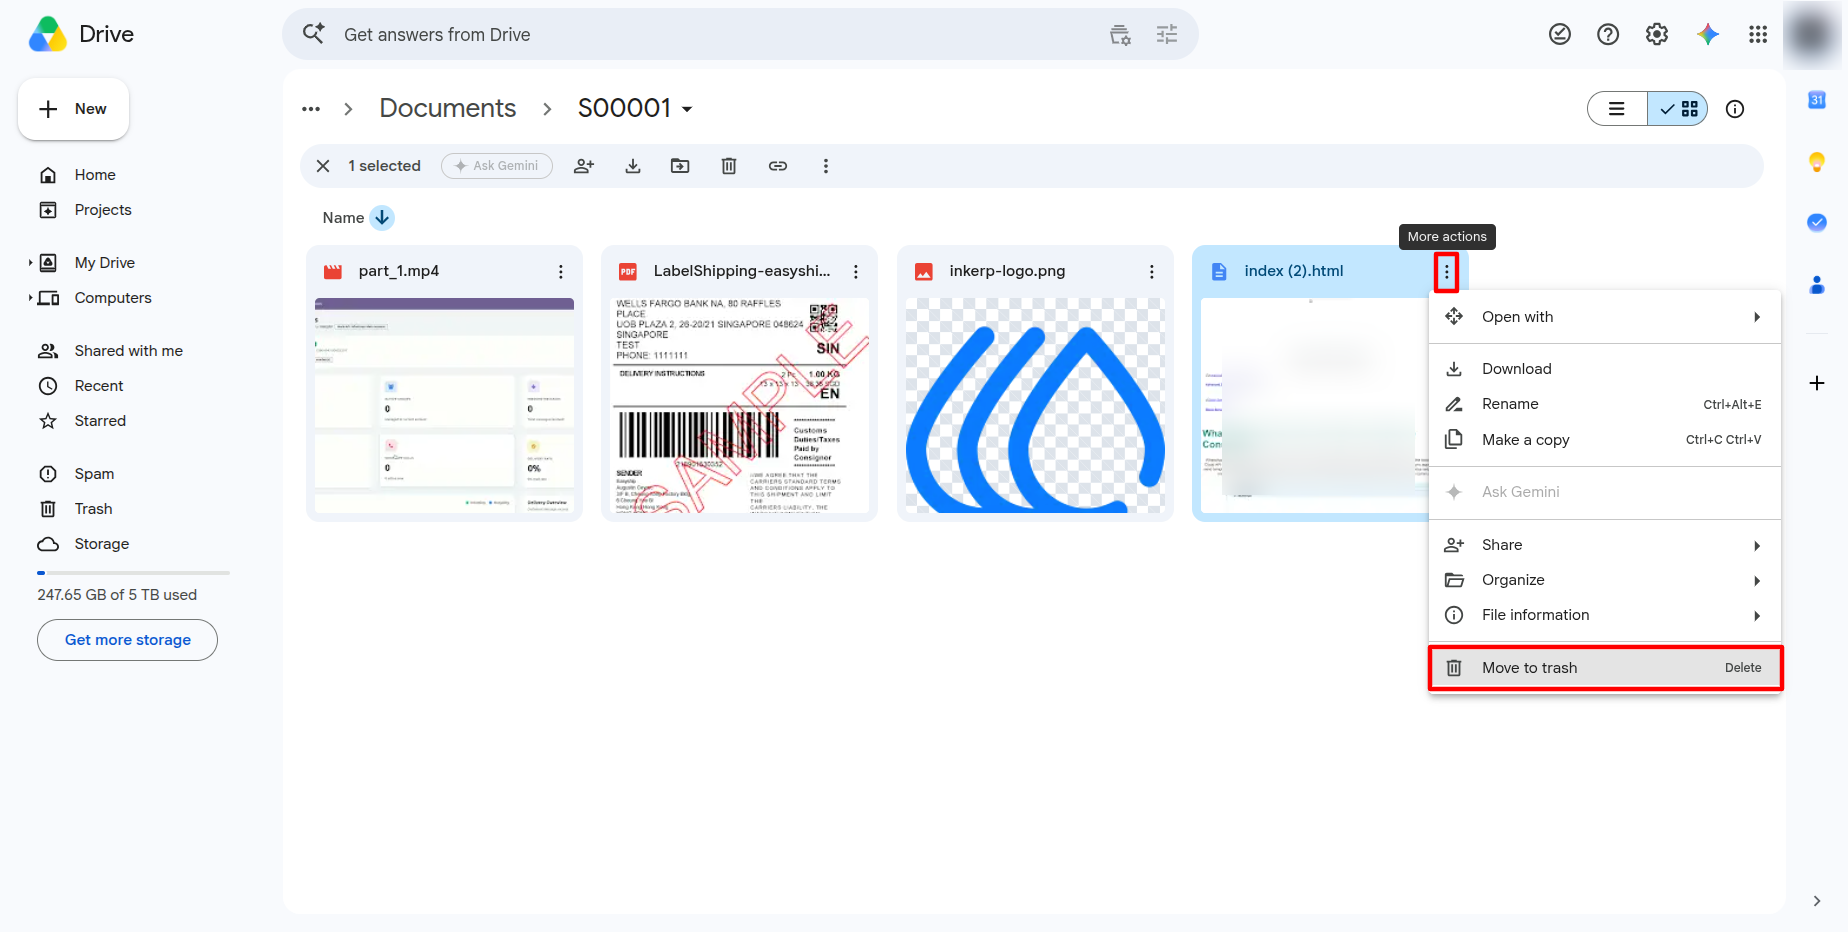
If a file is no longer needed, you can delete it directly from the Odoo File Manager using the "Trash" button on the file card. This action not only removes the file's reference within your database but also securely moves the actual document into your Google Drive's trash bin, ensuring both systems remain perfectly clean and aligned.
21.) Syncing Deletions Made in Google Drive
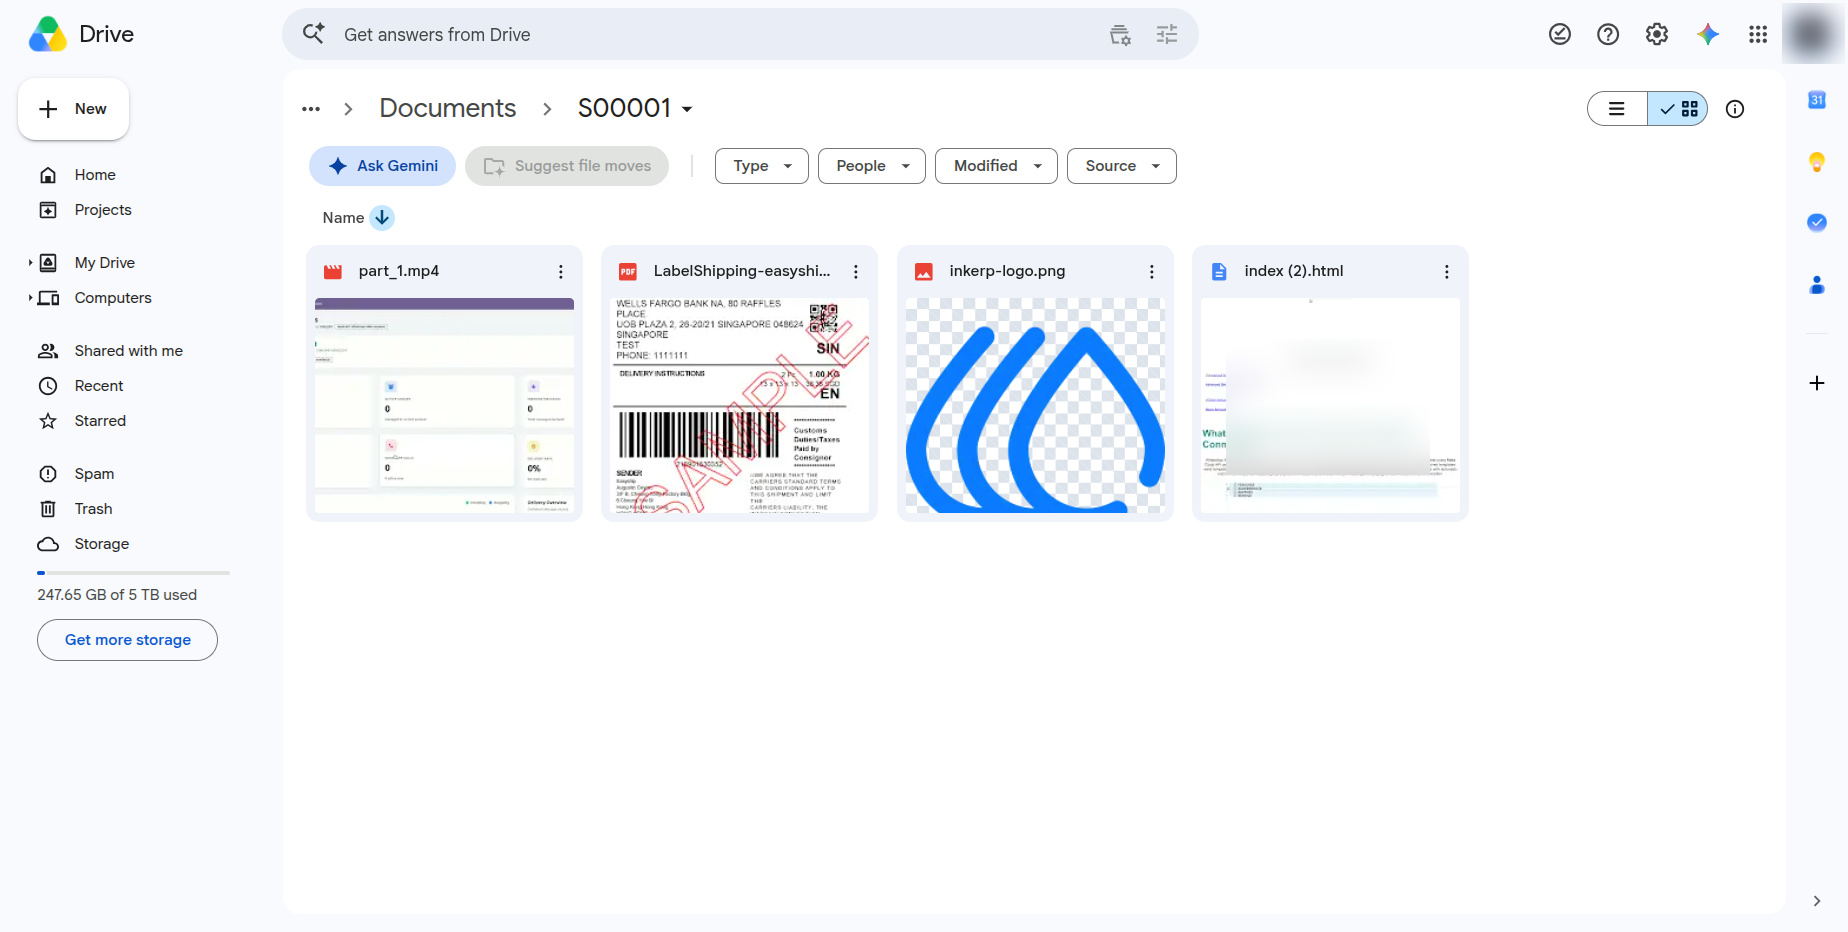
When a user deletes a file directly within the Google Drive interface (moving it to the trash), the system's intelligent backward sync detects this change. The deleted file will be automatically unlinked and removed from your Odoo database during the next sync cycle, maintaining strict data consistency across both platforms.
22.) Automatic Cleanup of Missing Files Missing Cloud Files
If a file is permanently deleted or moved outside the synced folder structure directly within Google Drive, the system's background sync automatically detects the change. Instead of cluttering your database with broken links or "missing" flags, Odoo will automatically delete and unlink the corresponding attachment record. This smart auto-delete functionality ensures your database stays perfectly clean and exactly matches your actual cloud storage, saving administrators from having to manually clean up dead files.
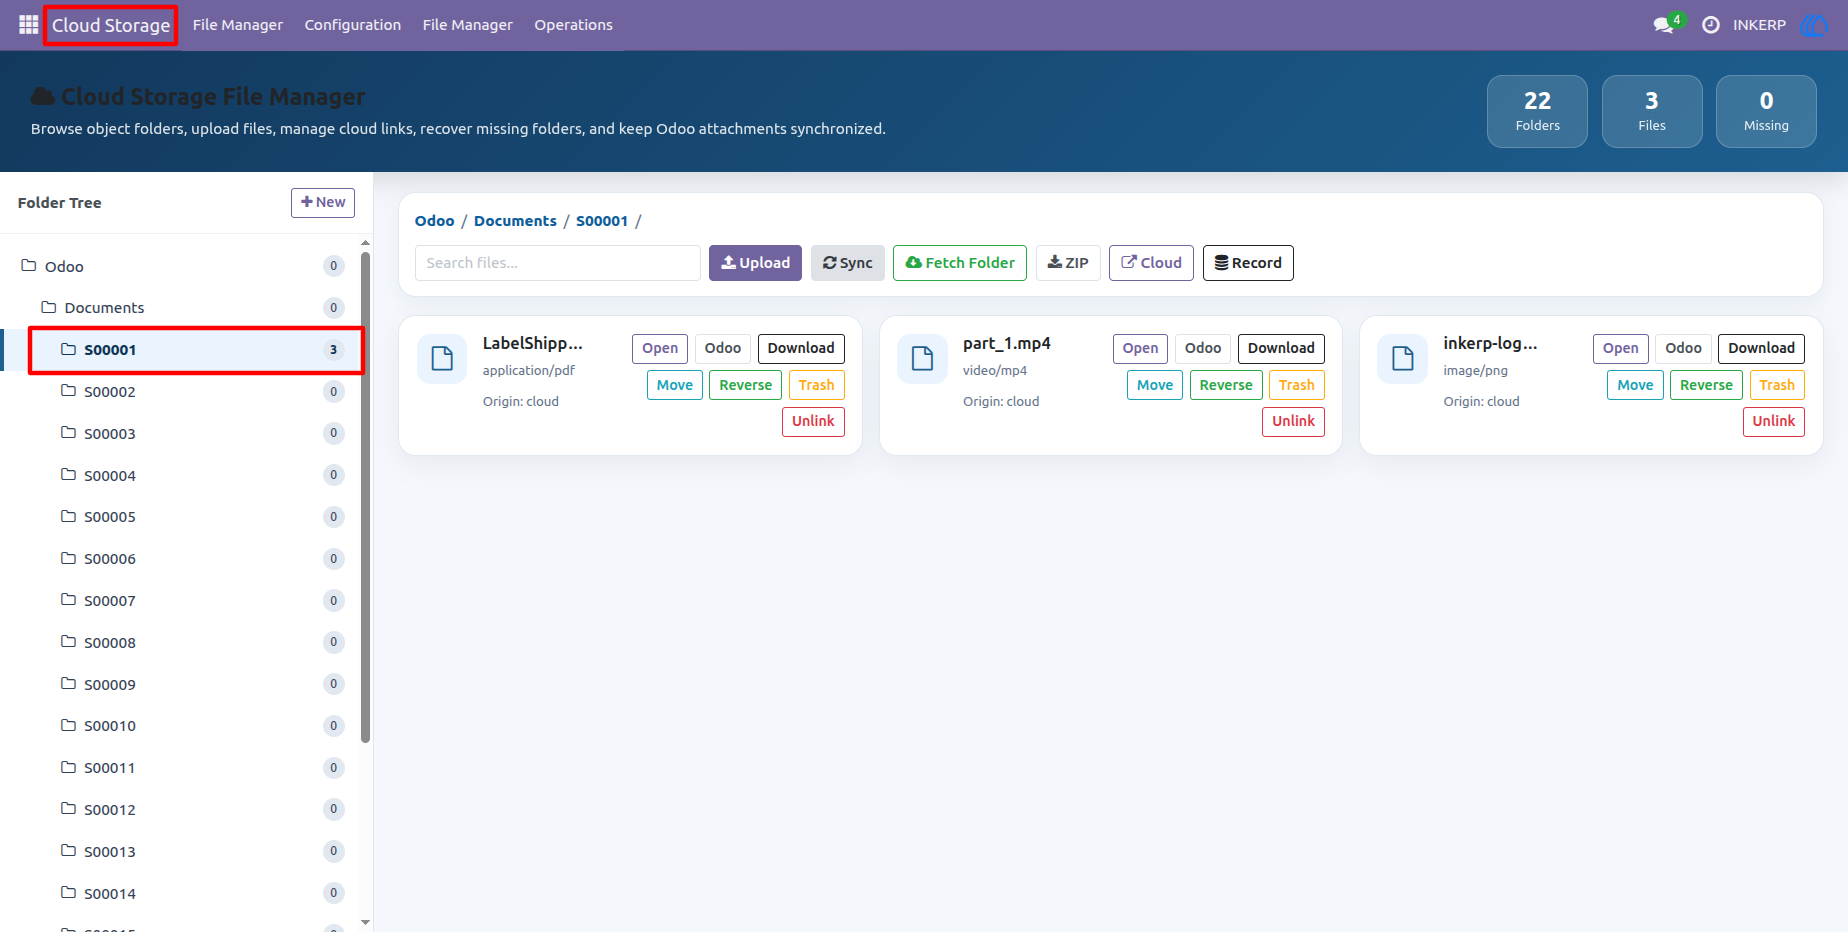
23.) Initiate Folder Fetching
Easily bring pre-existing Google Drive directories into your database by selecting the "Fetch Cloud Folder" option from the Operations menu. This tool allows you to integrate external cloud folders into your current workflow without having to recreate them manually.
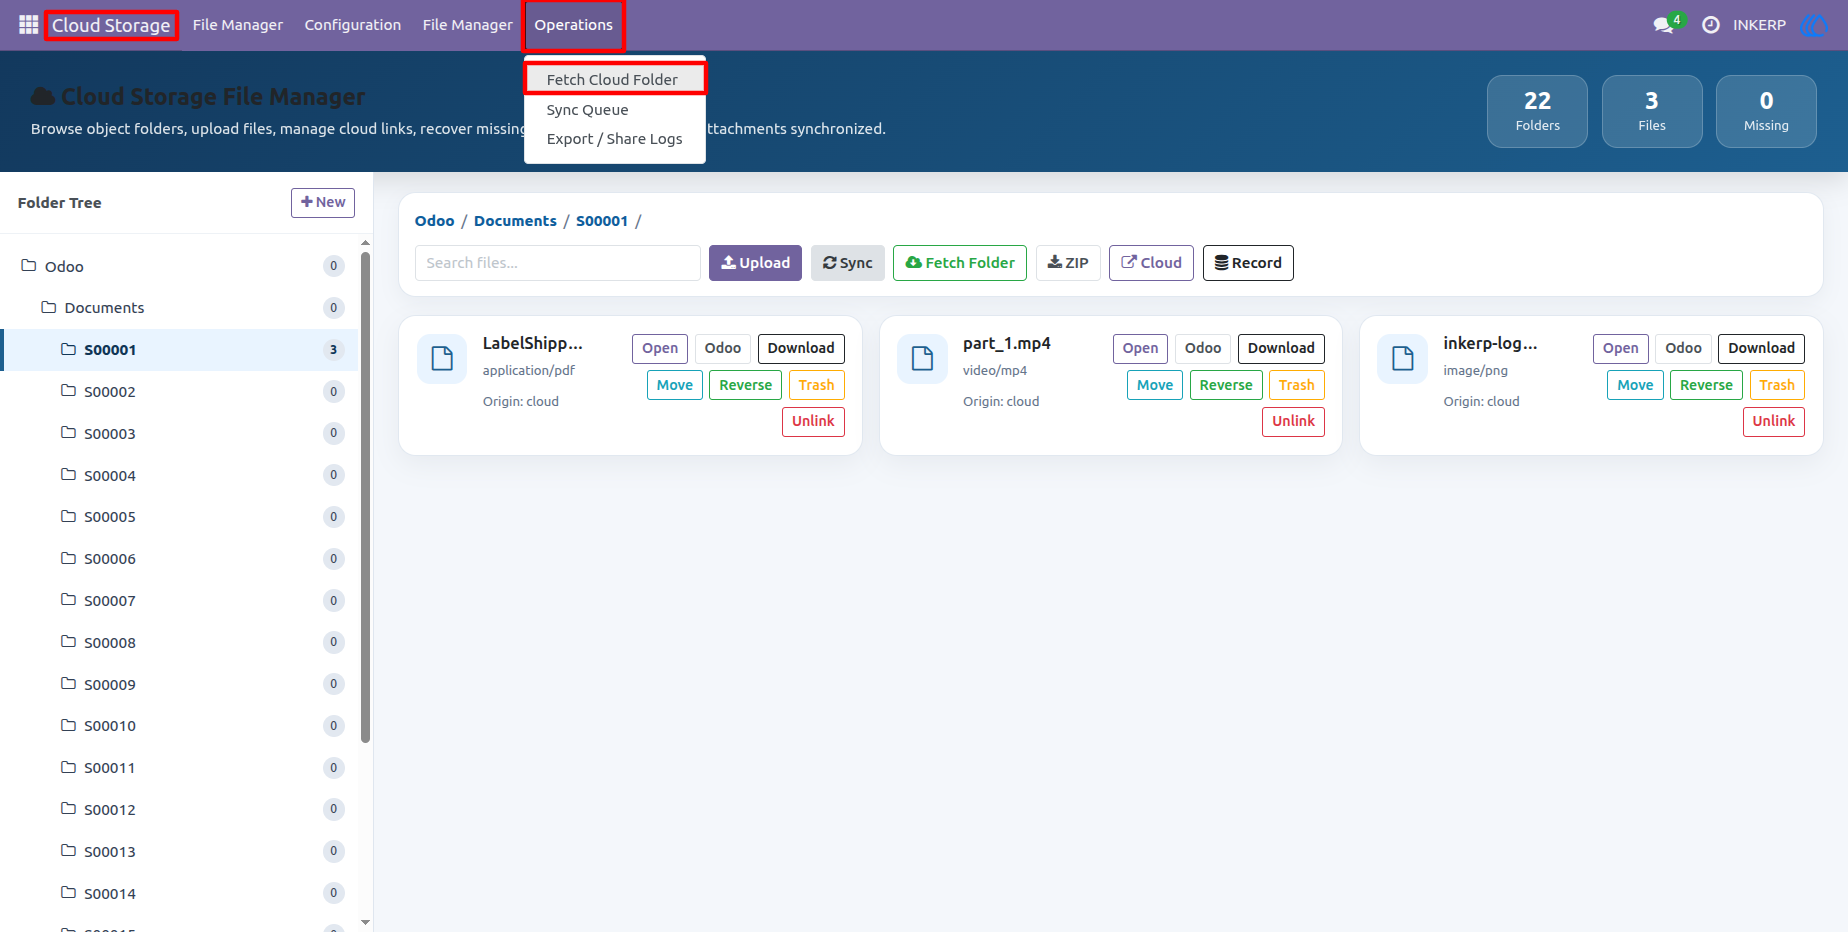
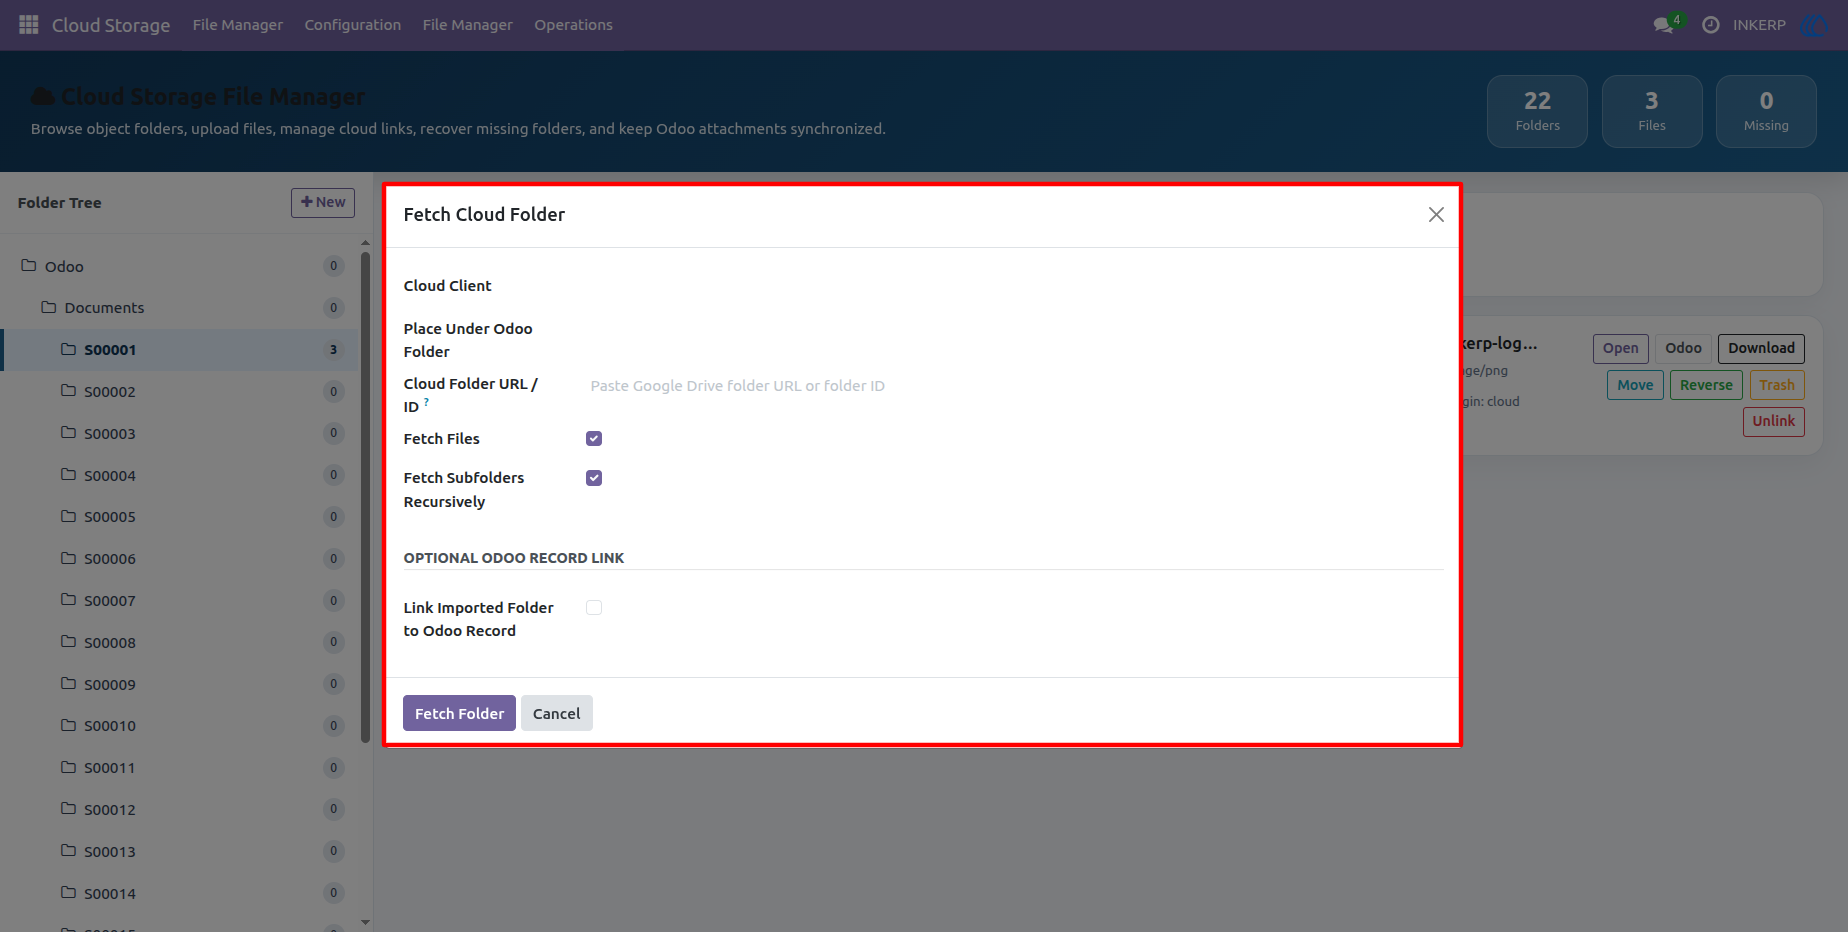
24.) Configure the Fetch Wizard
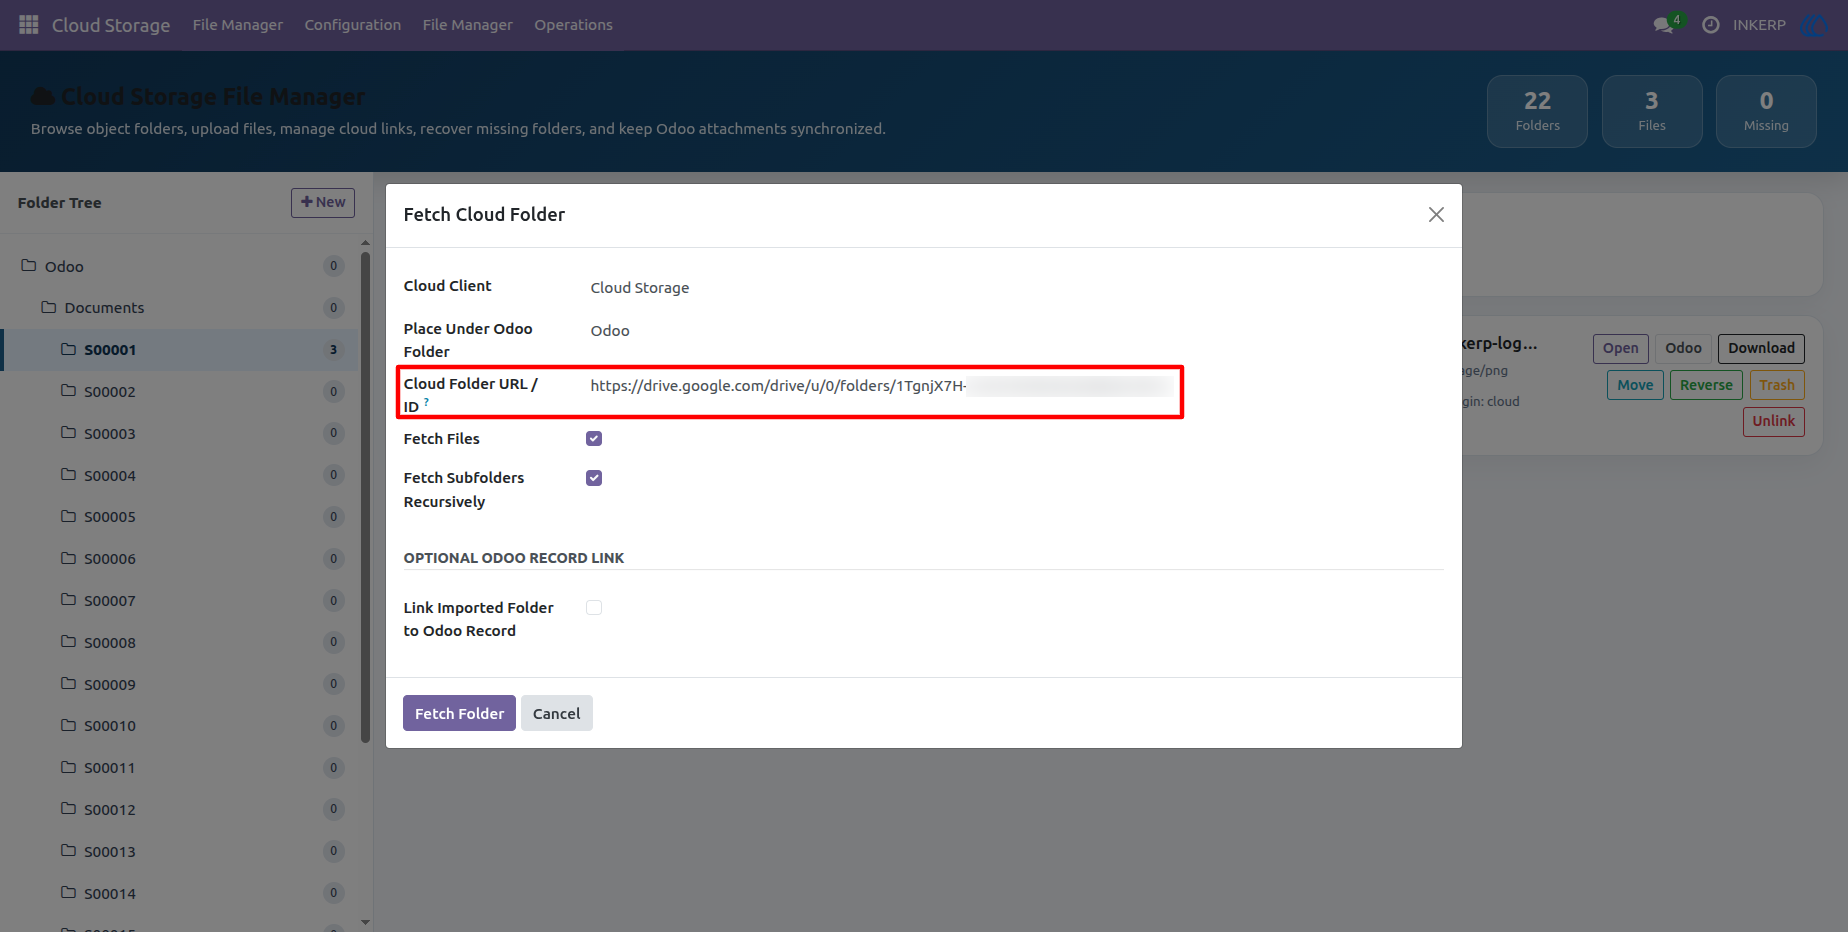
A dedicated wizard guides you through the import process. You can specify whether to bring in just the folder itself, its files, or its entire hierarchy of subfolders recursively. You also have the option to link this imported cloud directory directly to a specific record in your database.
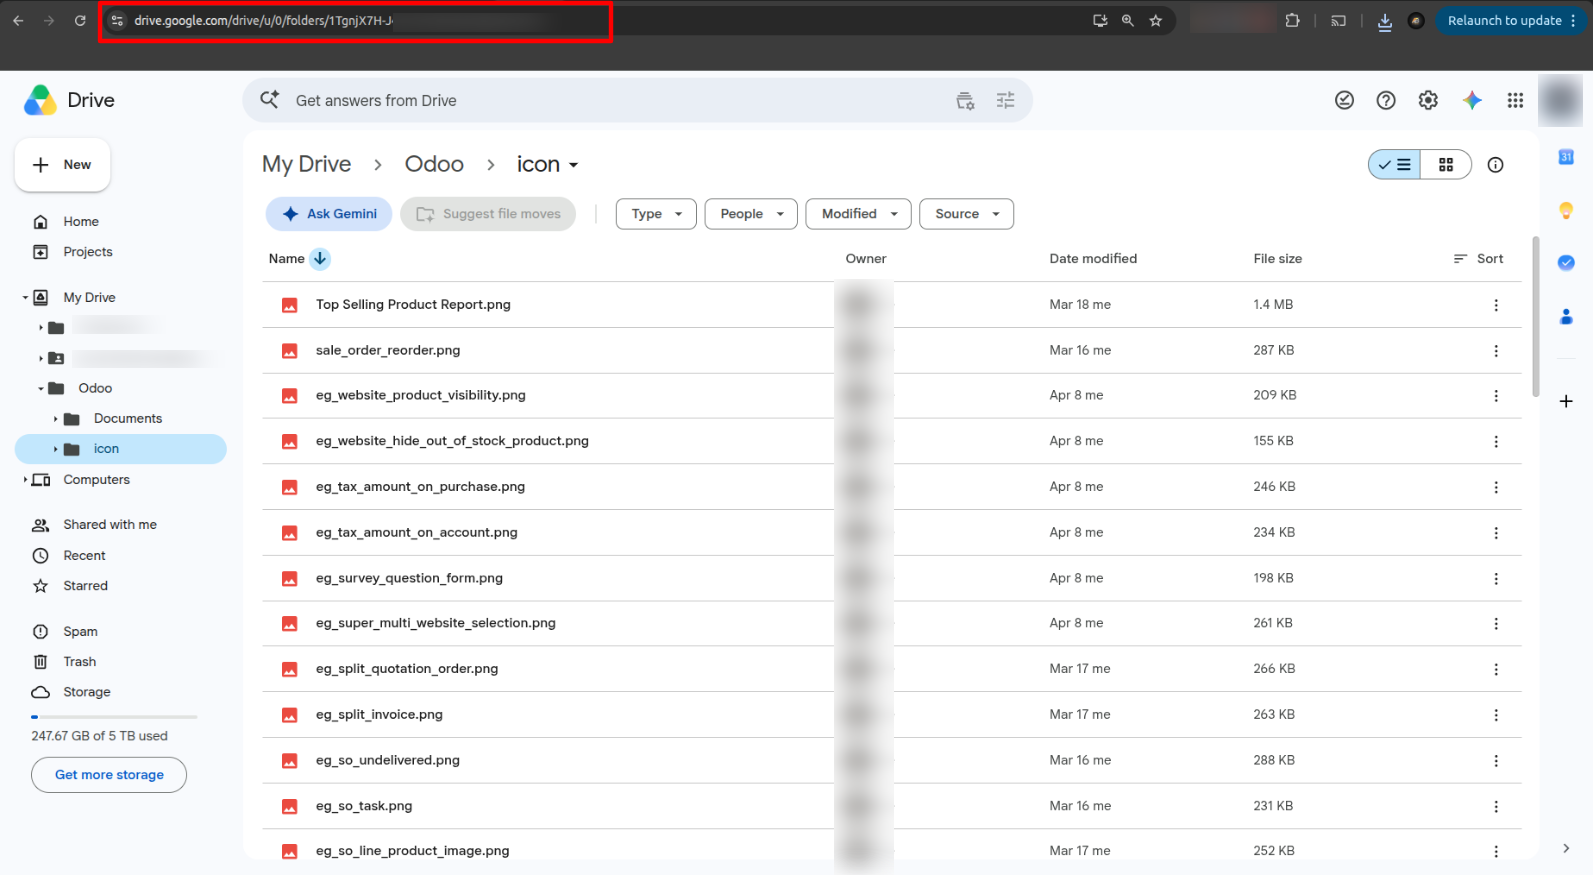
25.) Locate the Google Drive Folder URL
To link an existing folder, simply open it within your Google Drive web interface. Copy the full URL directly from your browser's address bar this link contains the unique identifier the system needs to locate your files.
26.) Paste and Execute the Fetch
Paste your copied Google Drive URL into the designated field within the Odoo wizard. Once you click "Fetch Folder," the system securely connects to your cloud storage and begins indexing the directory structure and its contents in the background.
27.) Access Imported Folders Instantly
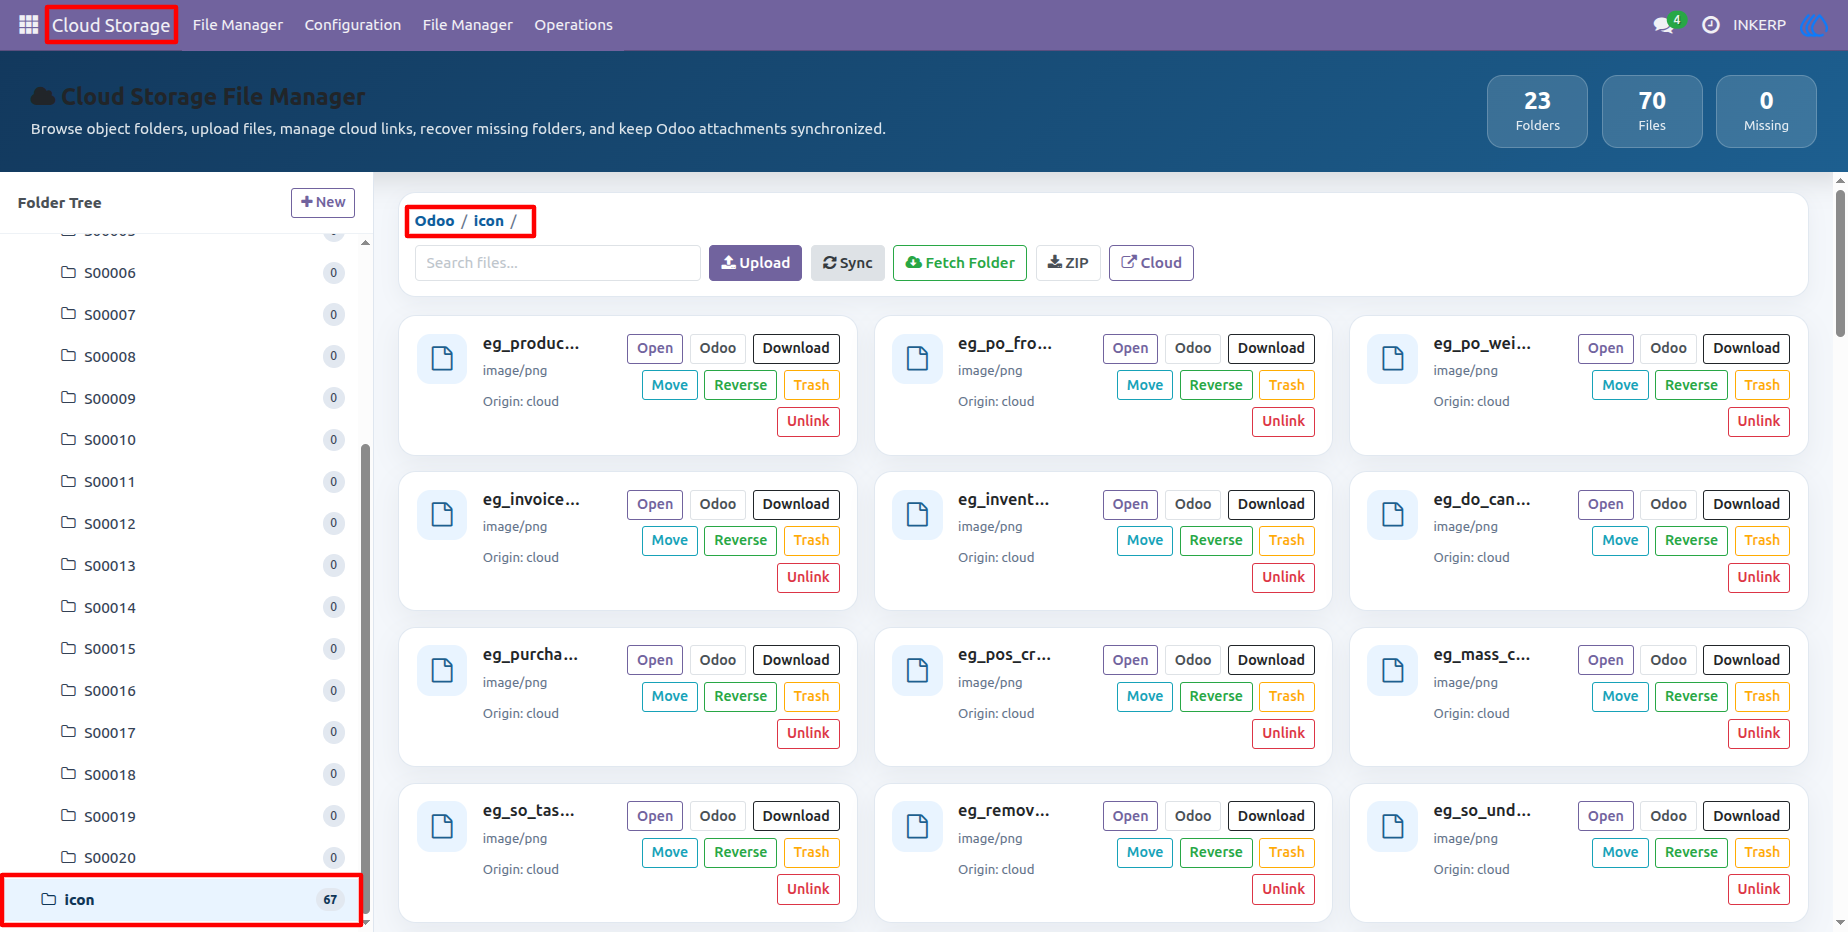
Once the fetch process is complete, the newly imported folder appears seamlessly within your Cloud File Manager's left-hand navigation tree. All imported files are instantly available as interactive cards, ready to be viewed, managed, or linked to your daily business records.
User Guide