

Our Most Suggested Products


Advance Inventory Counting
This module streamlines inventory counting by enabling multi-user collaboration, real-time barcode scanning, and structured workflows. It ensures accuracy with approval/rejection mechanisms, automatic re-sessions for discrepancies, and audit trails. The app is designed for warehouses needing efficient, transparent, and compliant stock verification.
 Features
 Screenshots
 Support
 Service
Features
Inventory Count Using Mobile Camera scanning
Users can scan product barcodes directly with their mobile device camera.Eliminates the need for handheld scanners or manual entry.Speeds up counting and reduces human error.
Warehouse/Location Wise Counting
Useful for large businesses with multiple sites.in specific warehouse and location Ensures targeted and organized stock verification.
Approval/Rjection workflow
After a user submits a Session, managers can approve or reject it.Rejected counts automatically trigger a re-session for re-checking.
Role-based access control (User, Manager, Admin)
User: Can view and execute assigned counting sessions with barcode scanning.
Manager: approves/rejects inventory session and count and create adjustments
Admin: Full control over planning, sessions, adjustments, and reporting.Prevents unauthorized changes and ensures clear responsibilities.
Automatic Inventory Adjustment
Once the count is approved, the manager creates an inventory adjustment, and the system automatically updates the stock level when the inventory admin validates it.
Lot and serial number tracking for traced products
Also supports products that require lot or serial number tracking (e.g., pharmaceuticals, electronics). Ensures compliance with industry regulations. Provides full traceability of items.
Progress tracking
Visual indicators (like kanban stages) show session status.Provides clear visibility into ongoing operations.
Responsive UI(Session)
The session interface is responsive and works smoothly across devices (desktop, tablet, mobile).Makes it easy for users to perform counts anywhere.
Re-Session Automation
If a session is rejected, the system automatically creates a new re-session if type is multi session.Ensures discrepancies are re-checked without manual setup.Saves time and enforces accuracy.
Reporting
You can generate inventory count and inventory adjustment report based on date, location and approvers.
Screenshot
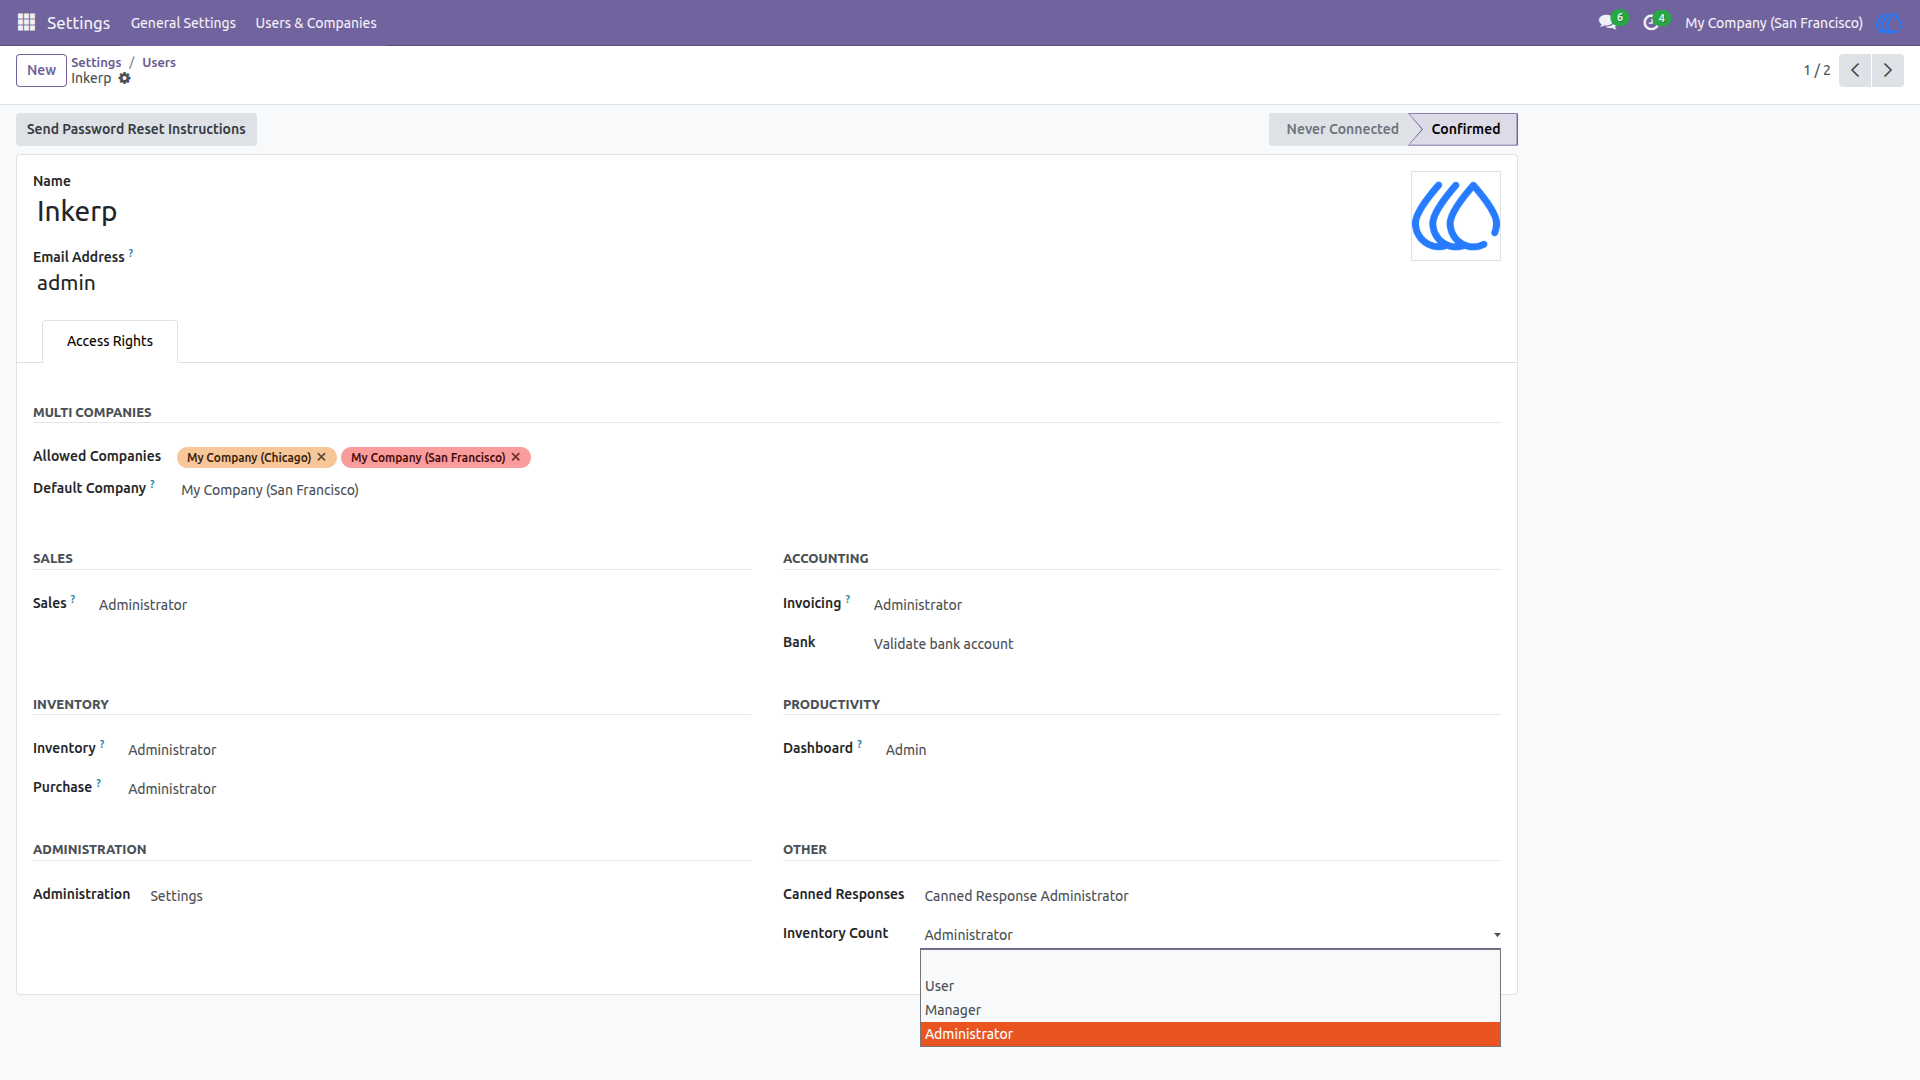
1) Access Right Configuration
User: Can view and execute assigned counting sessions with barcode scanning.
Manager: approves/rejects inventory session and count and create adjustments.
Admin: Full control over planning, sessions, adjustments, and reporting.
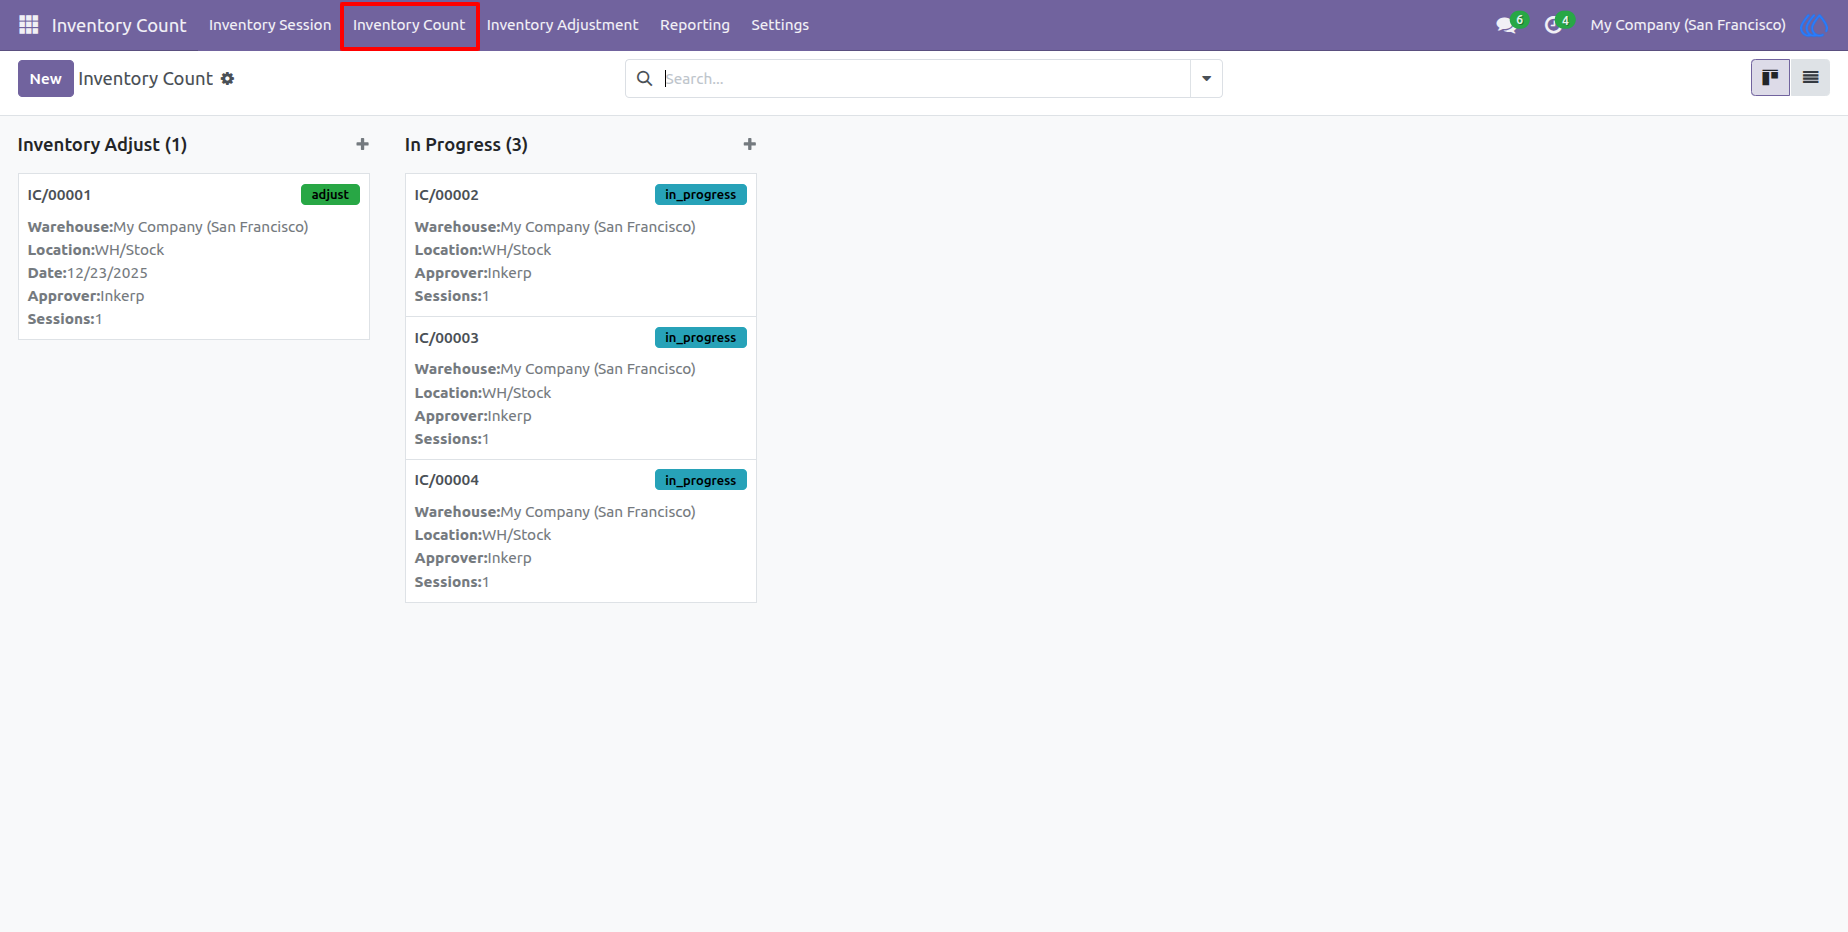
2) Inventory Count Menu
Here You can see Inventory Counts with group by status
Navigation : Inventory Count › inventory Count
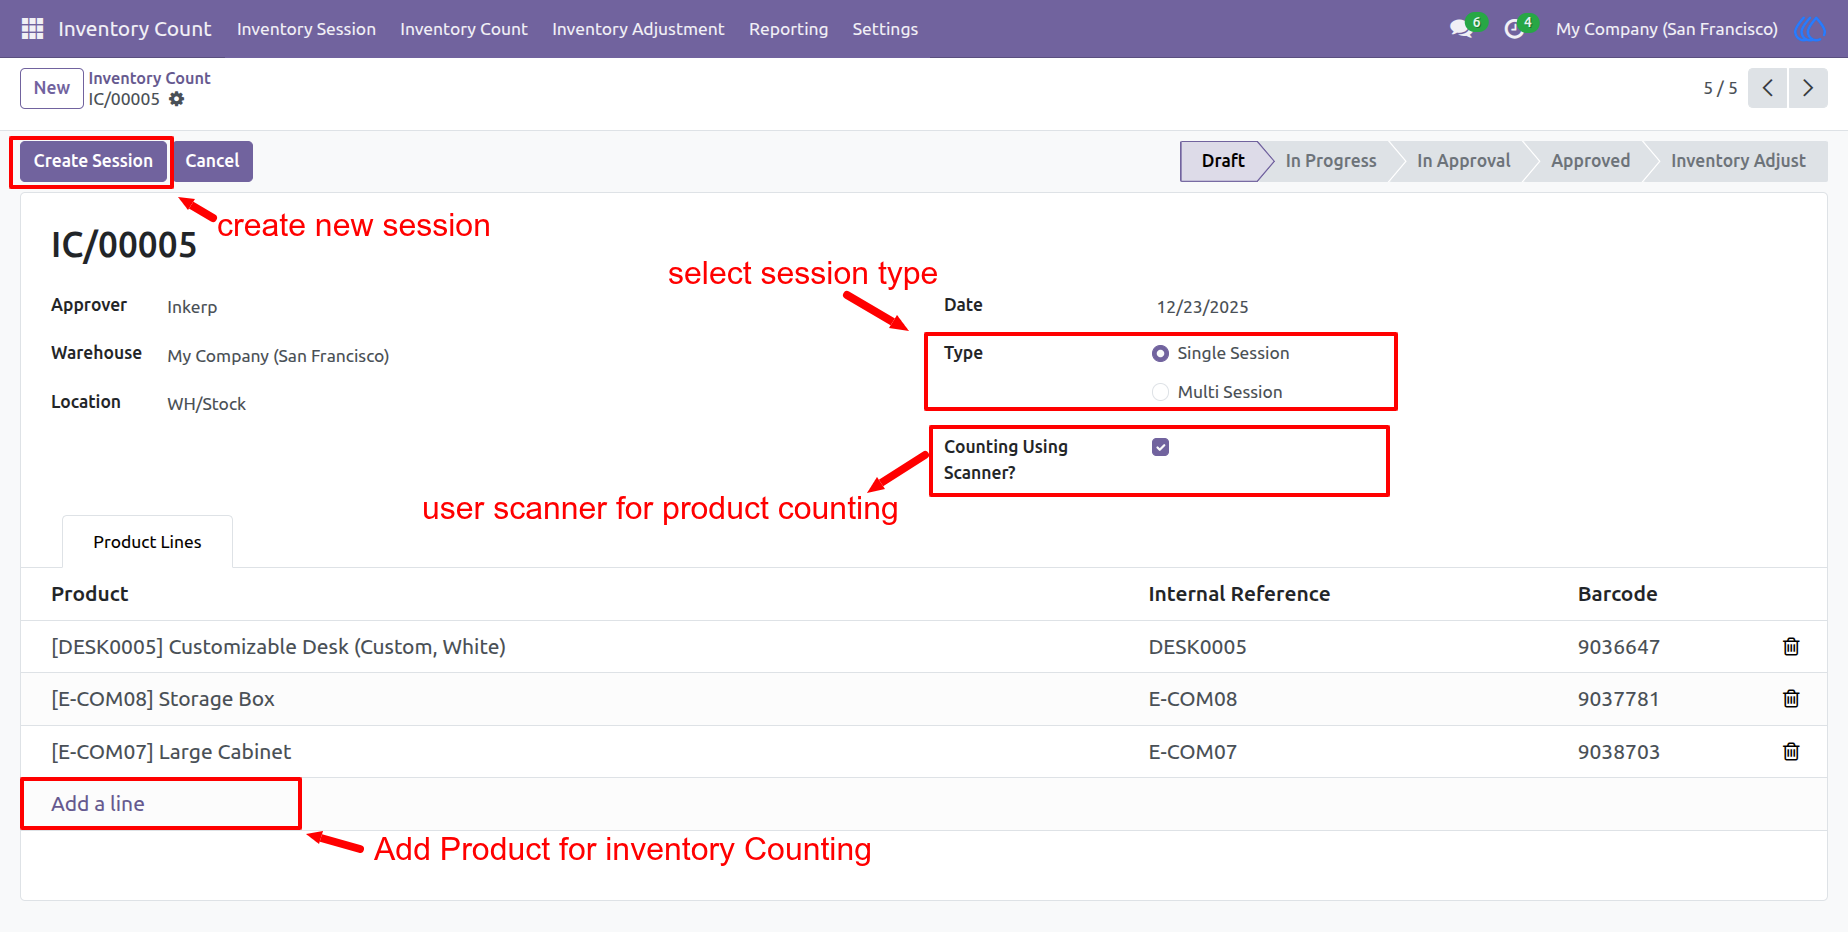
3) Create Inventory Count
Create a new inventory count record.
-Select a specific warehouse to count.
-Select a specific location to count.
-Select the products to count.
-Select the type to create the session (single or multiple), if youselected single you can only create one session for the selected product stock count.
-Enable "Count using scanner" if you want to use a barcode -scanner in the count-select a specific approver for approve/reject sessions
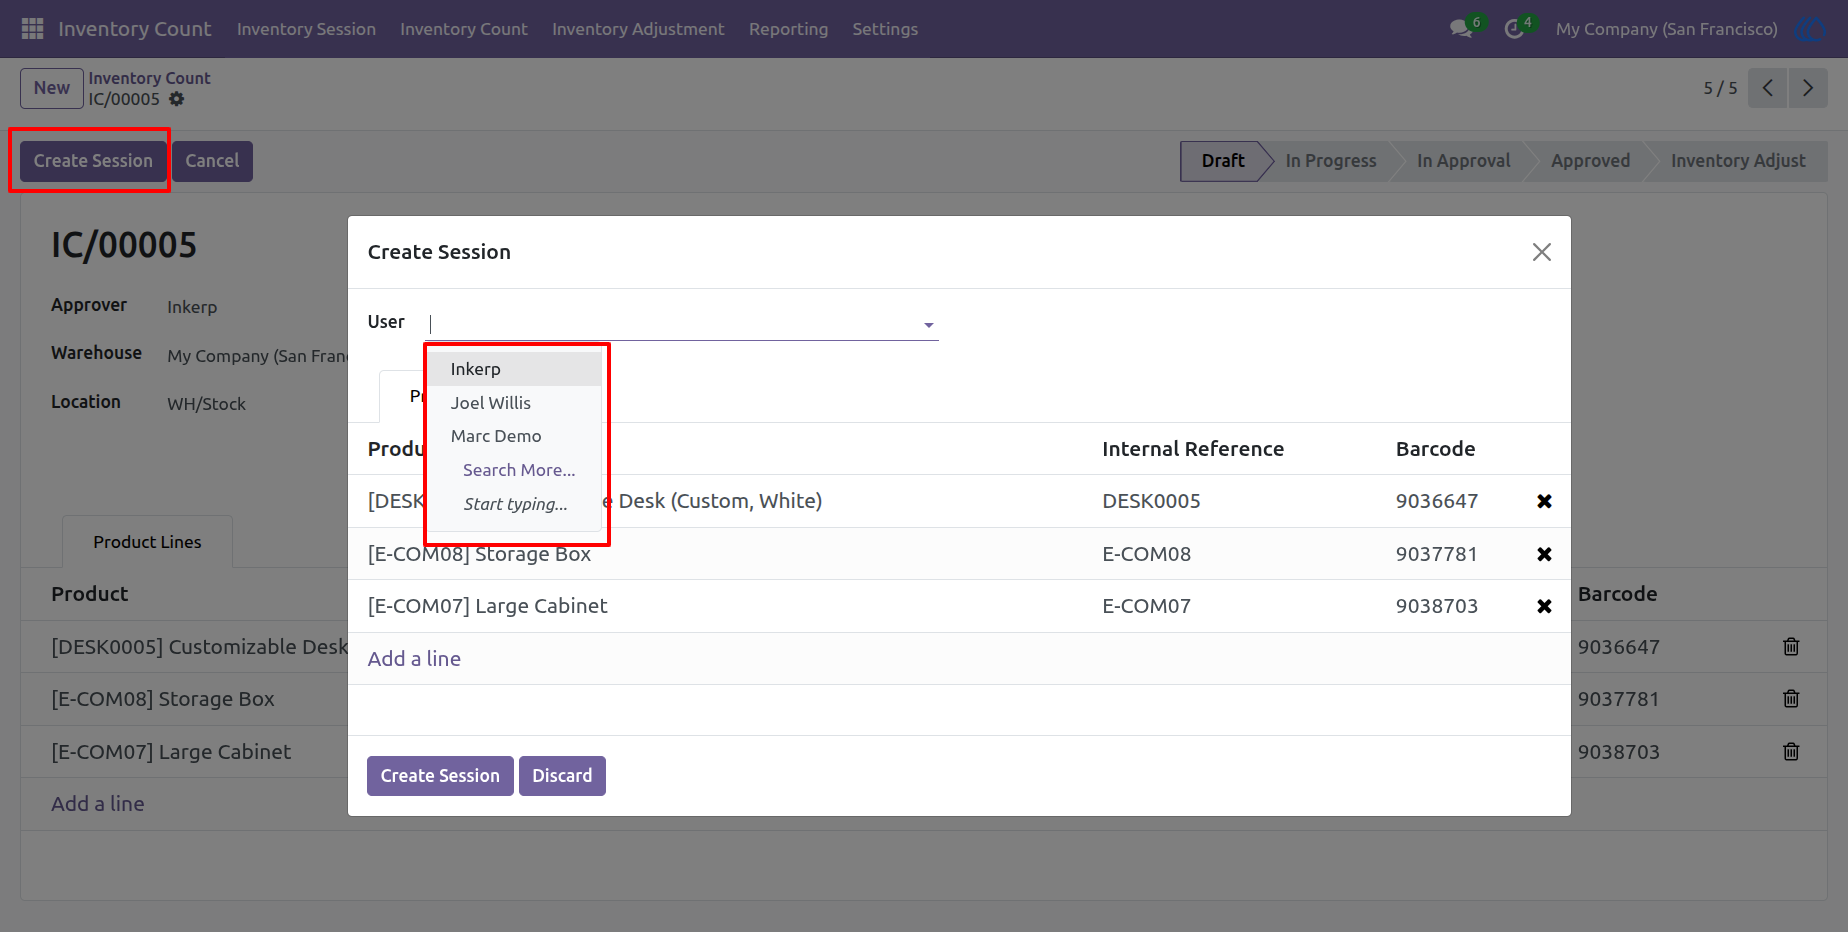
4)Creating Counting Sessions
Click on the "Create Session Button" to create a session for inventory counting, after clicking this button a wizard will open, in this wizard select the products and select the user to count this session.
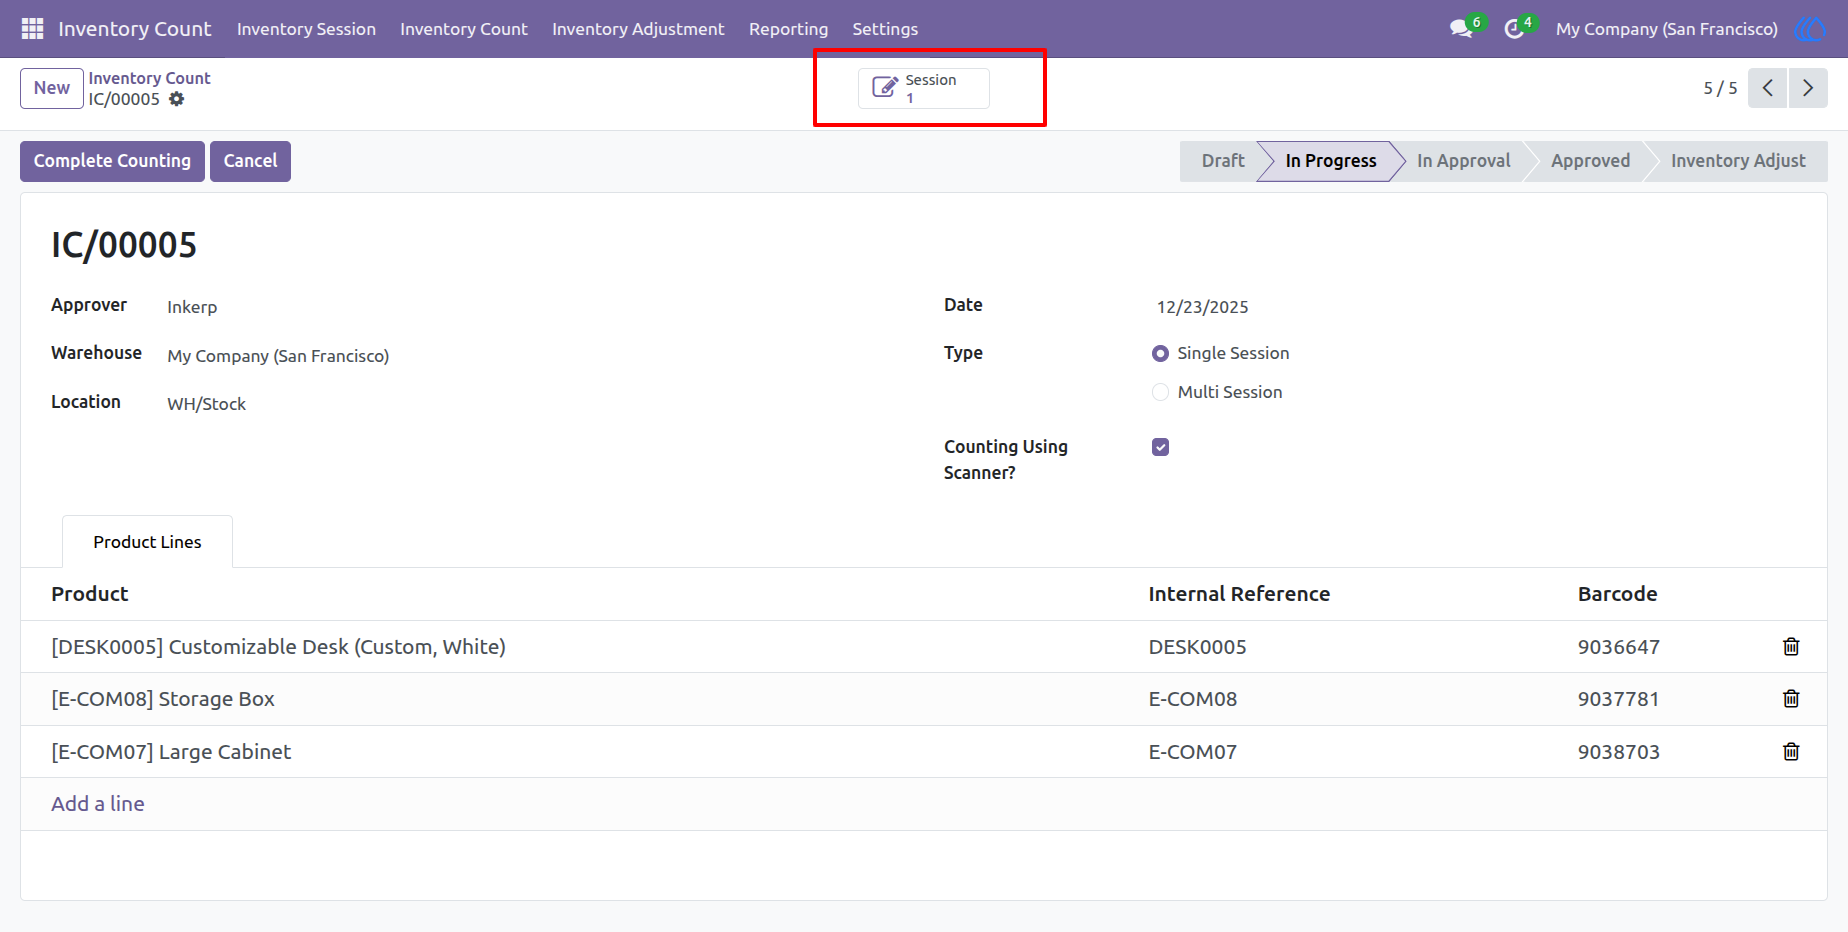
5)Created Session
Here you can See Created Session
6) Session User Login
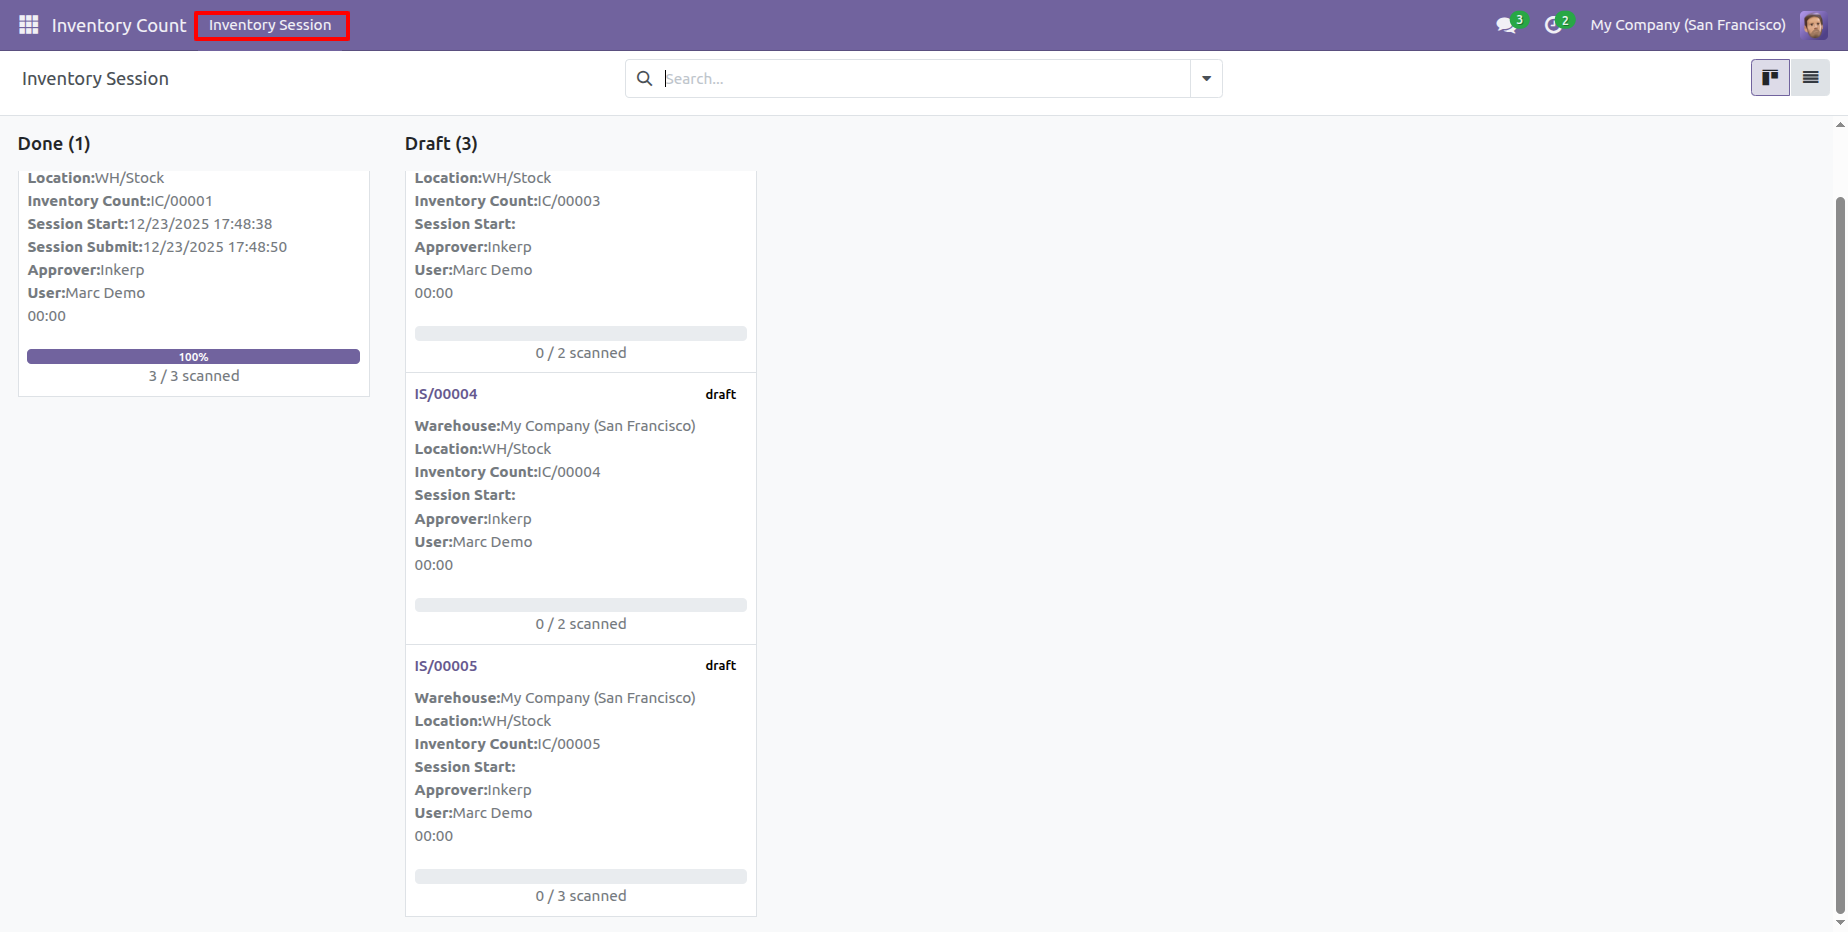
Here you can see all the sessions assigned to the logged-in user.
Navigation : Inventory Count › inventory Session
7) Session View for User
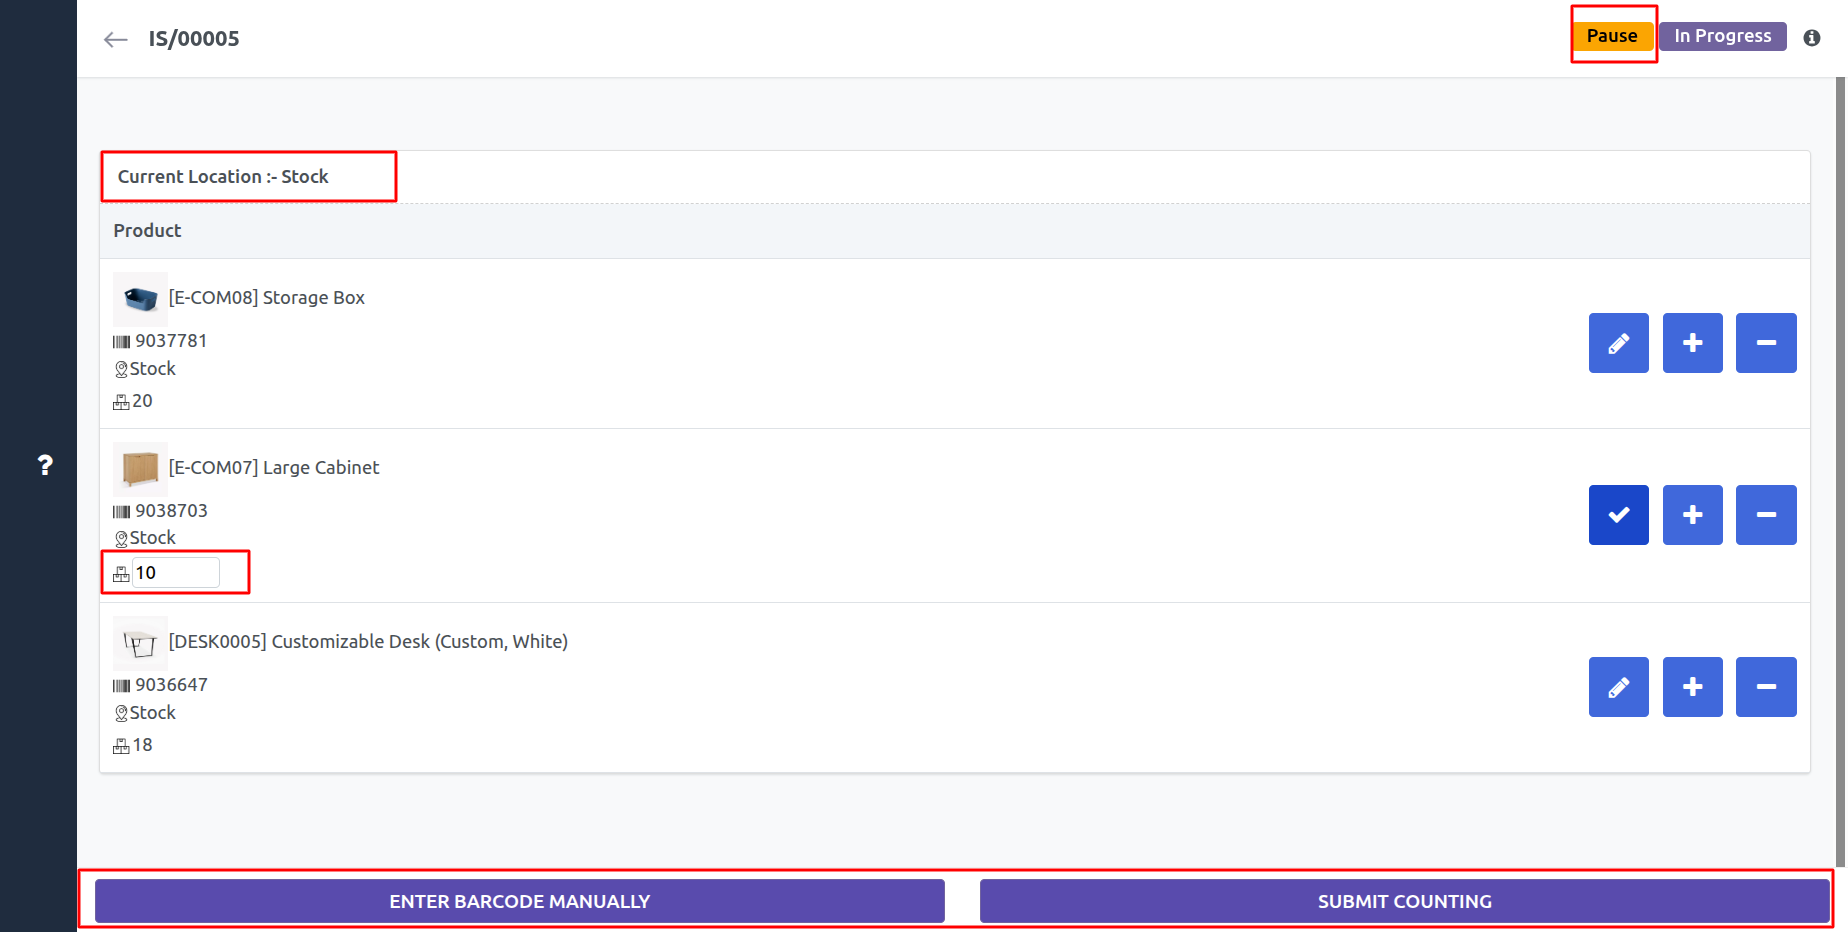
Here, the user can start, pause, and submit session counting. Quantities can be manually edited using plus or minus adjustments. The interface also displays product images, barcodes, locations, and lot/serial numbers for easy reference.
When using the barcode scanner:-
To start counting, first scan the barcode of the location you want to count the stock in. Then scan the product barcode or its lot/serial number
When moving to the next location for a stock count, first scan the location barcode. Then scan the product barcode or lot/serial number. If the scanned product matches an existing line for that location, its quantity will automatically be incremented by one.
Users can manually enter a barcode to increase the line quantity or change the location using the "Enter Barcode Manually" button.
8) Scan Barcode Using Camera
Inventory Counting Using Camera Scanning
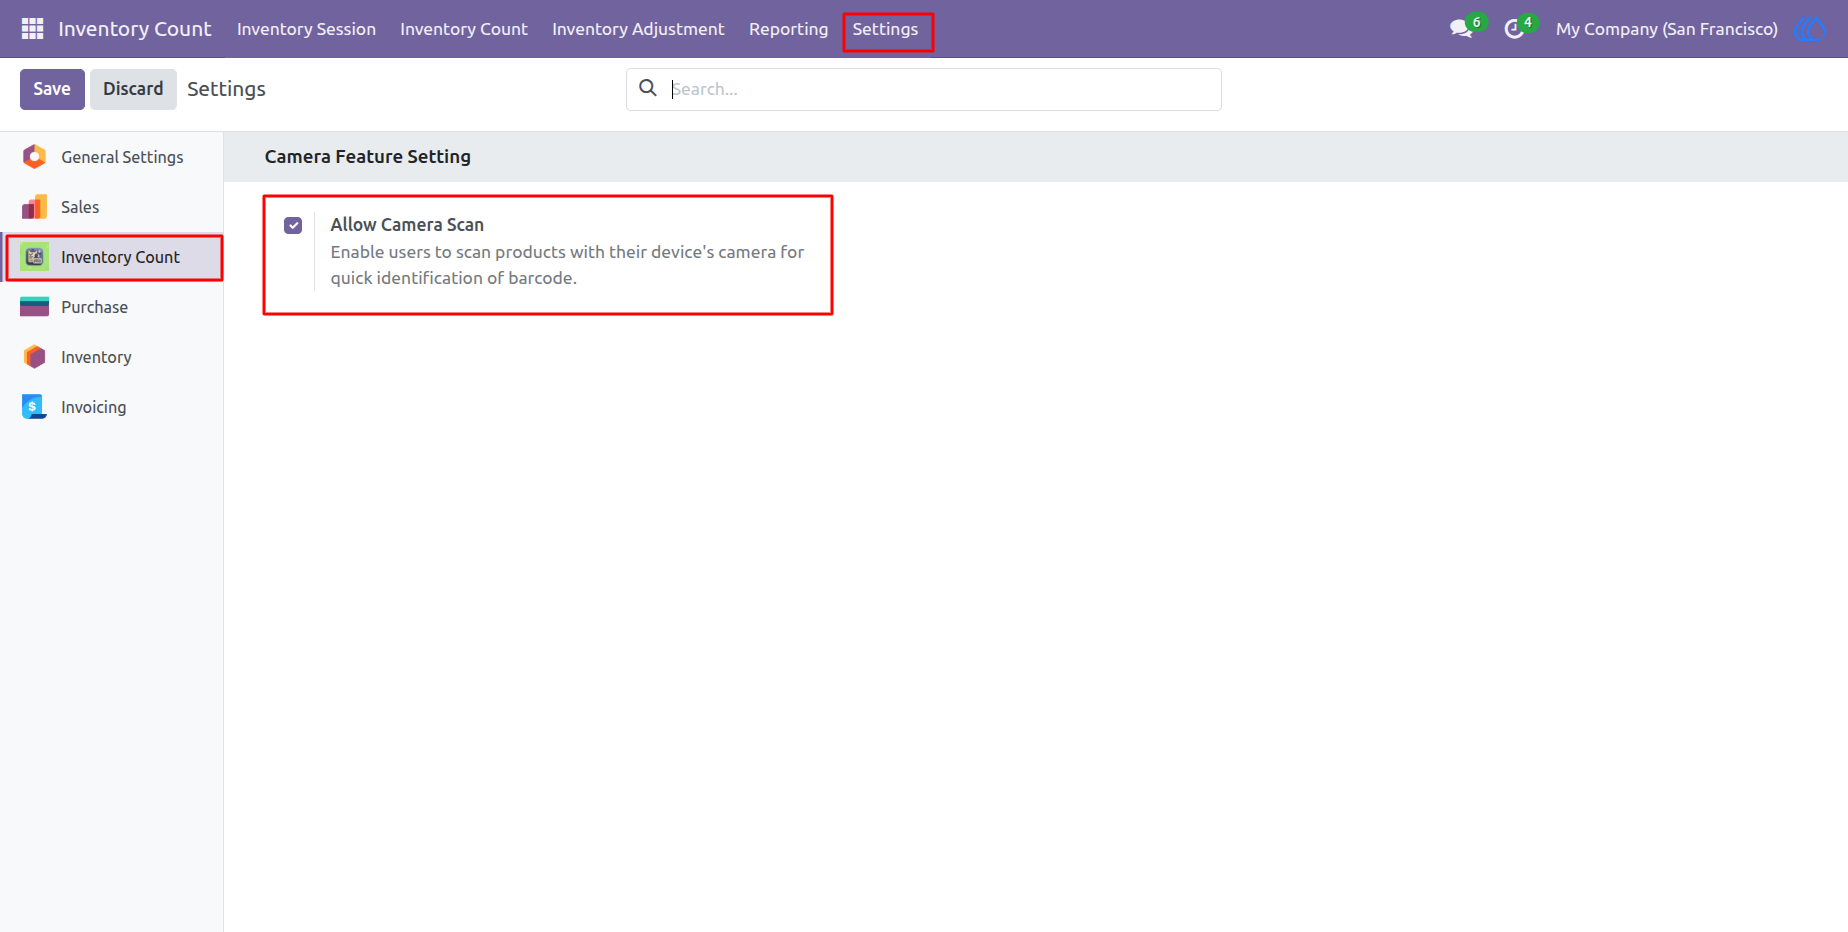
Note:- For Camera Scanning HTTPS is Required.
enable"Allow Camera Scan" for inventory counting using camera scanning.
Navigation : Inventory Count › Settings › Inventoy Count
9) Start Camera Desktop
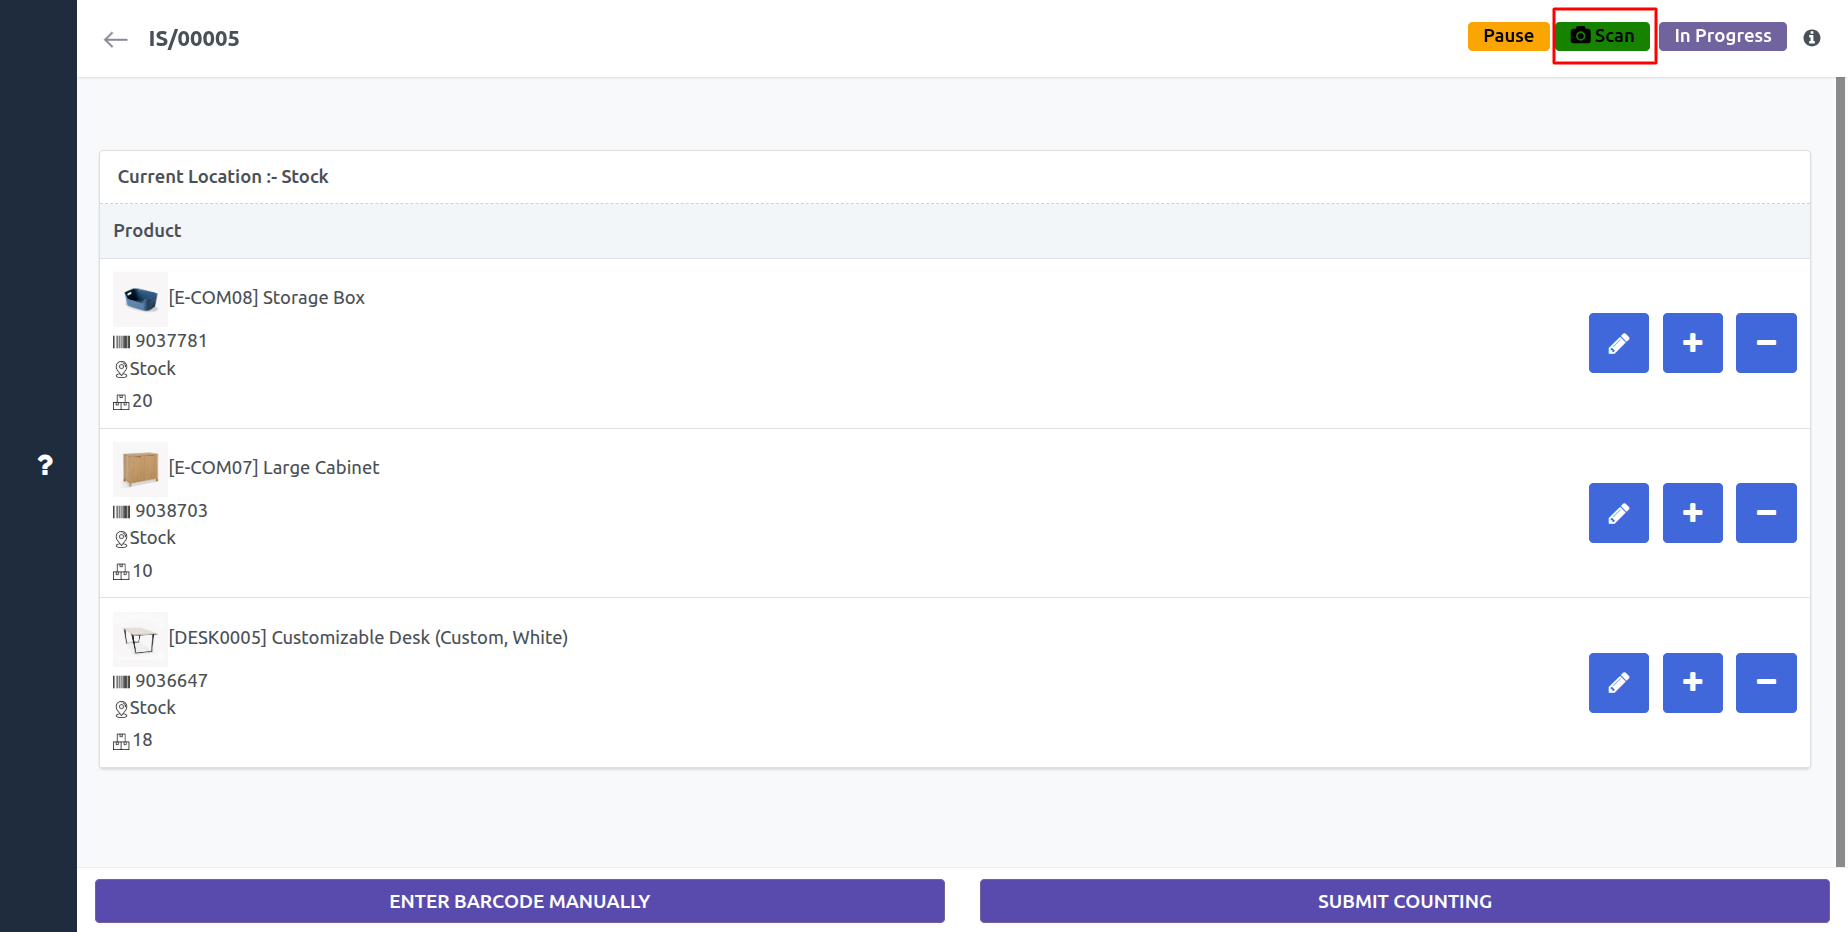
To open the camera, click the "Start" button.
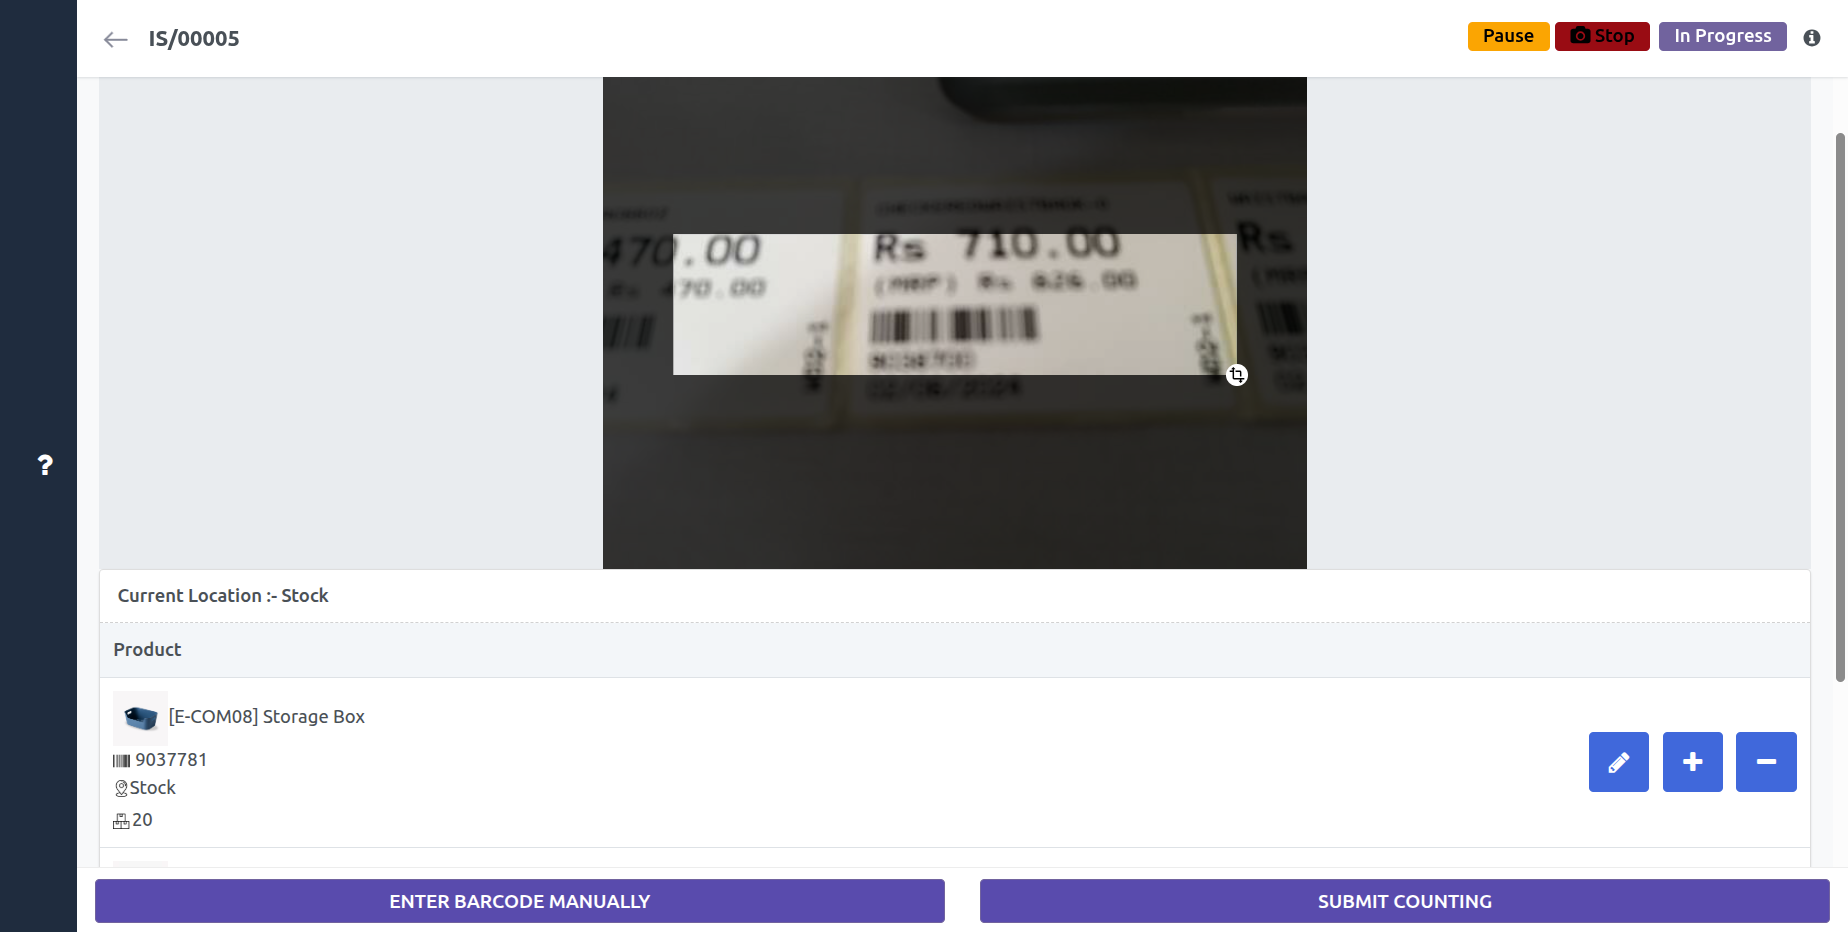
10) Scan Barode desktop
Here you can see camera section. in Desktop view.After all process submit session count using "submit counting" button.
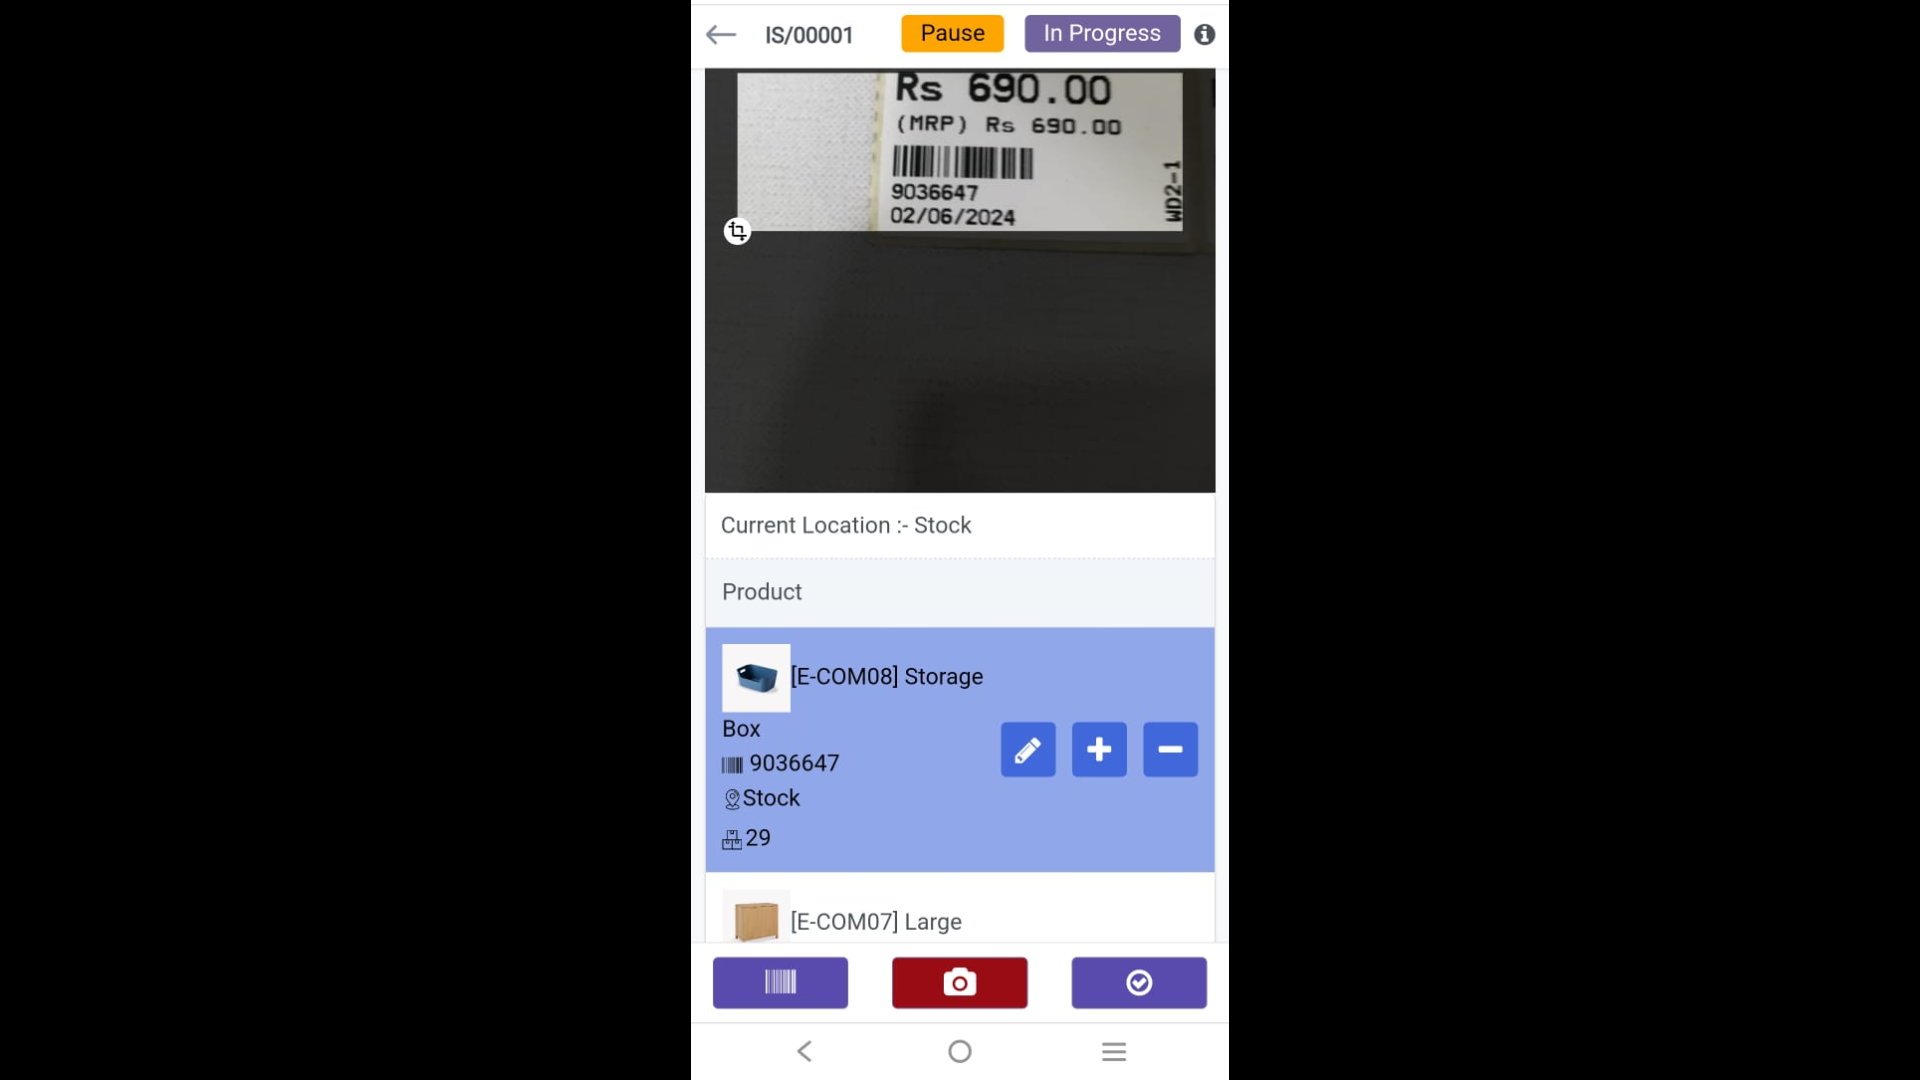
11) Session counting in mobile view
Here you can see camera section. in mobile view.After all process submit session count using "submit counting" button.
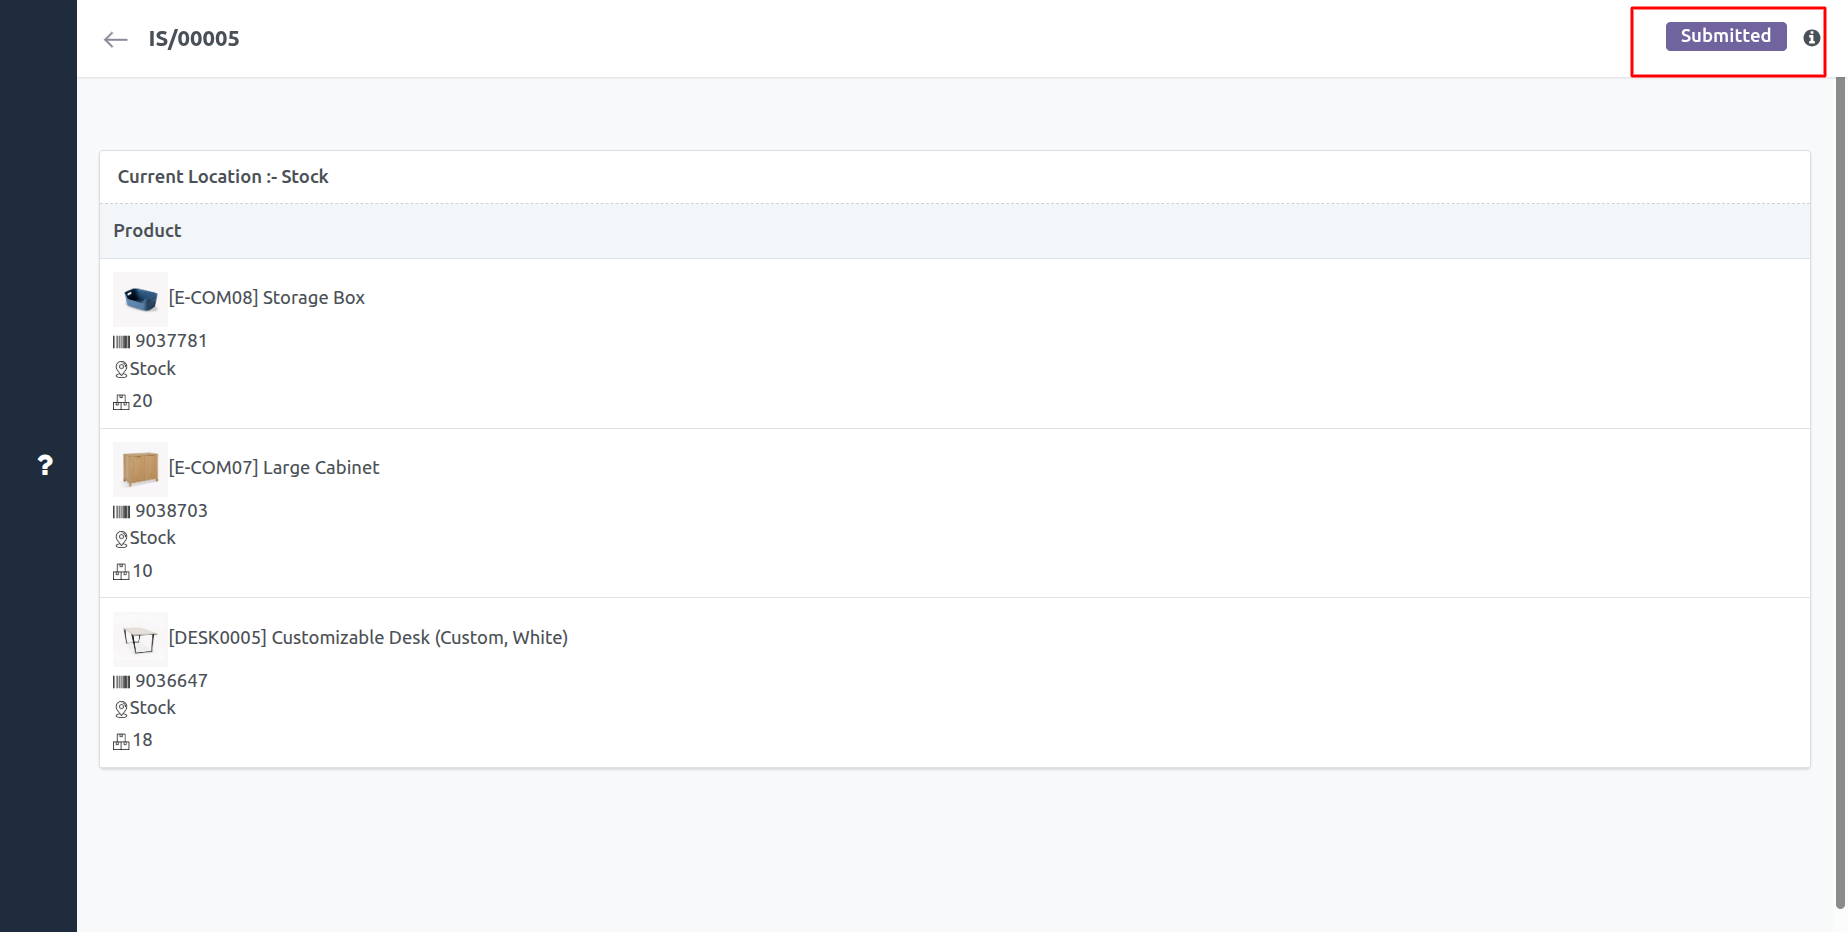
12) Submitted Session(User)
After a session is submitted, session user not editable current session.
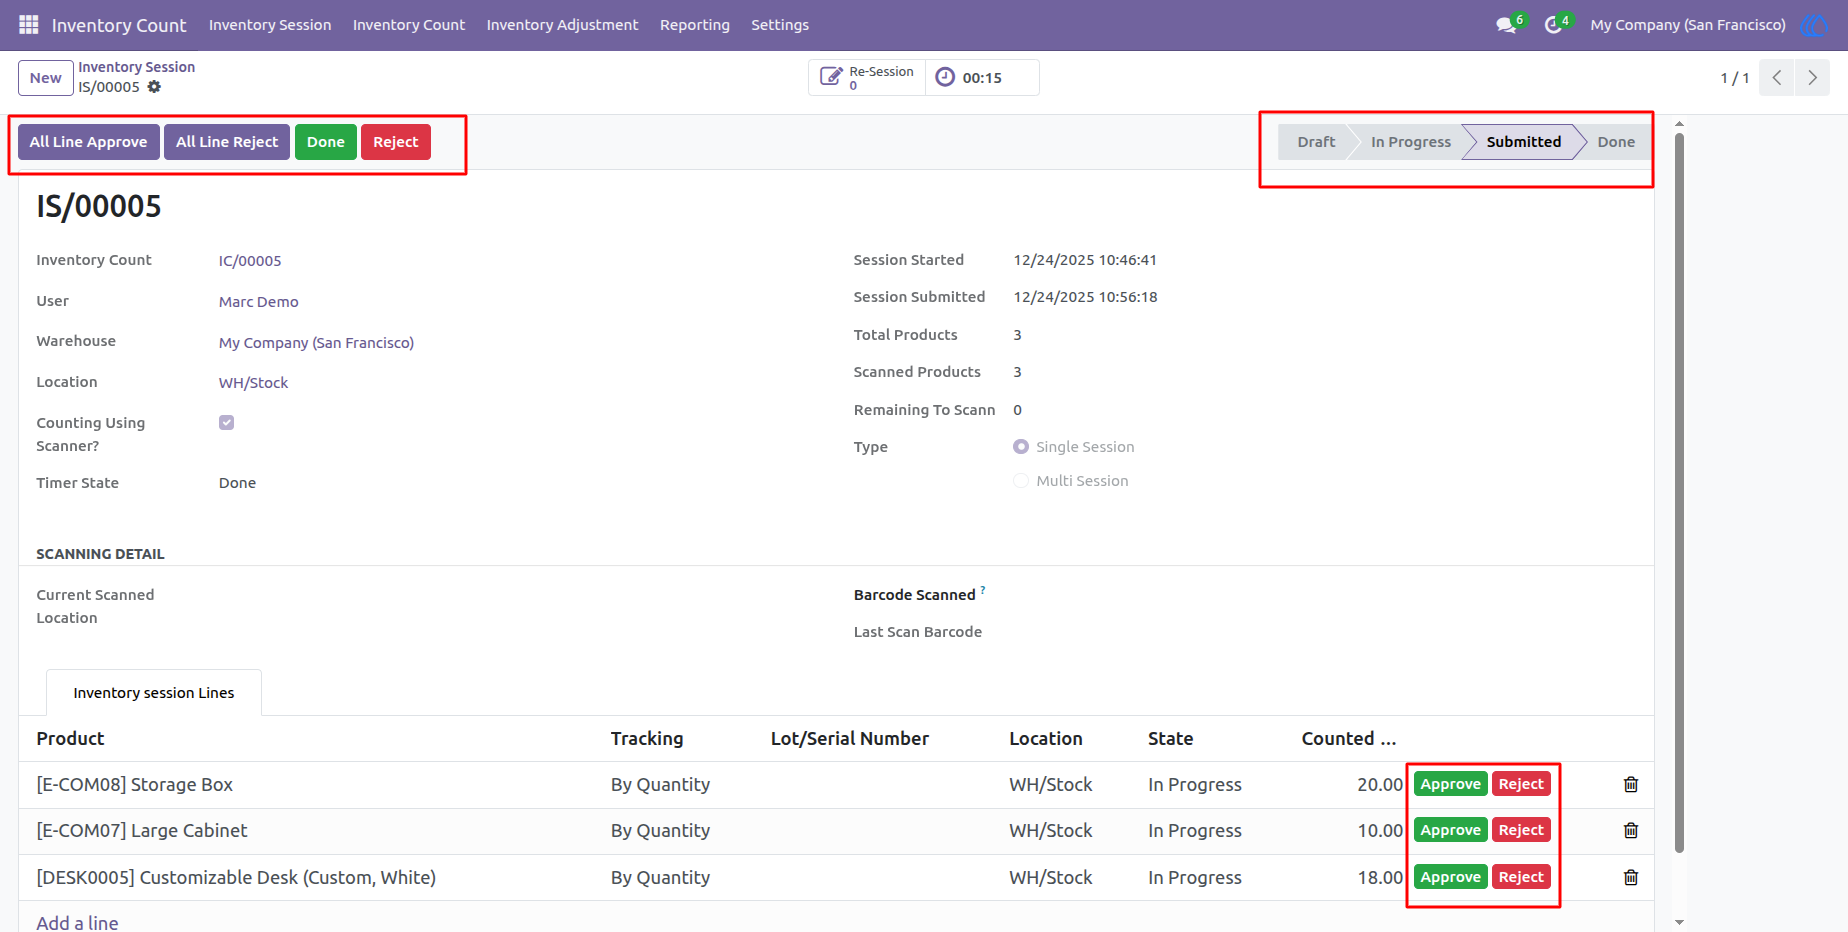
13) After Submitted Session(Manager/Approver)
After a session is submitted, the inventory manager or approver reviews the session lines. If everything is correct, they approve the session line; otherwise, they reject it.
-There is also a buttons to approve/reject all lines at once.
14) Approve/Reject Session
After reviewing all session lines, the manager either approves the session if it is correct or rejects it if discrepancies are found.
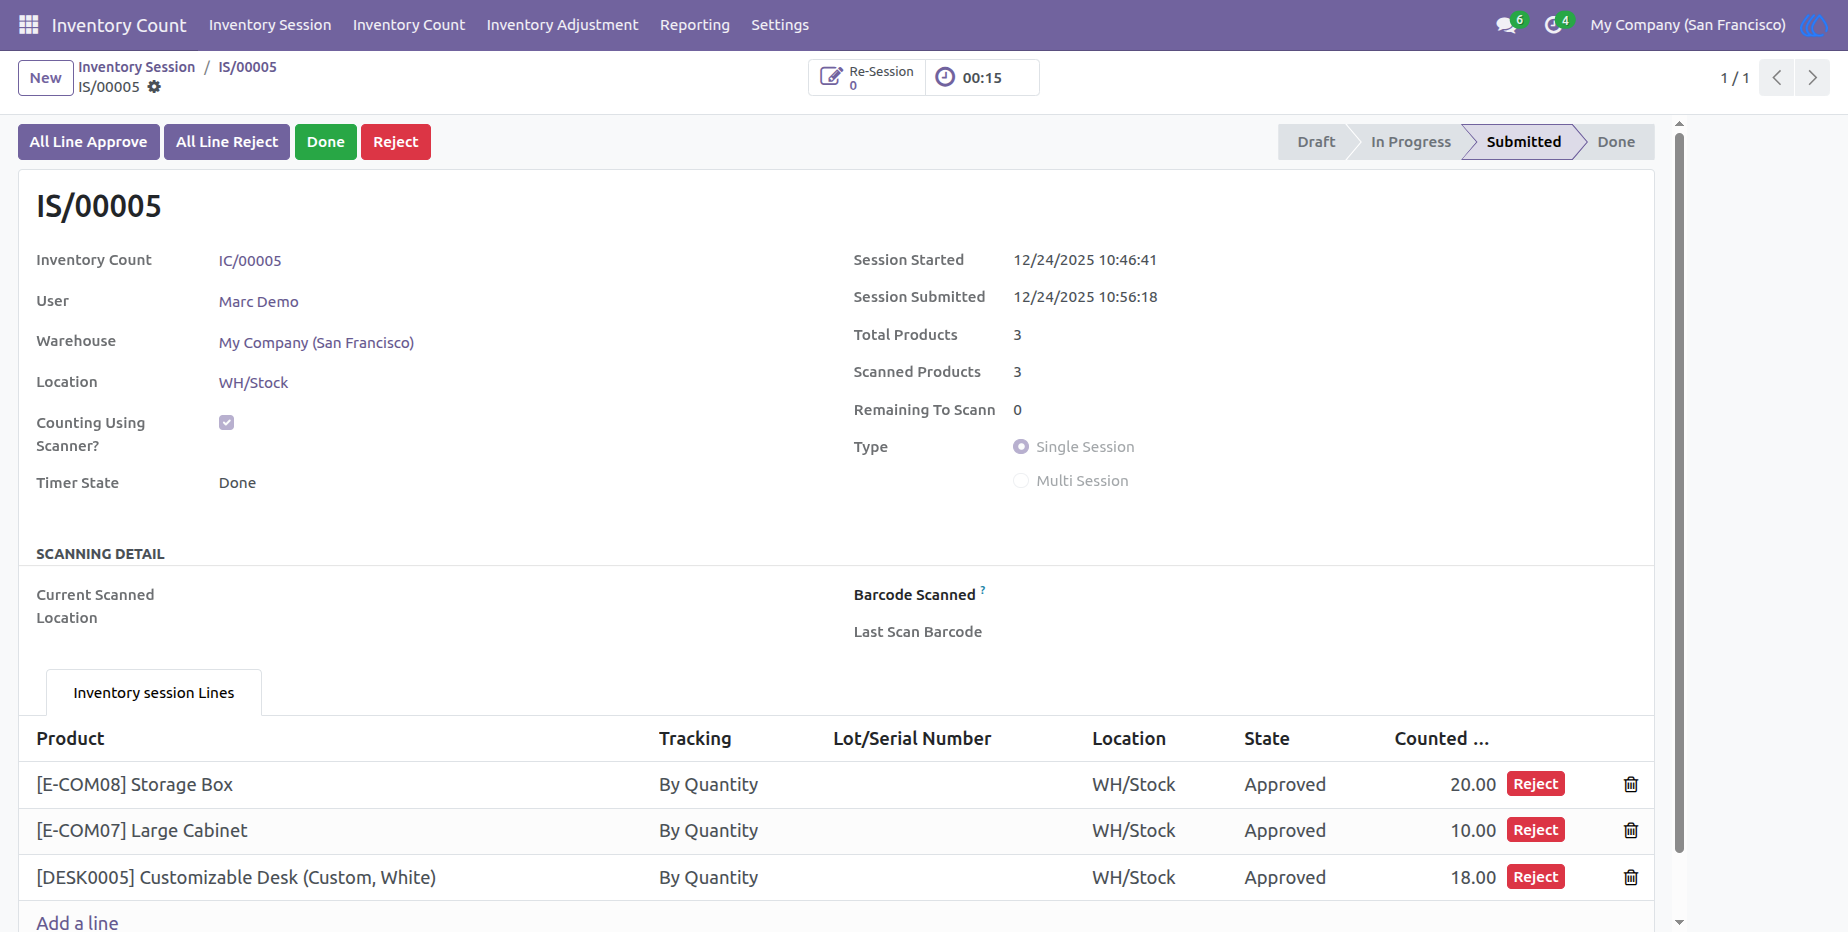
15) Done Session
Here you can see done session
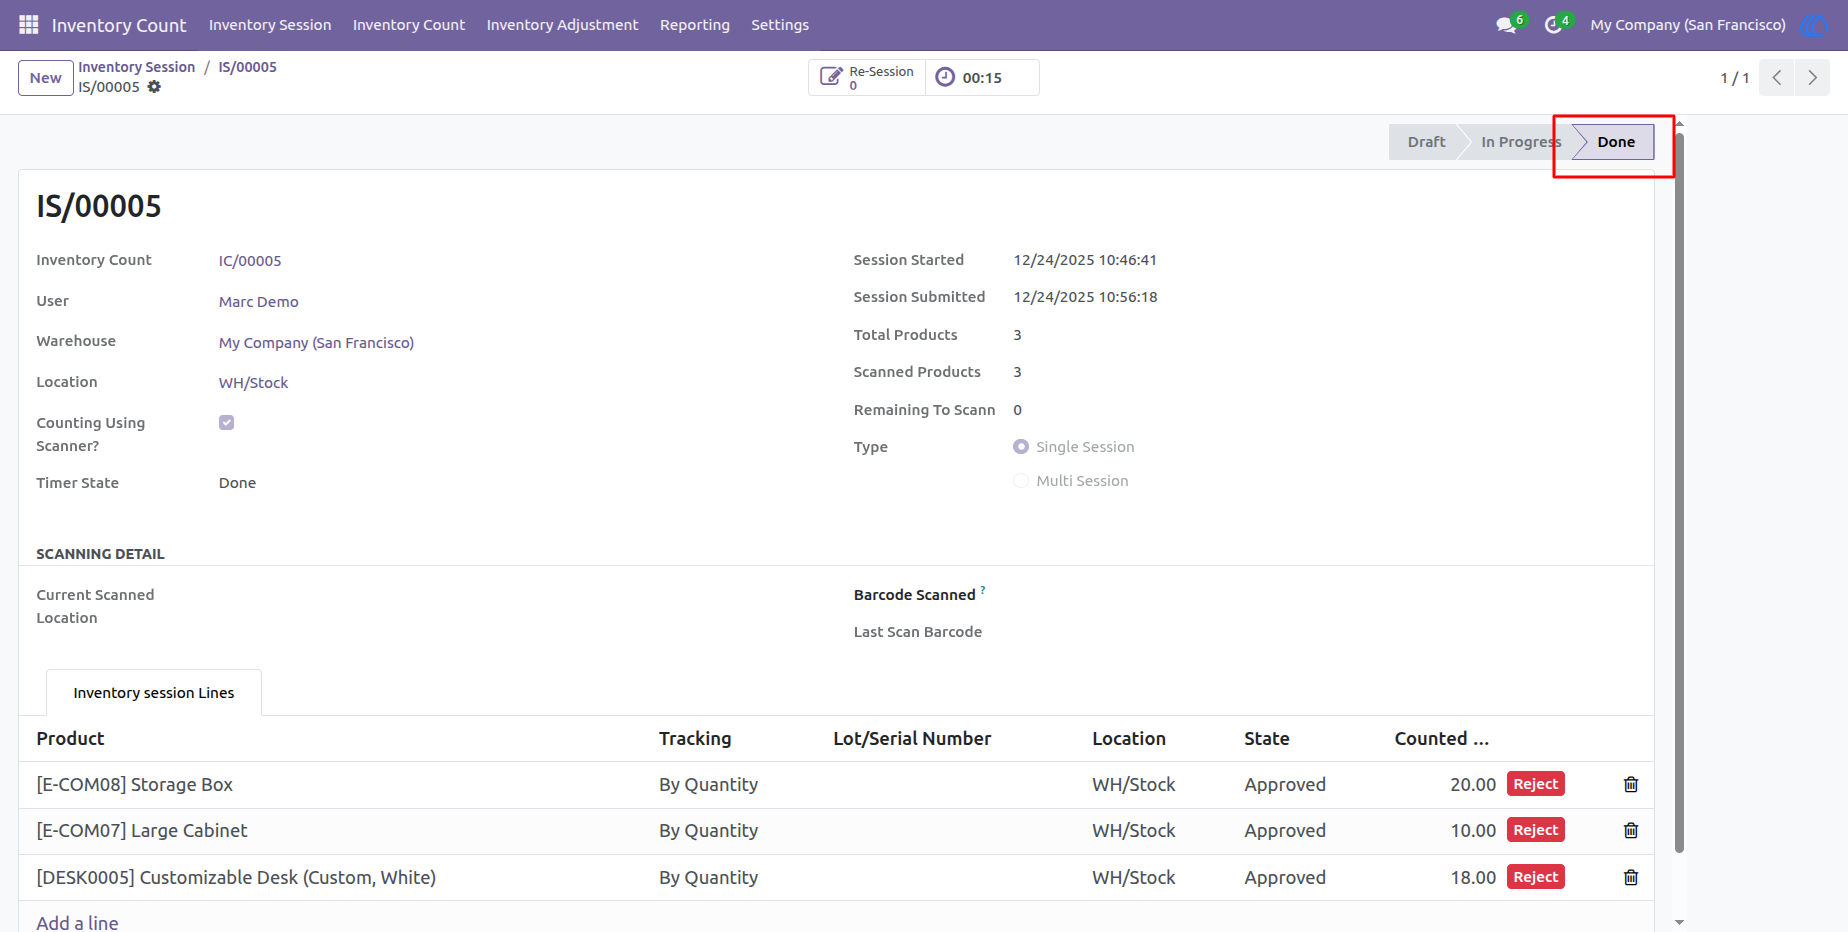
16) Check Counting
After all session done, check counting in inventory count
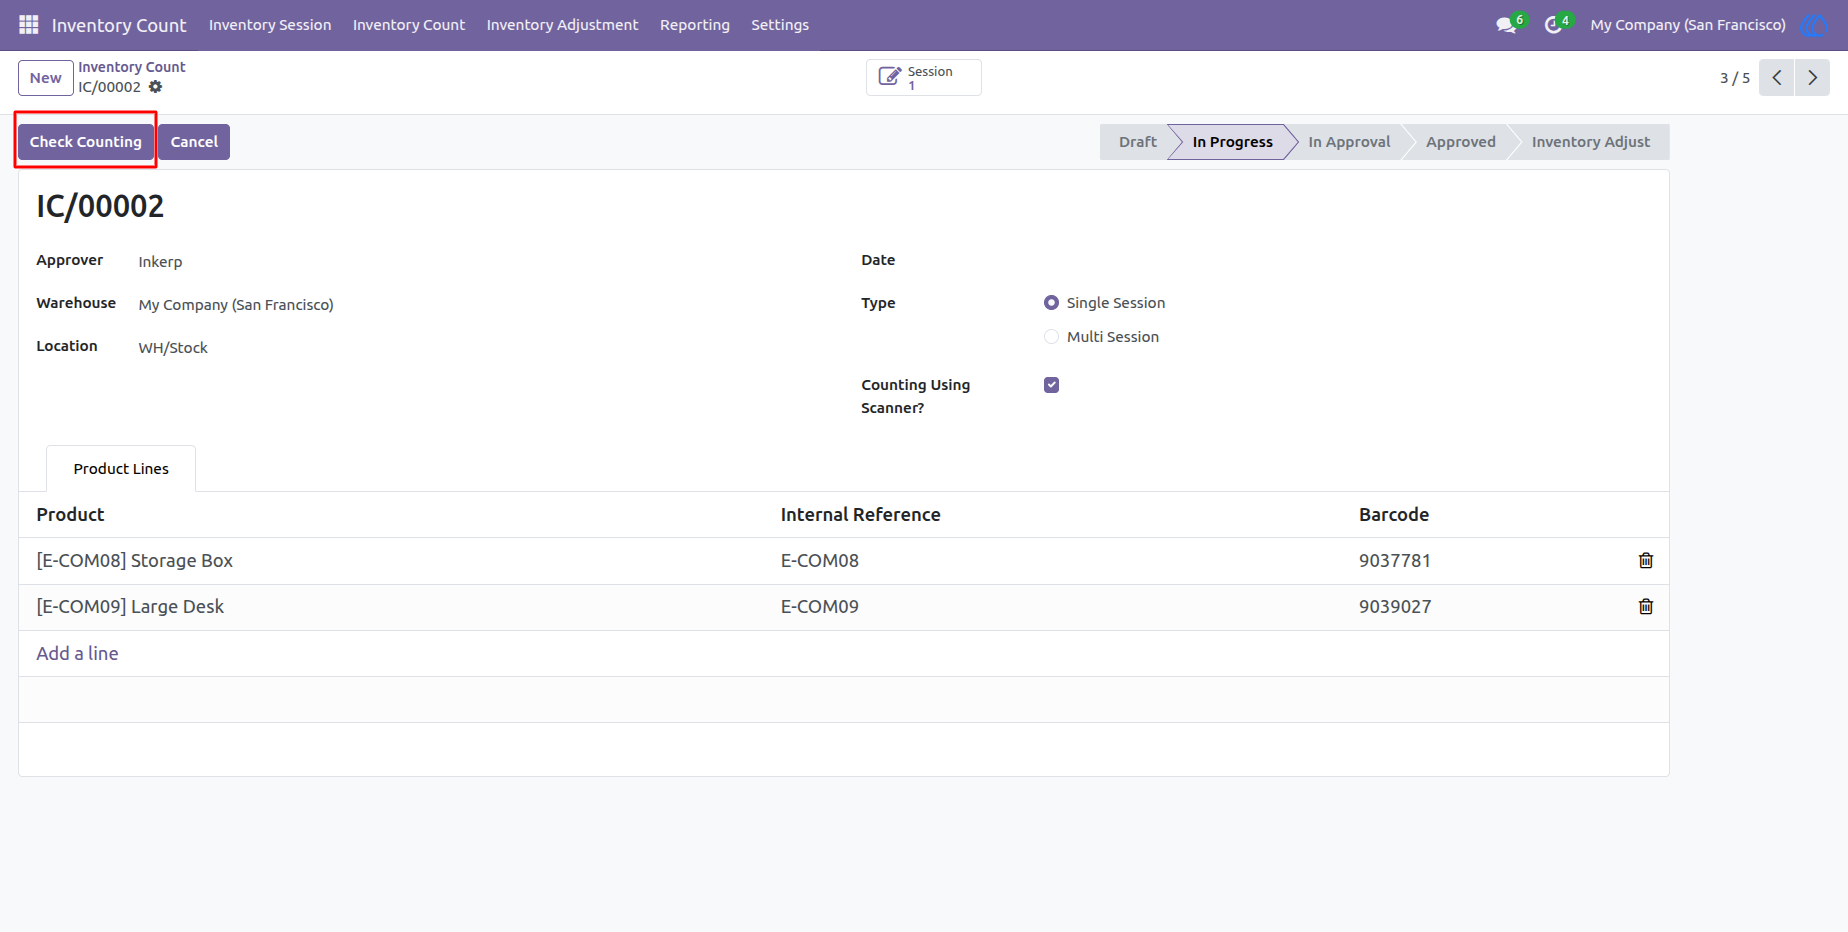
17) Approve/Reject Inventory Count
Inventory Approver/Manager can approve or reject inventory counting
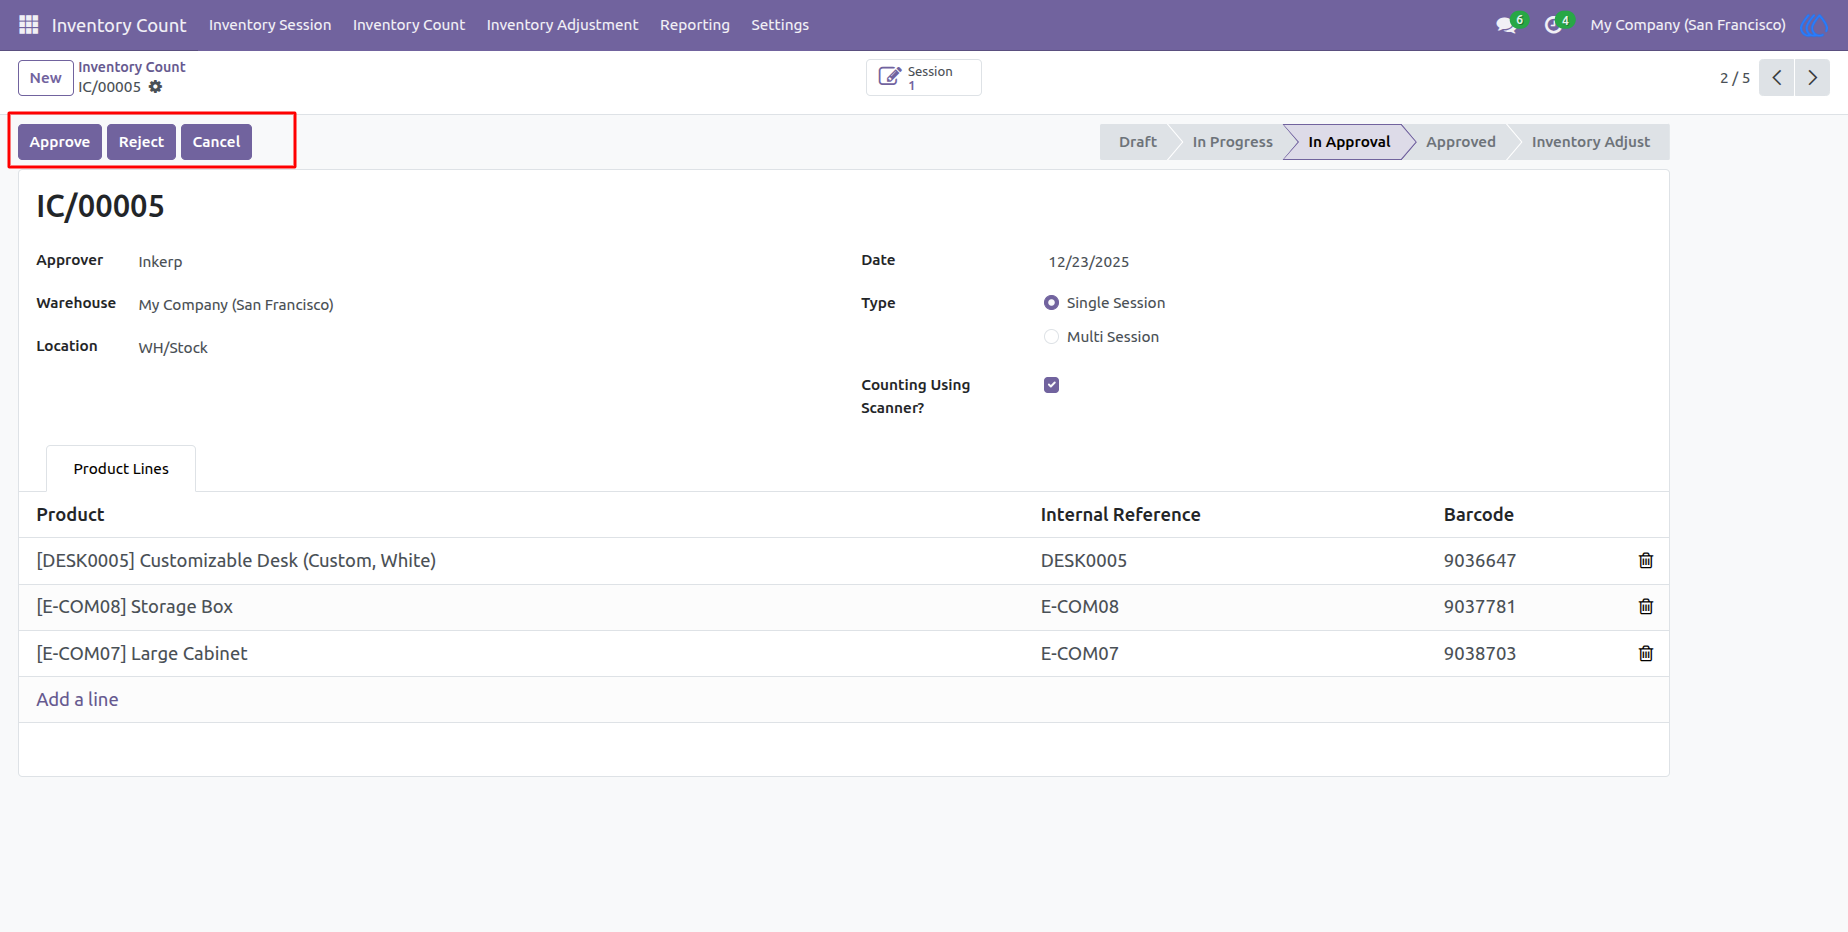
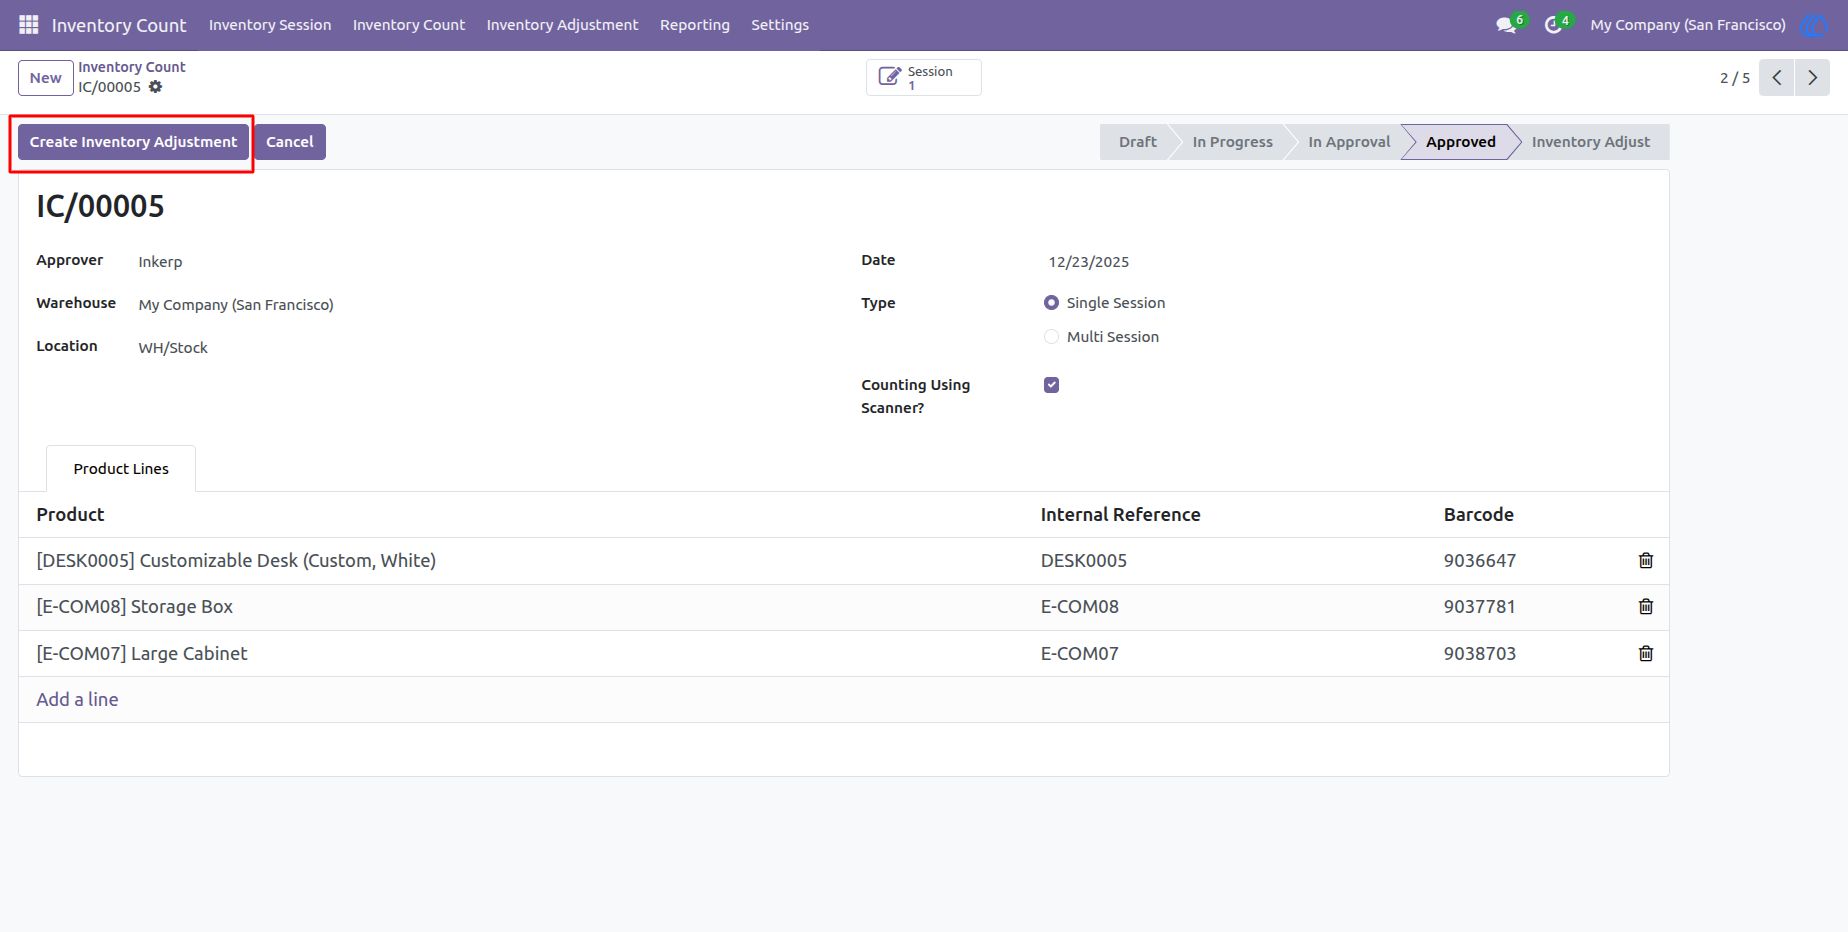
18) Create Inventory Adjustment
After approving the inventory count, the inventory manager or approver can create an inventory adjustment by clicking the "Create Inventory Adjustment" button
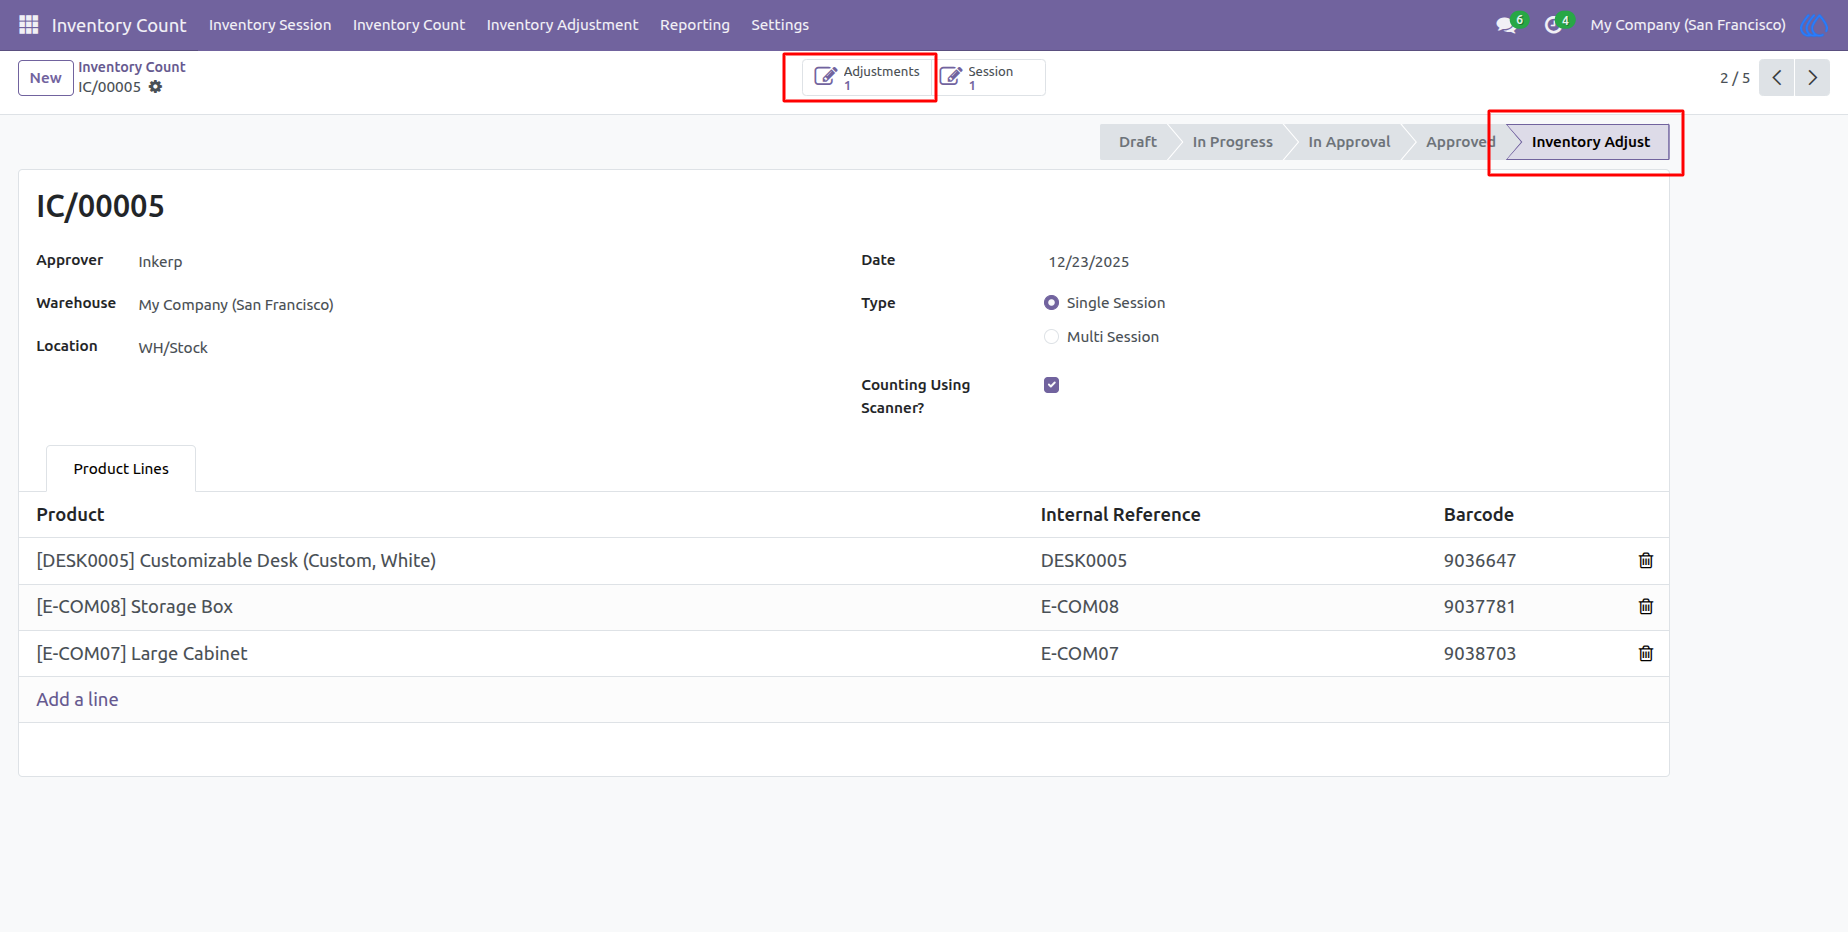
19) Adjustment State
After creating an inventory adjustment, you can view it through the Smart Button.
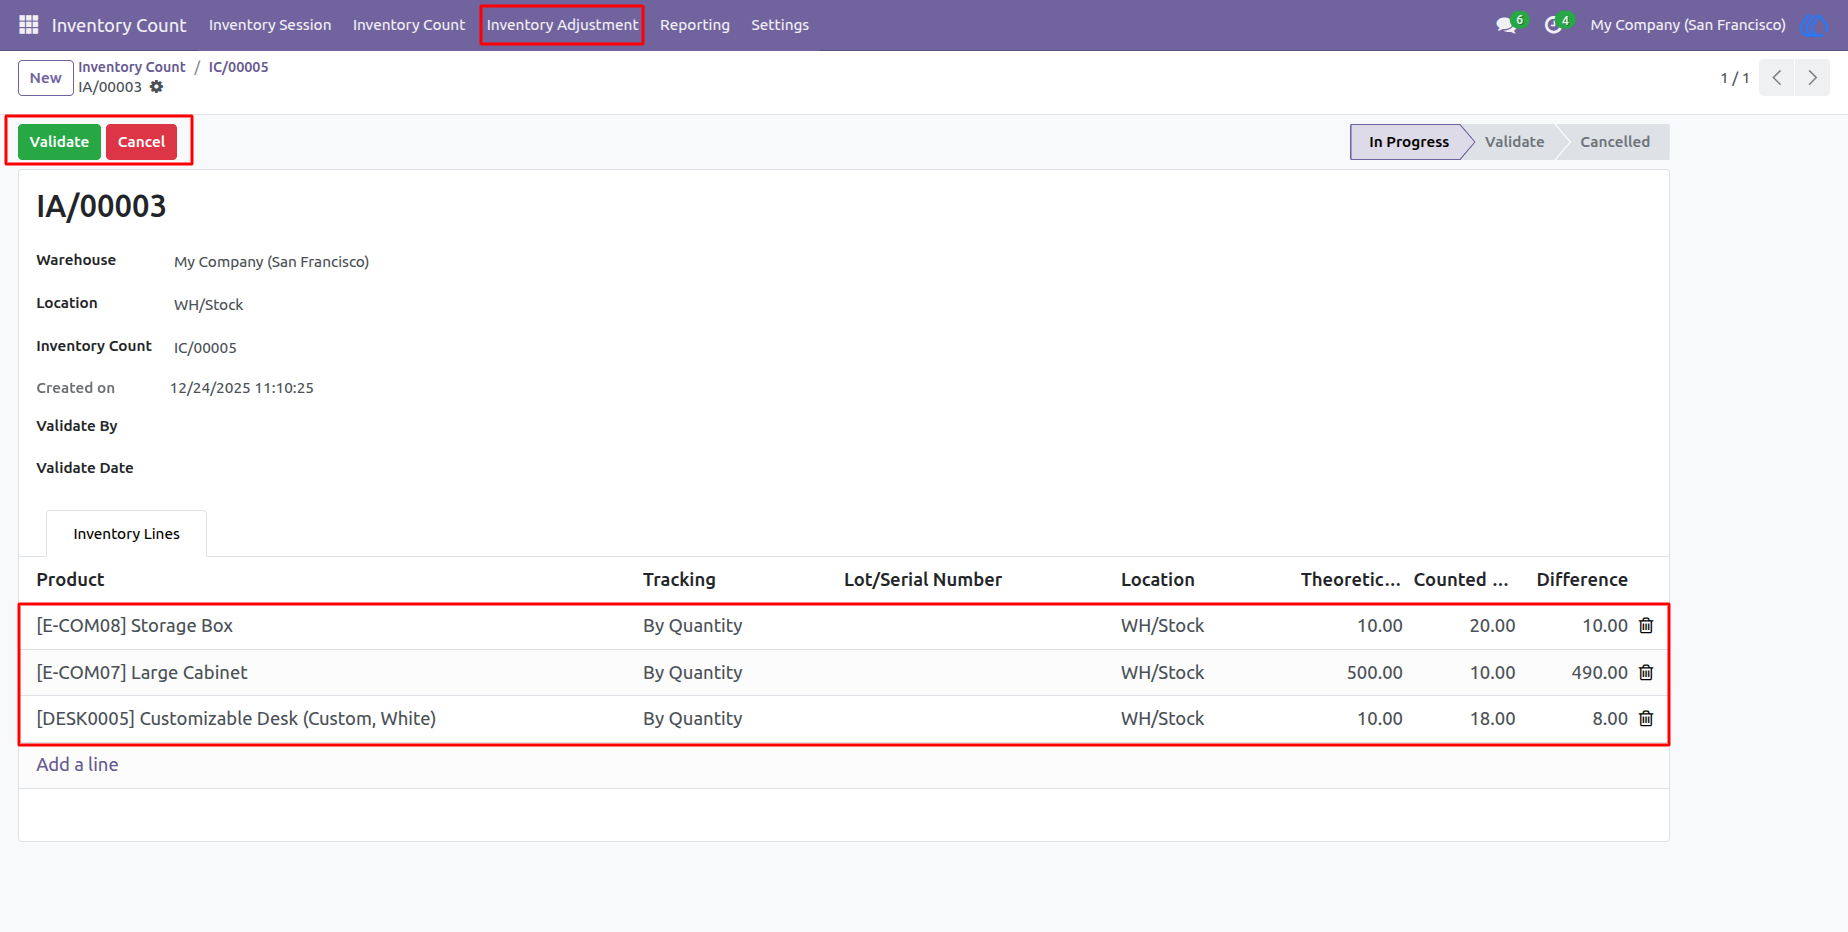
20) Inventory Adjustment View
Here you can see inventory adjustment created from inventory count.
-Only inventory admin can validate or cancel inventory adjustment.
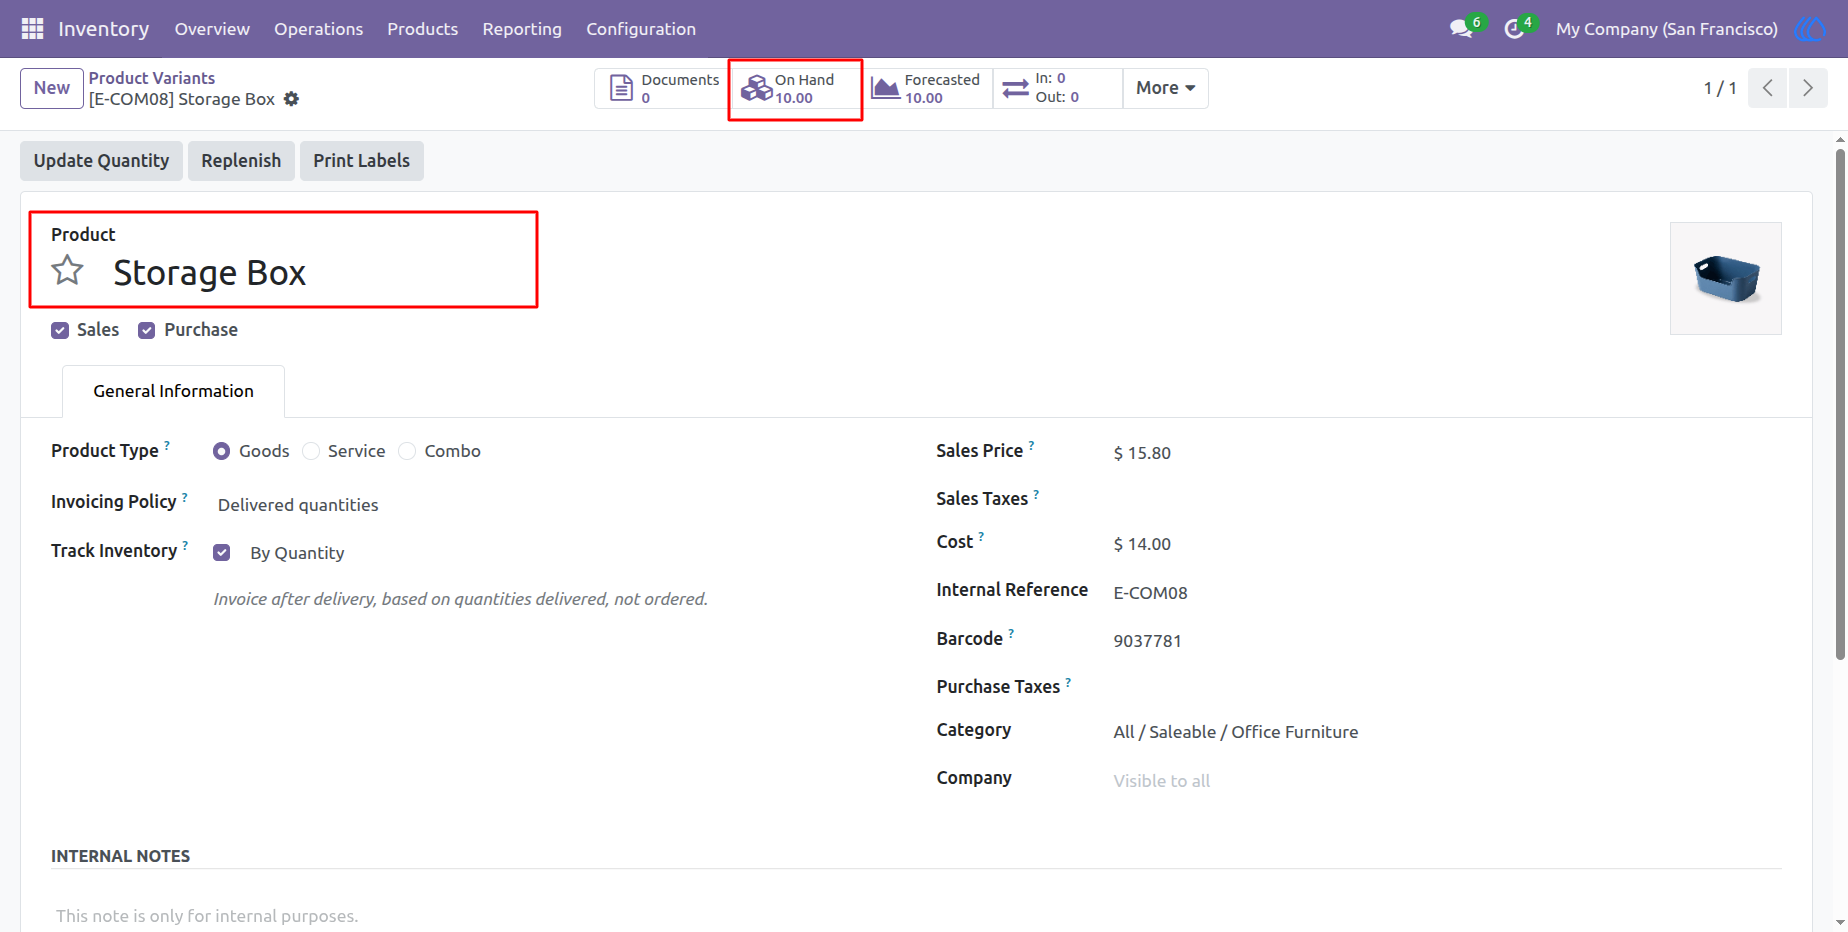
21) Product View
Product On Hand quantity before validate inventory Adjustment
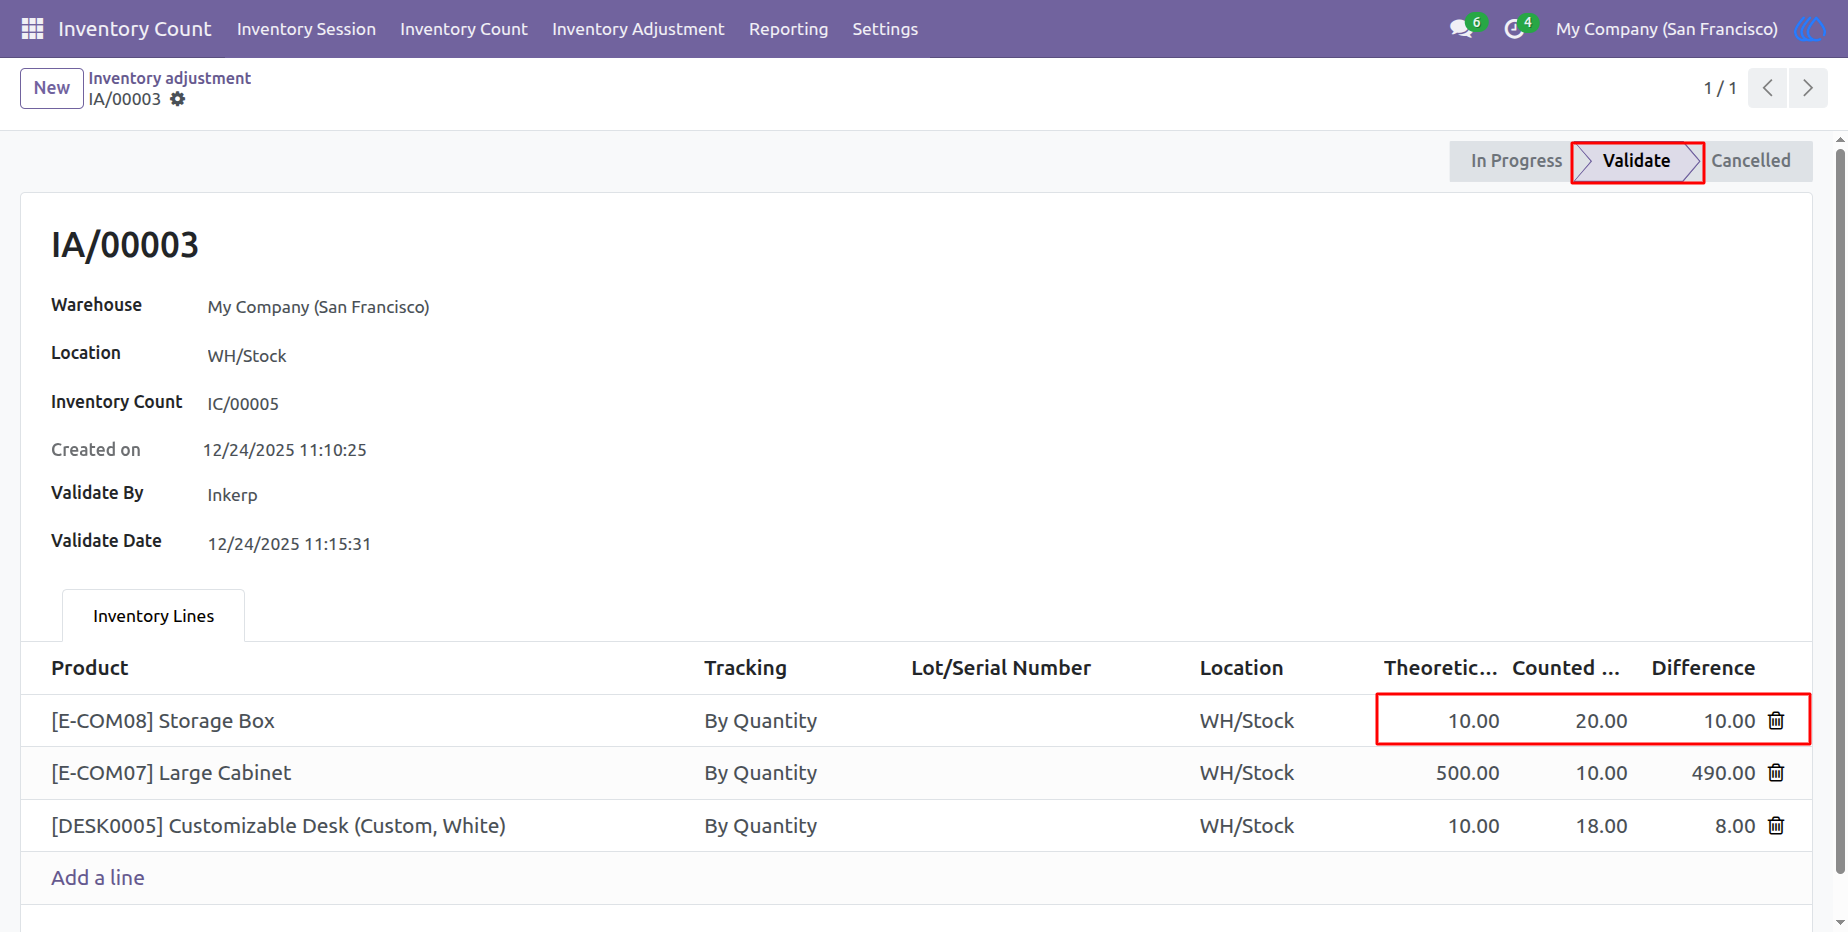
22) Validate Inventory Adjustment
Hera you can see validated inventory Adjusment
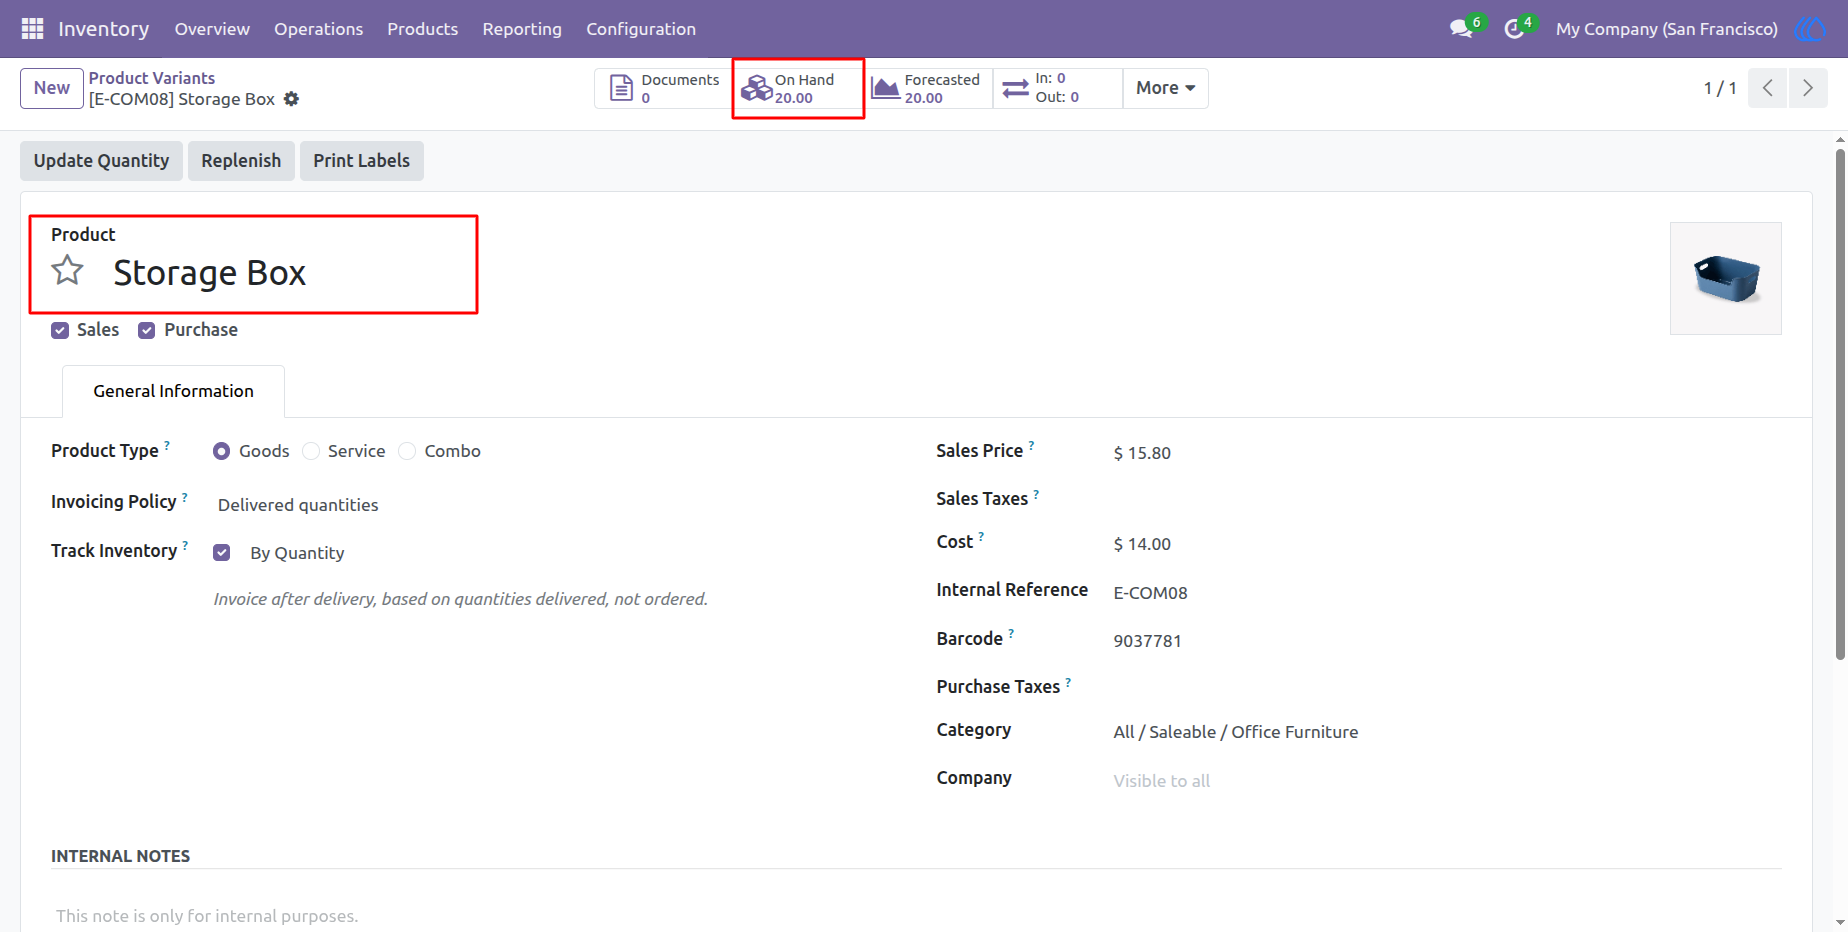
23) Product View
Product On Hand quantity after validate inventory Adjustment
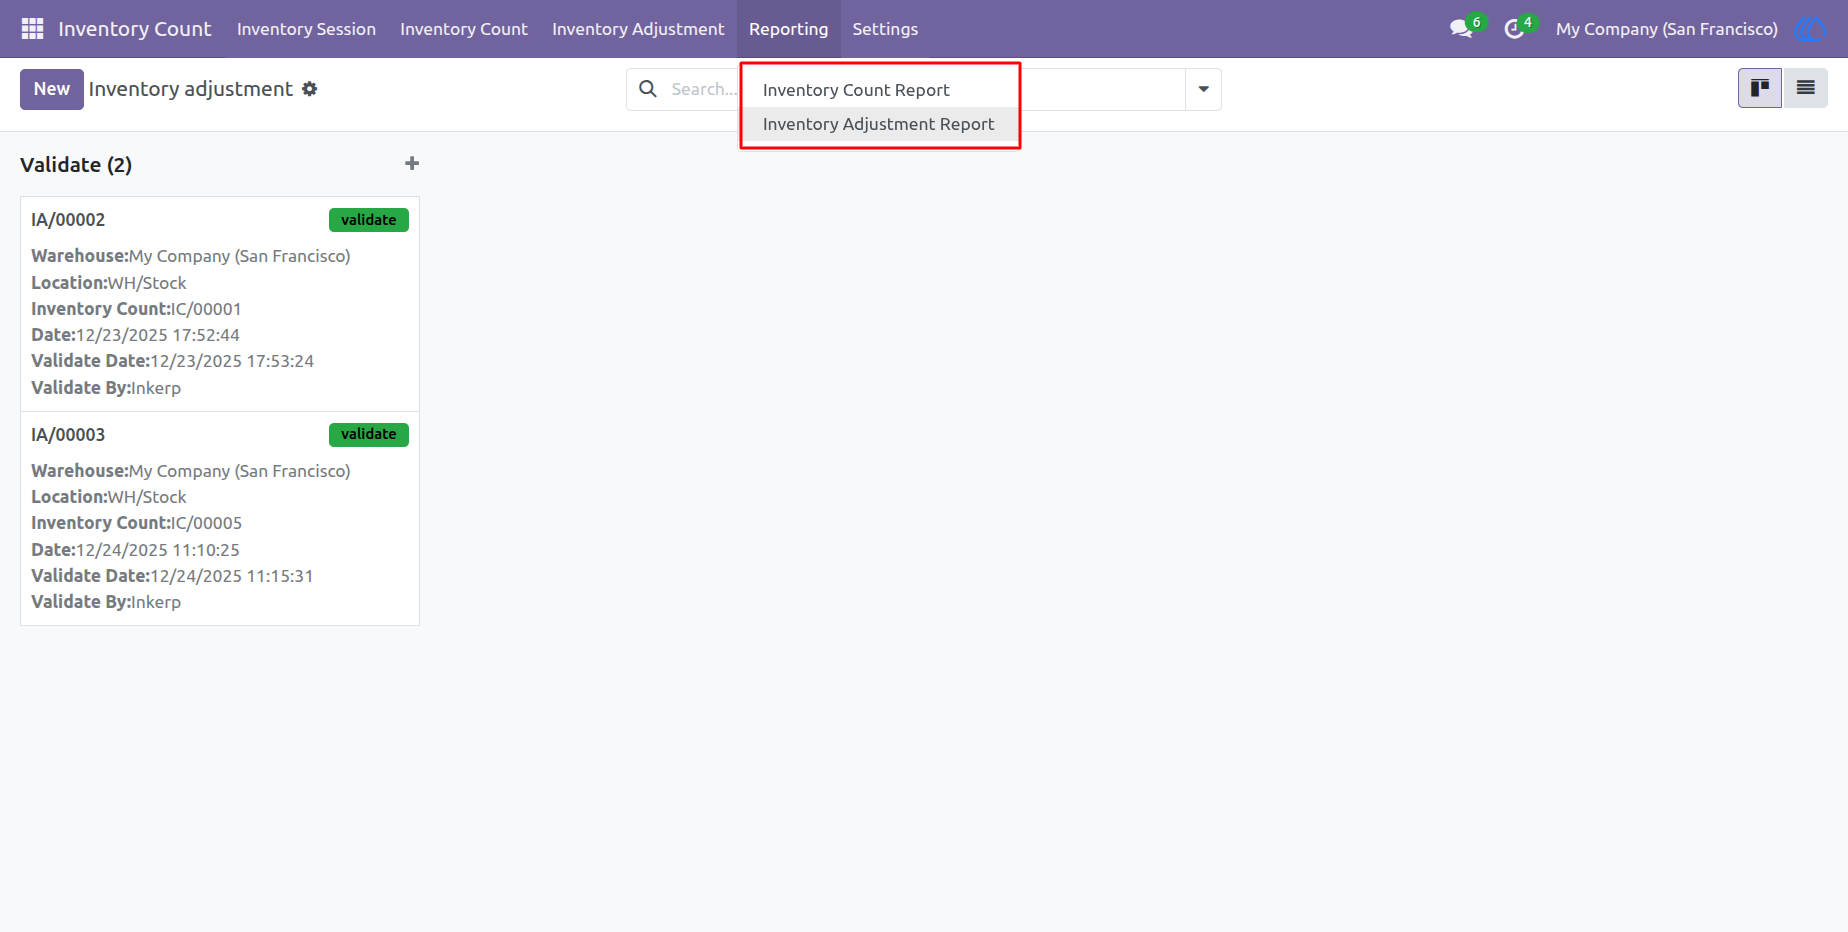
24) Reporting
Navigation : Inventory Count › Reporting
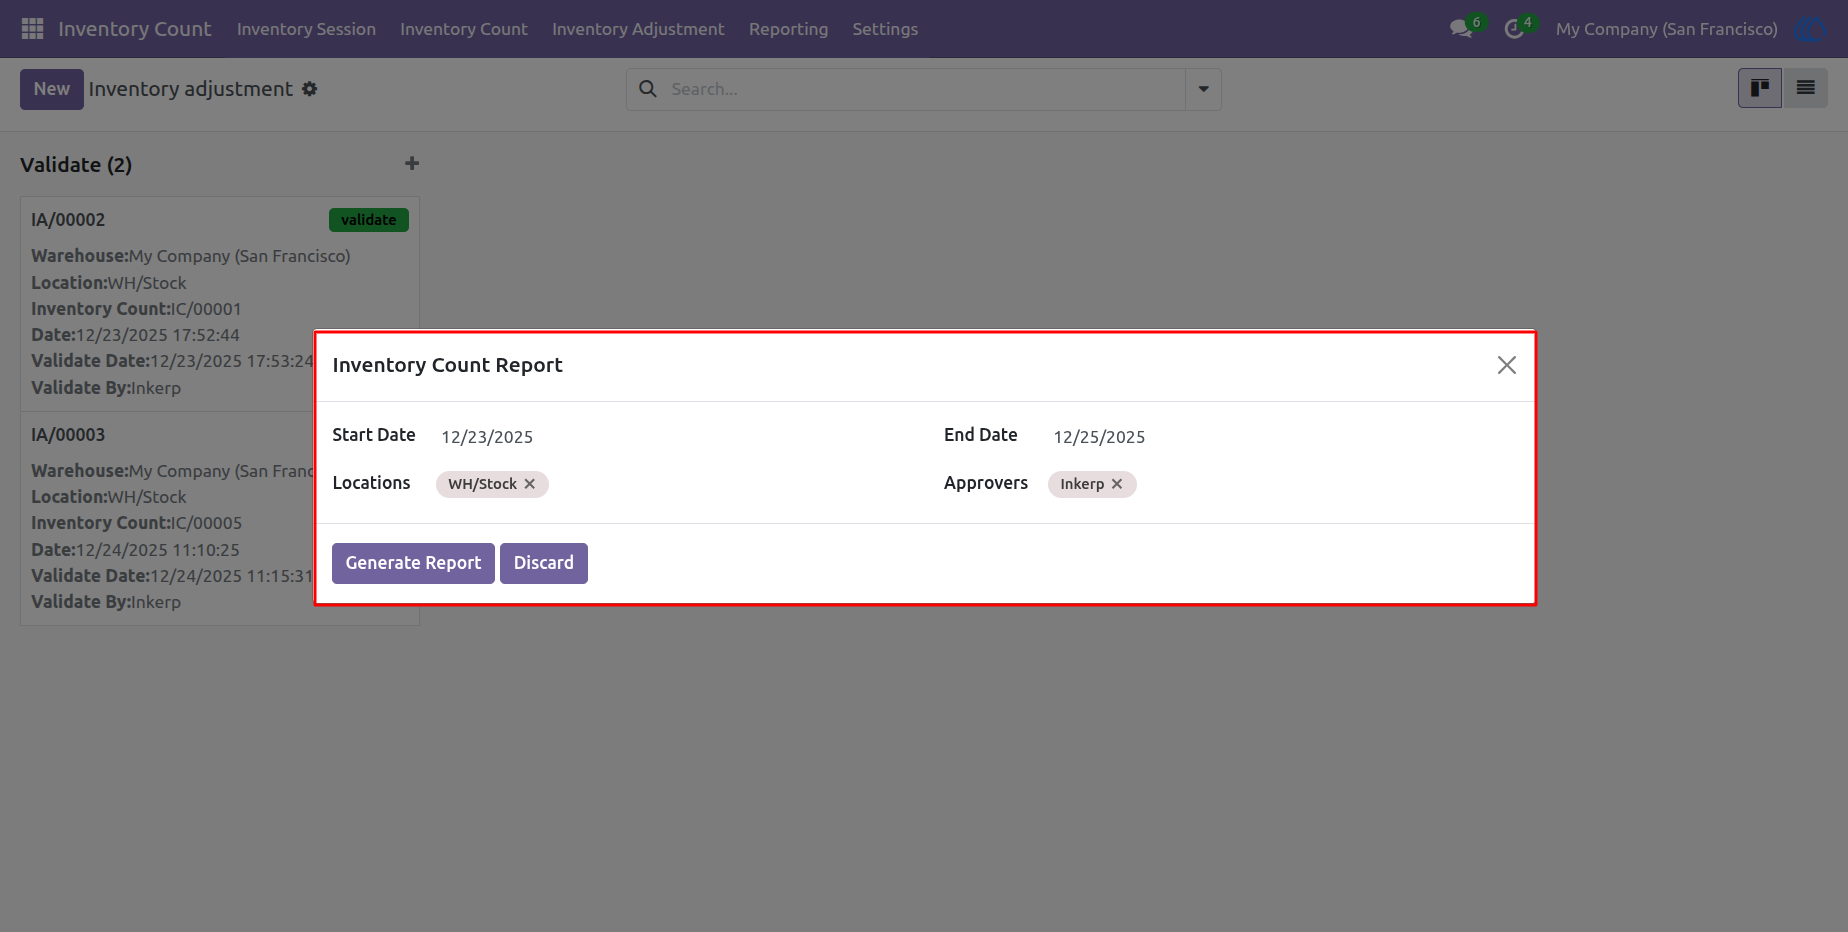
25) Inventory Count Report
Inventory count admin generate an Inventory Count Report based on selected dates, warehouse locations, and approvers
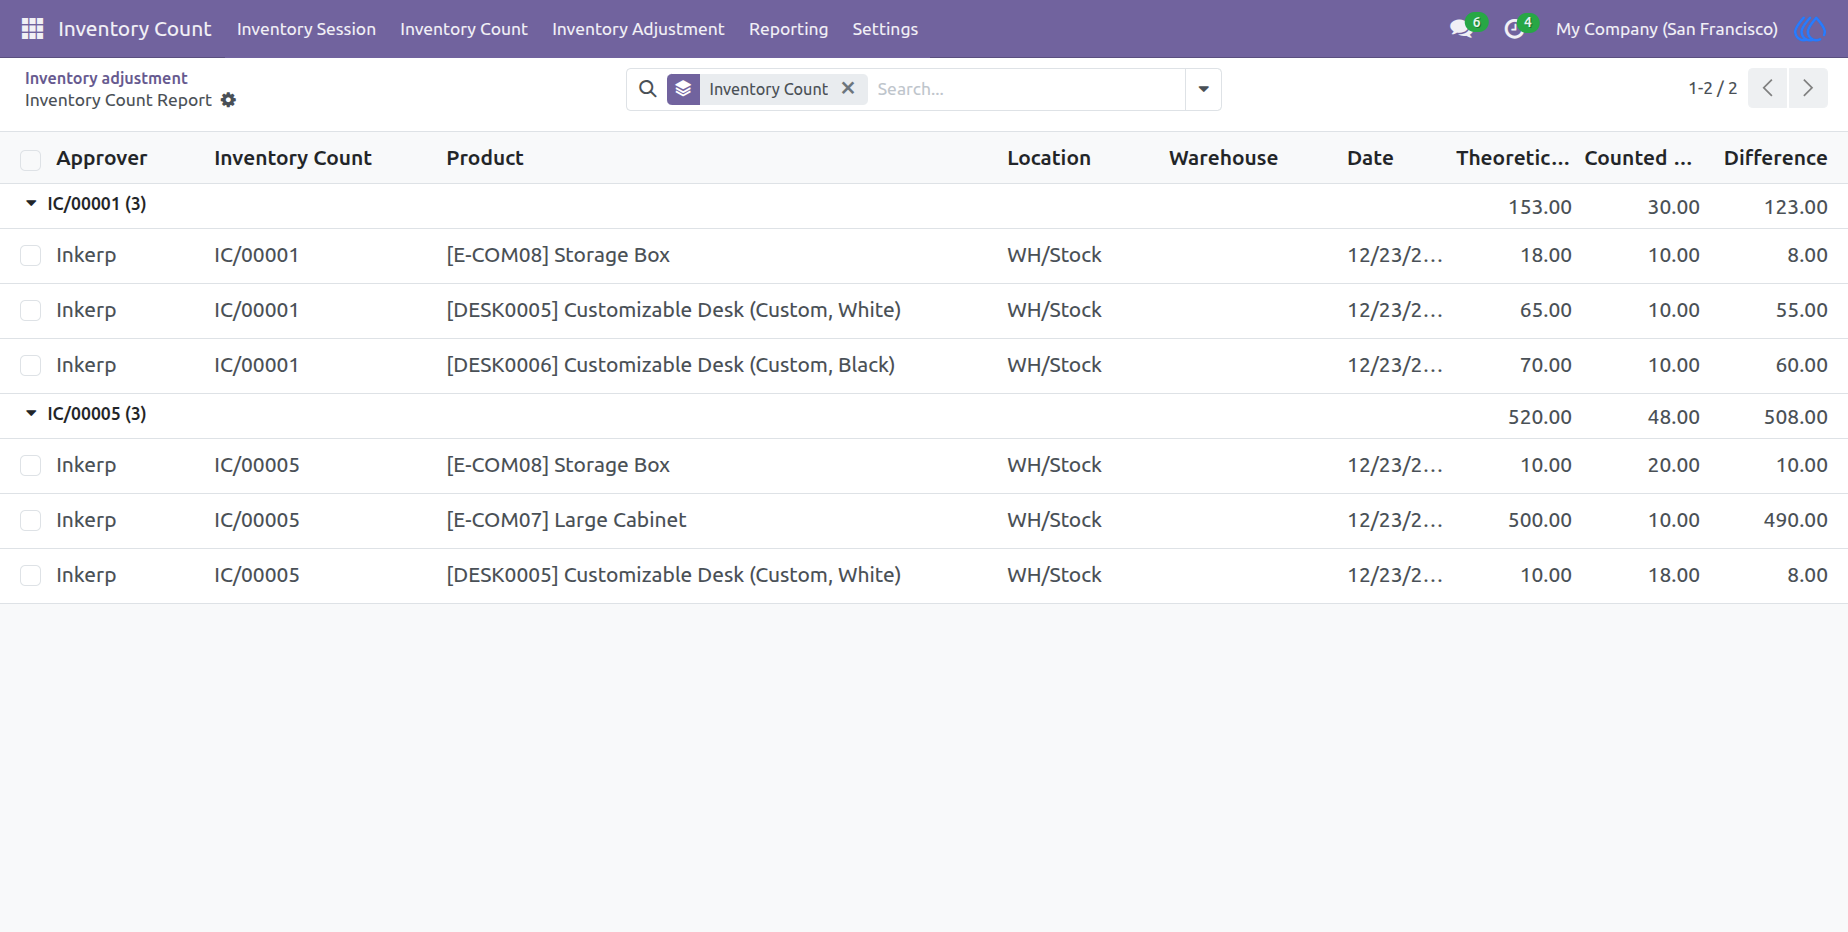
26) Inventory Count Report View
Here you can see generated inventory count report
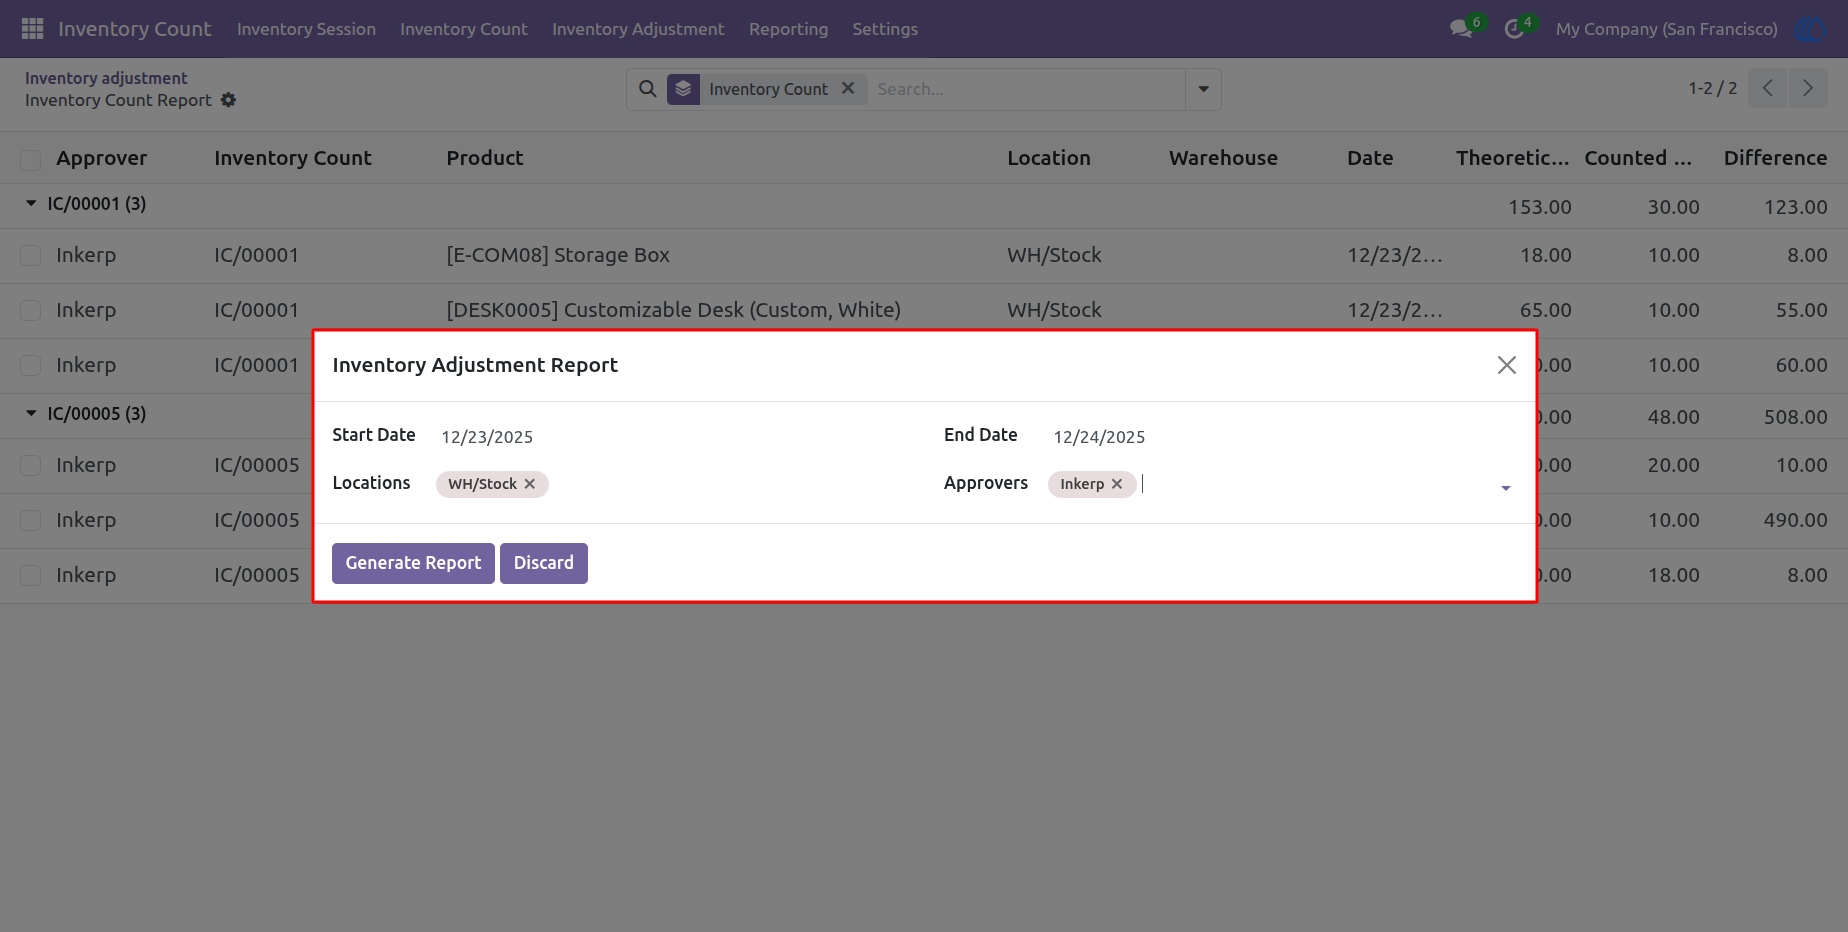
27) Inventory Adjustment Report
Inventory count admin generate an Inventory adjustment Report based on selected dates, warehouse locations, and approvers
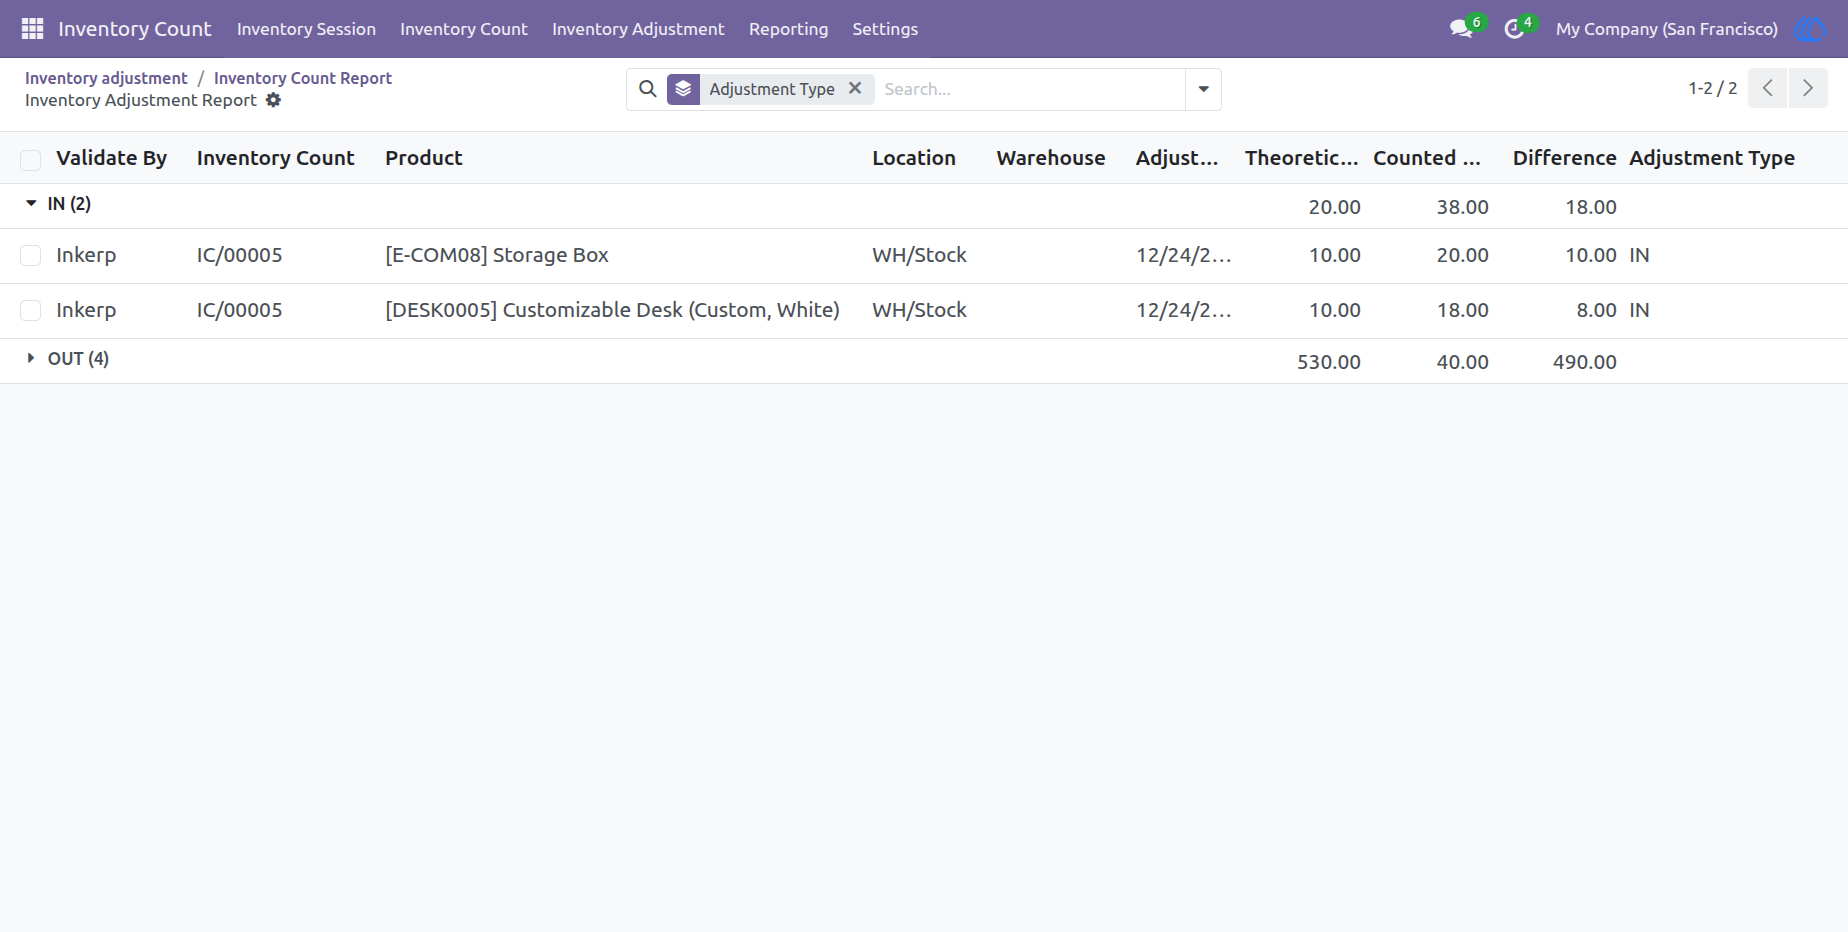
28) Inventory Adjustment Report View
Here you can see generated inventory Adjustment report
User Guide